Traditional on-site backups, while useful, were vulnerable to localized failures that could result in complete data loss. Cloud backups revolutionized data protection by offering secure, off-site storage with minimal mainenance. To take this security a step further, we can replicate data to decentralized storage solutions.
Storj offers a distributed storage network with strong data resilience. In this guide, we'll cover setting up an automated sync between AWS S3 and Storj using SimpleBackups.
Prepare Your AWS S3 Bucket for Sync
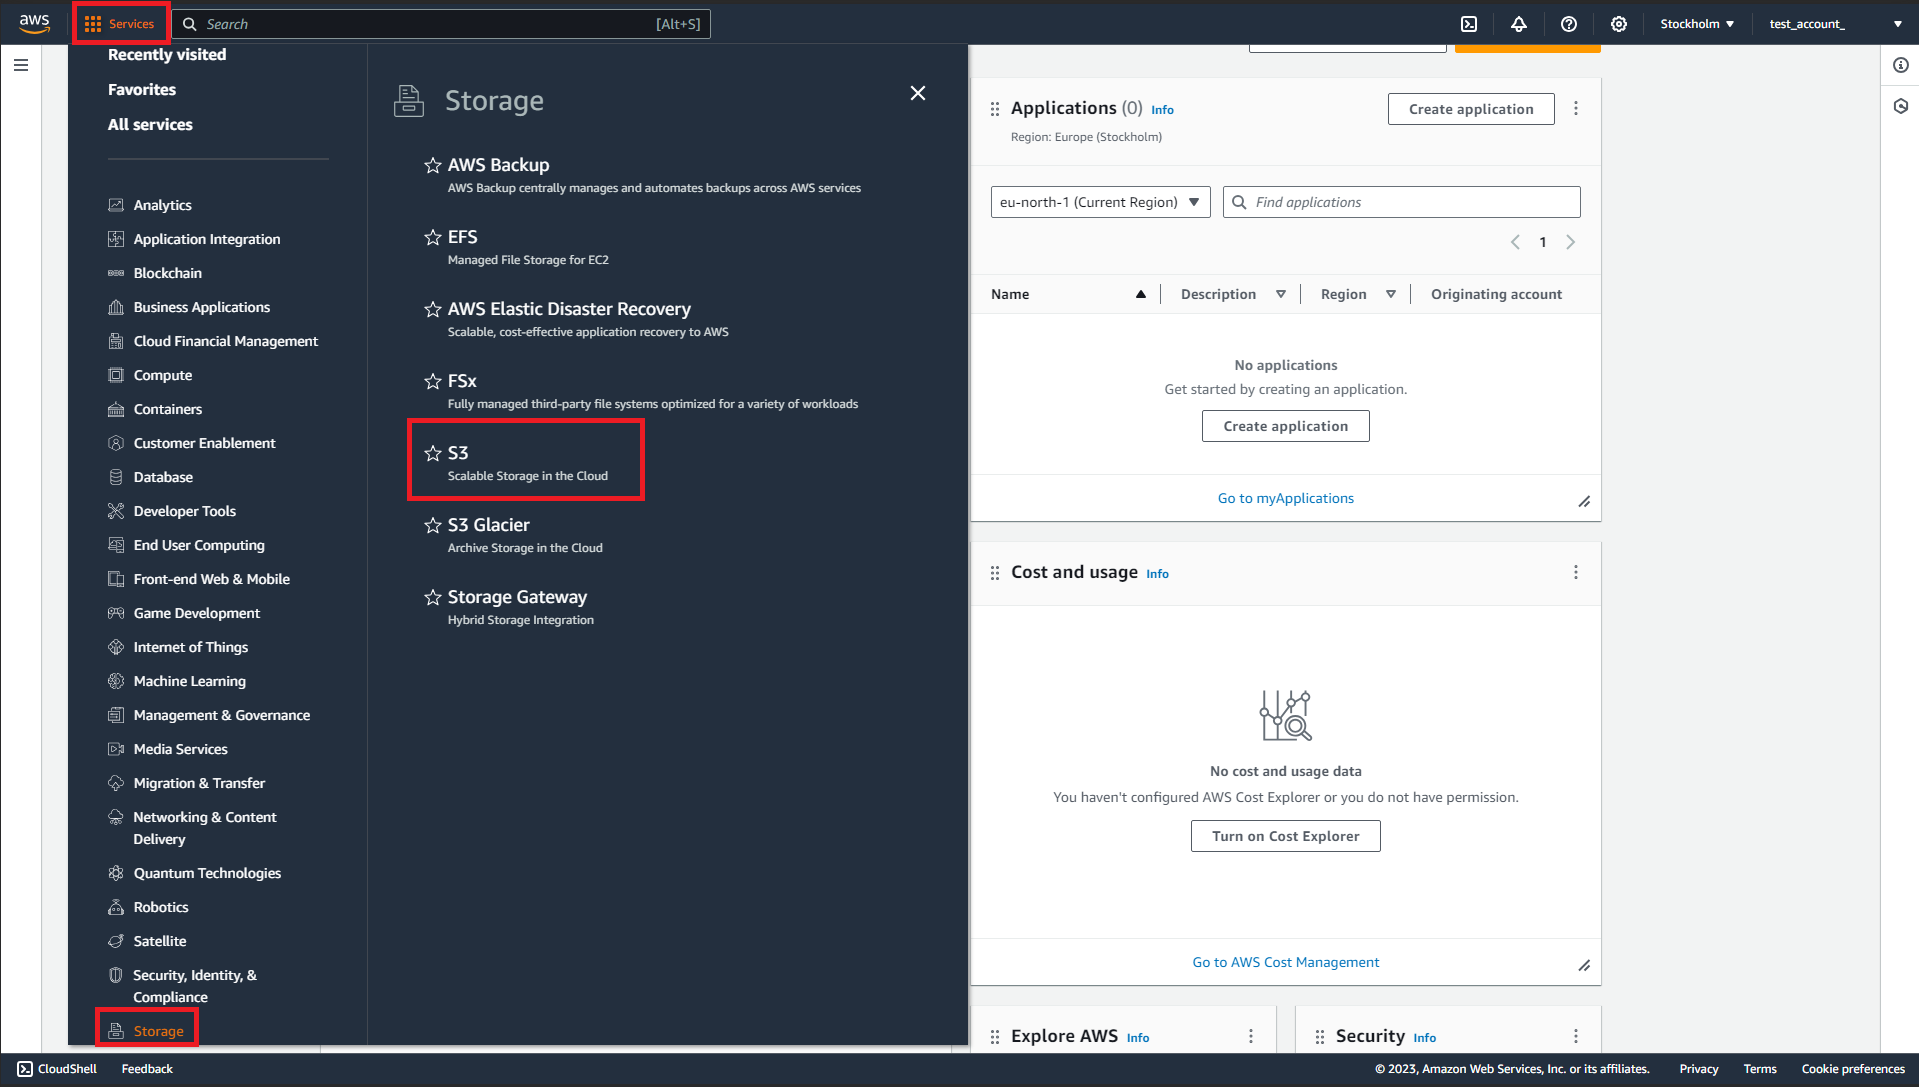
Let’s start by setting up an AWS S3 bucket. To do this, log into your AWS console, click on Storage in the Services menu, and then on S3. Click on Create bucket on the page that opens.
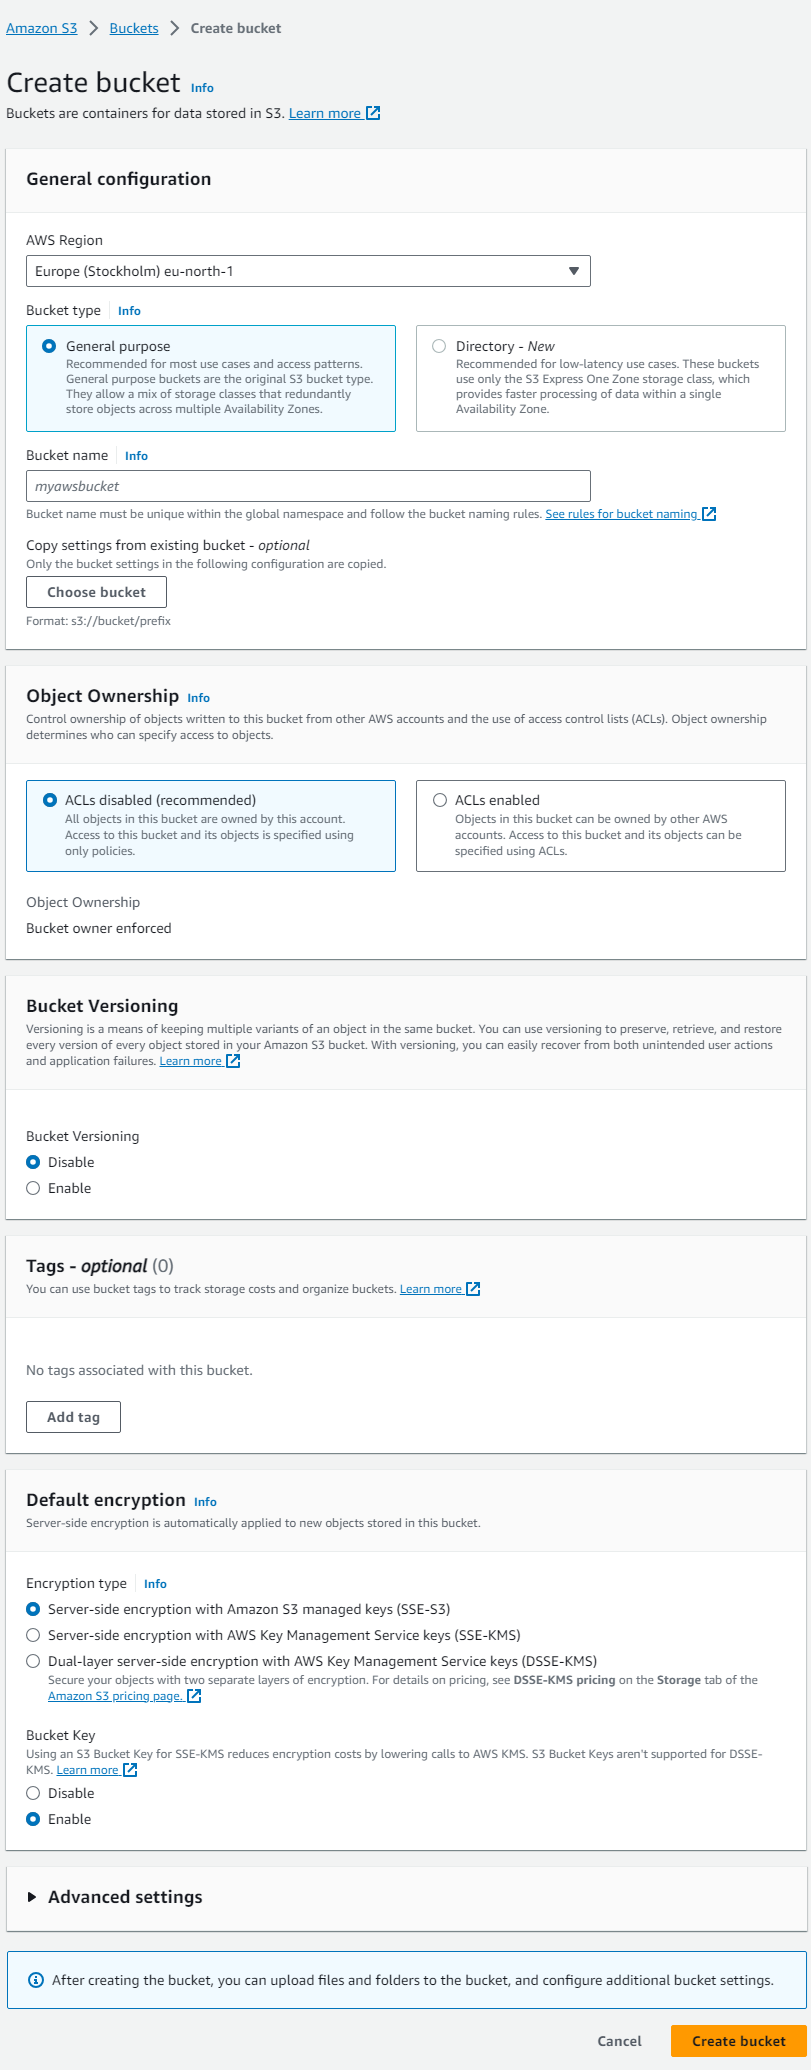
On the page that opens:
- Give your bucket a name.
- Select the AWS region you’d like to use to host your bucket.
- Provide configuration information about the bucket, including determining the level of public access you require for the bucket.
- Click Create bucket when you’re satisfied with all the other settings.
To allow access to SimpleBackups to run the backup, you’ll also need to set up a user with the right permissions. Here:
- Go to your AWS console, click on the Services menu, and then on Security, Identity, and Compliance. Then click on IAM.

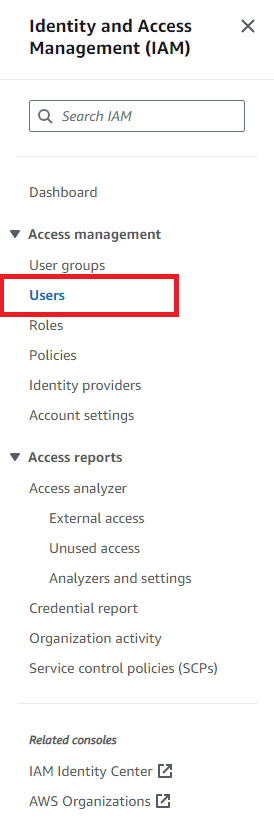
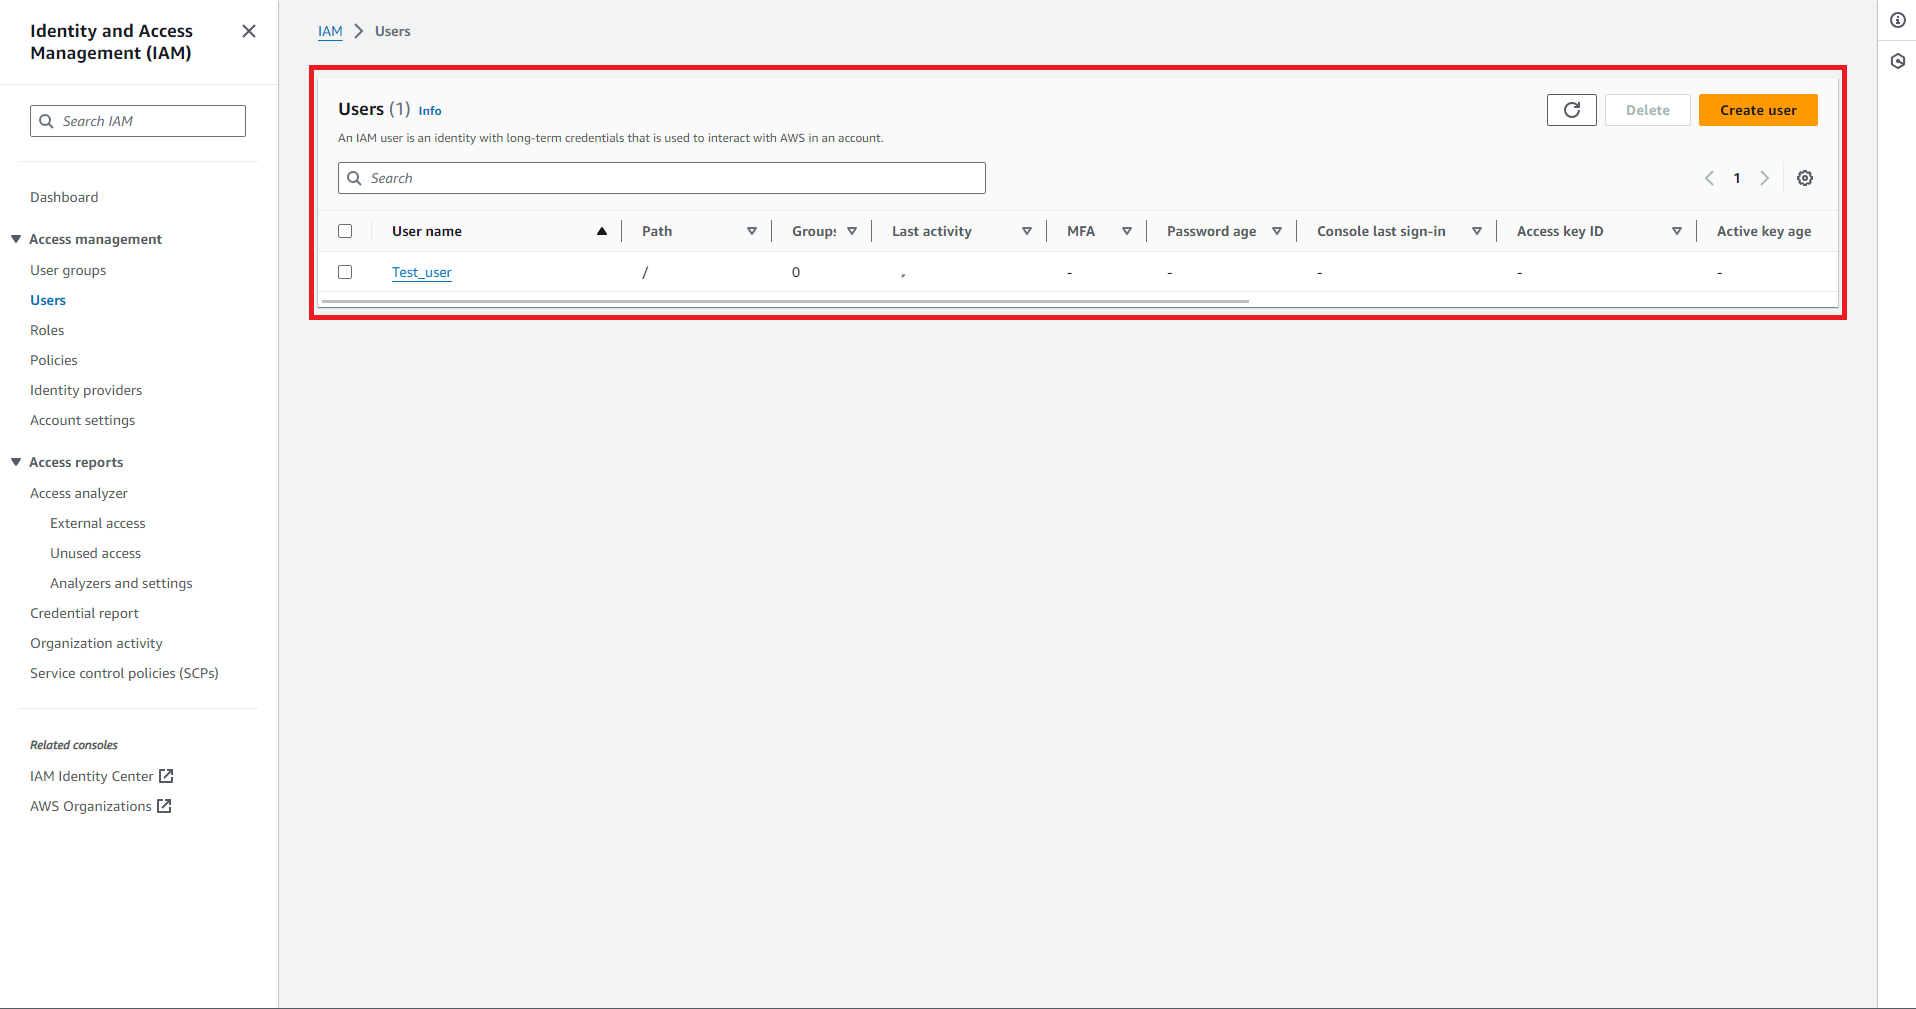
- Click on Users in the menu on your IAM dashboard.
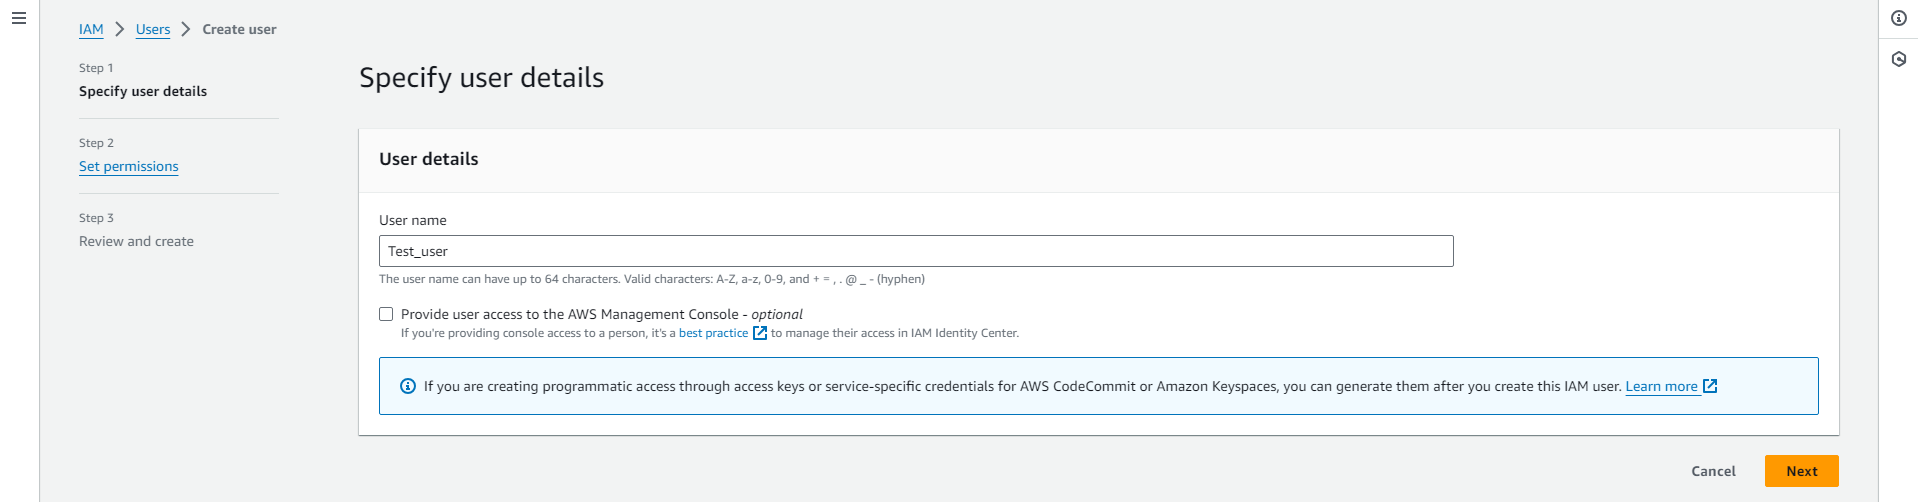
- Click on Create User and provide a name for the user you want to create.
- Select the Attach policies directly option, search for S3, and you may select the AmazonS3FullAccess option.
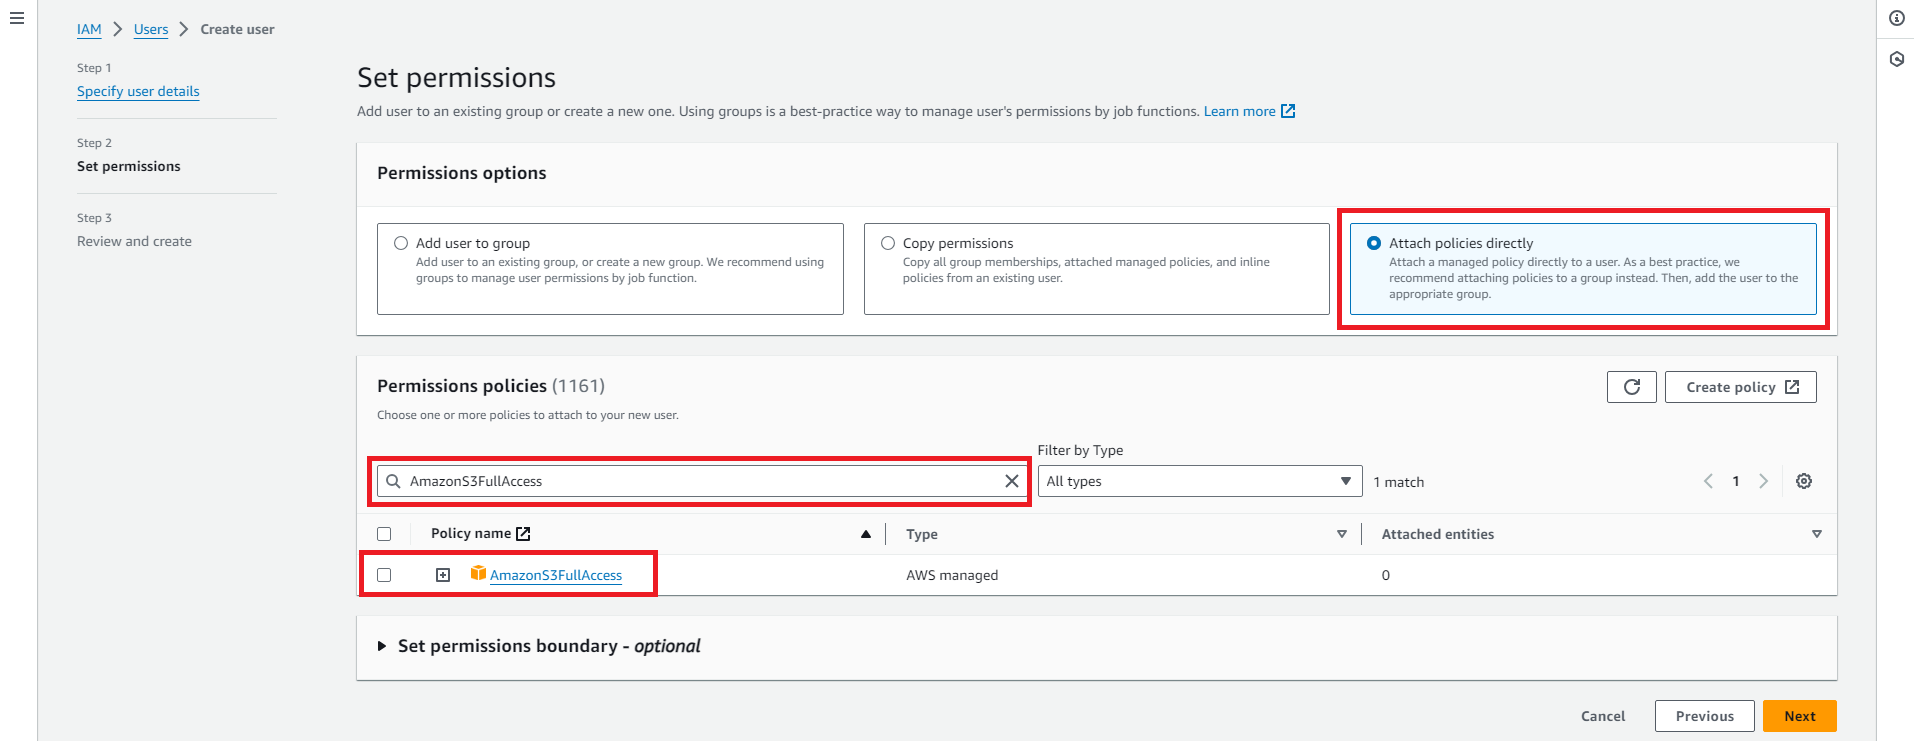
- Review all your settings on the final page and click Create user if you’re satisfied.
When the user is created, you’ll also need to generate the credentials you’ll use to give SimpleBackups access to your AWS S3 bucket. To do this, click on Users on your IAM dashboard and click on the user in the list of users.
Click on the Security credentials tab, scroll down to Access keys, and click on Create access key. On the next page, click Next, and then provide a description tag and click Create access key. On the confirmation screen, copy and paste the access so you can use it later to connect your bucket to SimpleBackups.

Prepare Storj Bucket for Sync
Next, you’ll need to configure your Storj bucket for authentication with SimpleBackups; To do so, please navigate to your Storj dashboard, click on "Access"
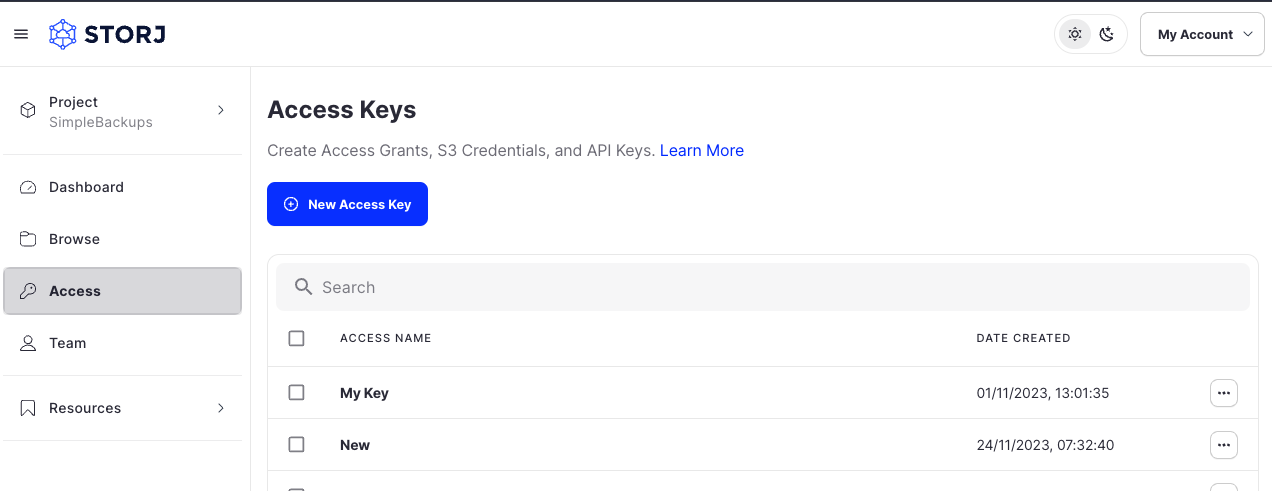
You'll see a list of all created access keys, and a button that's labeled "New Access Key"
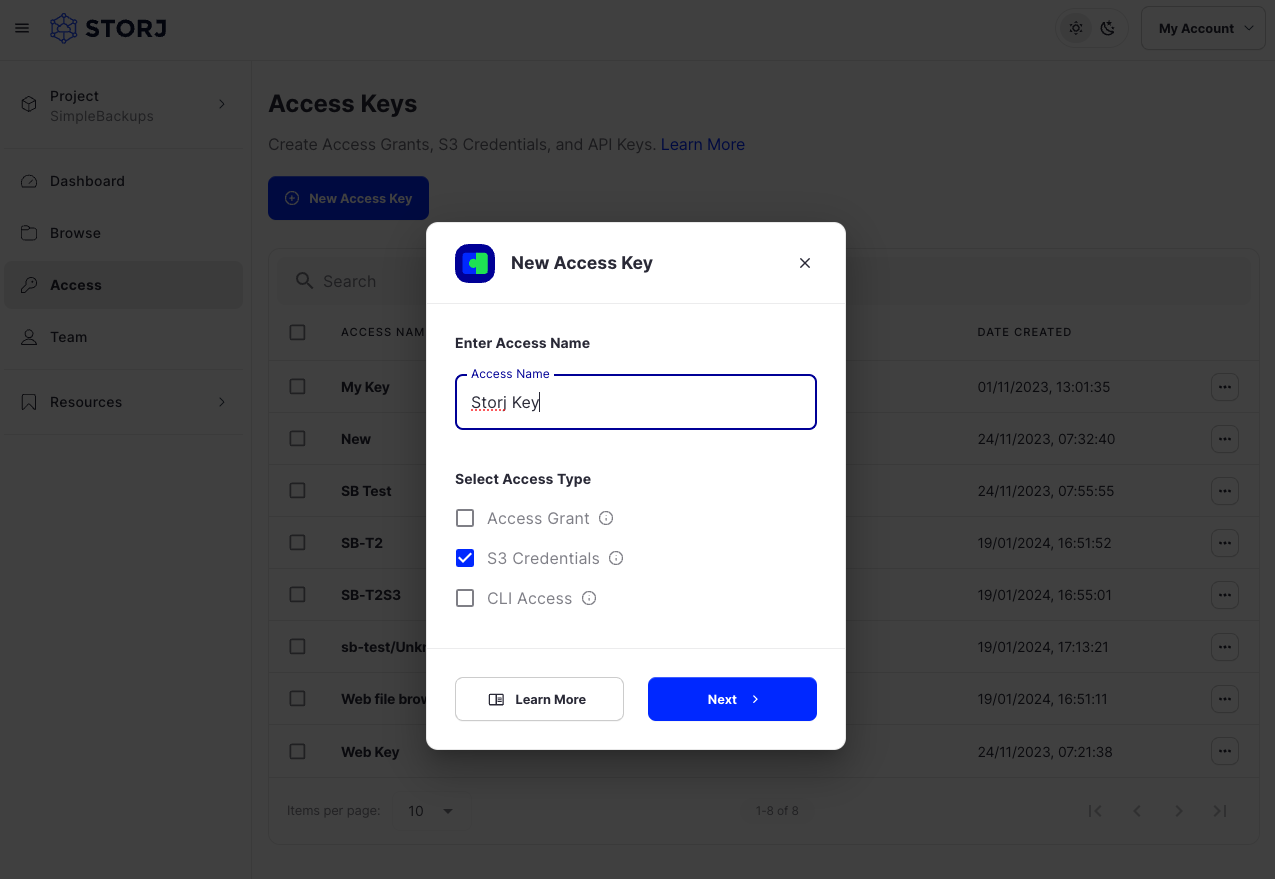
Click on the "New Access Key" button and give your key an "Access Name", and select S3 Credentials, then hit next.
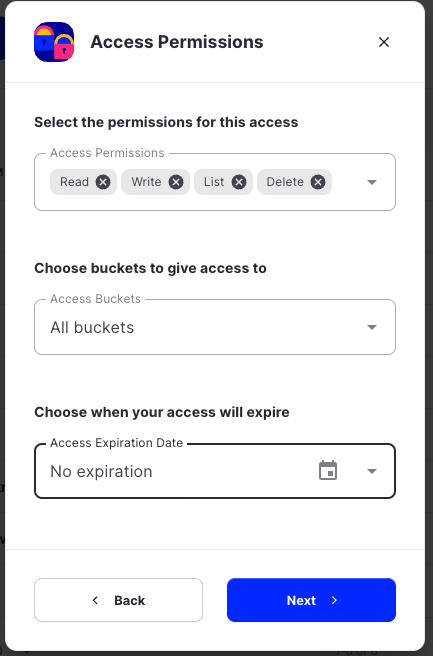
You'll be asked to selected Access Permissions, please select Read, Write, List, and Delete, then select the bucket that you'd like this key to access, and an expiration date.

After that, your S3 Credentials will be generated, please store them somewhere safe.
Replicate your AWS S3 bucket data to Storj
Now that we’ve set up both the AWS and Storj buckets, we can now back up the S3 bucket to Storj.
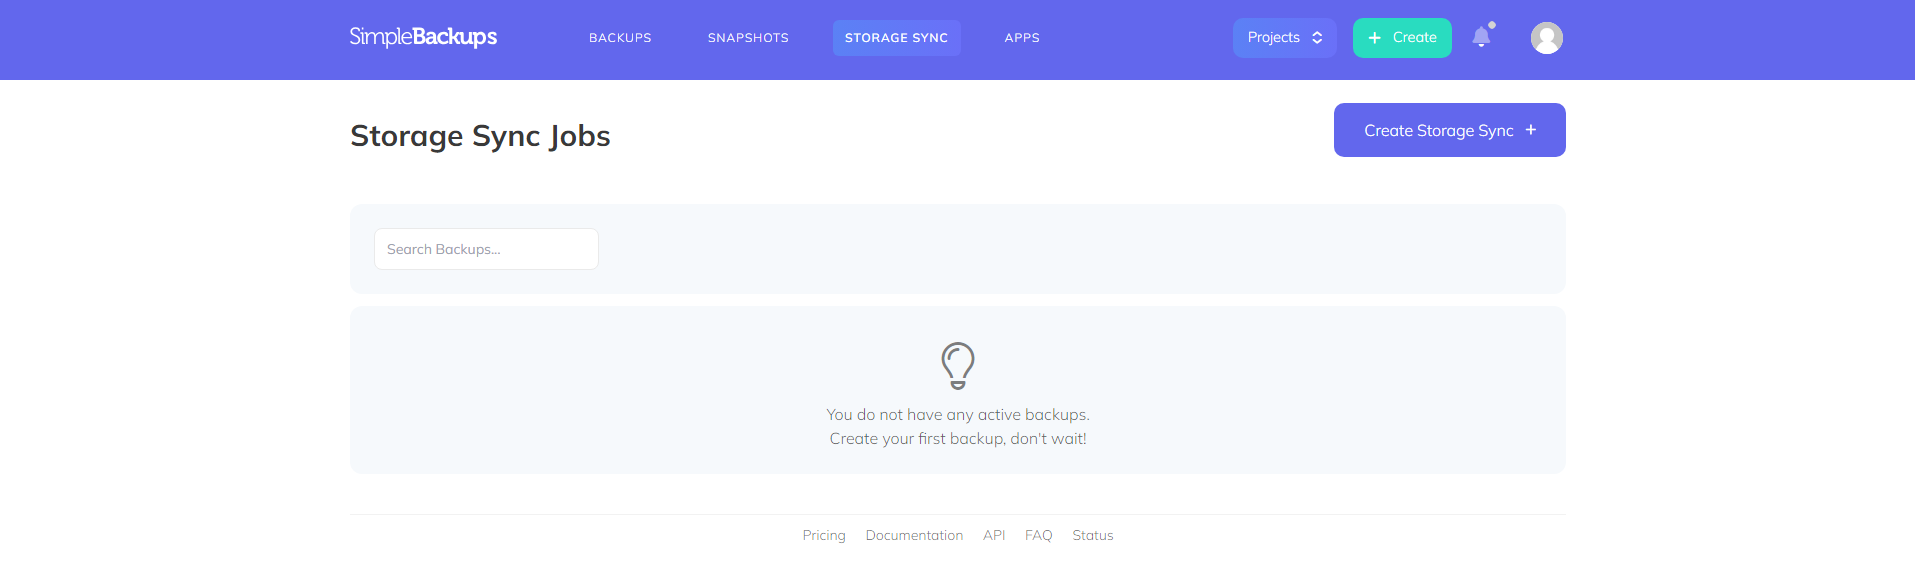
Here, the first step is to log into your SimpleBackups account and click on Storage Sync in the main menu. On the page that opens, click on Create Storage Sync.
You can also click on Storage Replication Backup further down on the page. Either way, you’ll go to the Create Storage Sync page.
When setting up your backup, your first choice will be whether you’d like to use your own server or use SimpleBackups’ infrastructure to run the backups. Here, you’ll choose either the Own Server or, as is the case in this example, the Serverless option.

Next, you’ll decide when you’d like your backup to run. You can choose between Daily, Weekly, Monthly, Custom, or On Demand based on your unique requirements. In this example, choose Daily from the drop-down list.

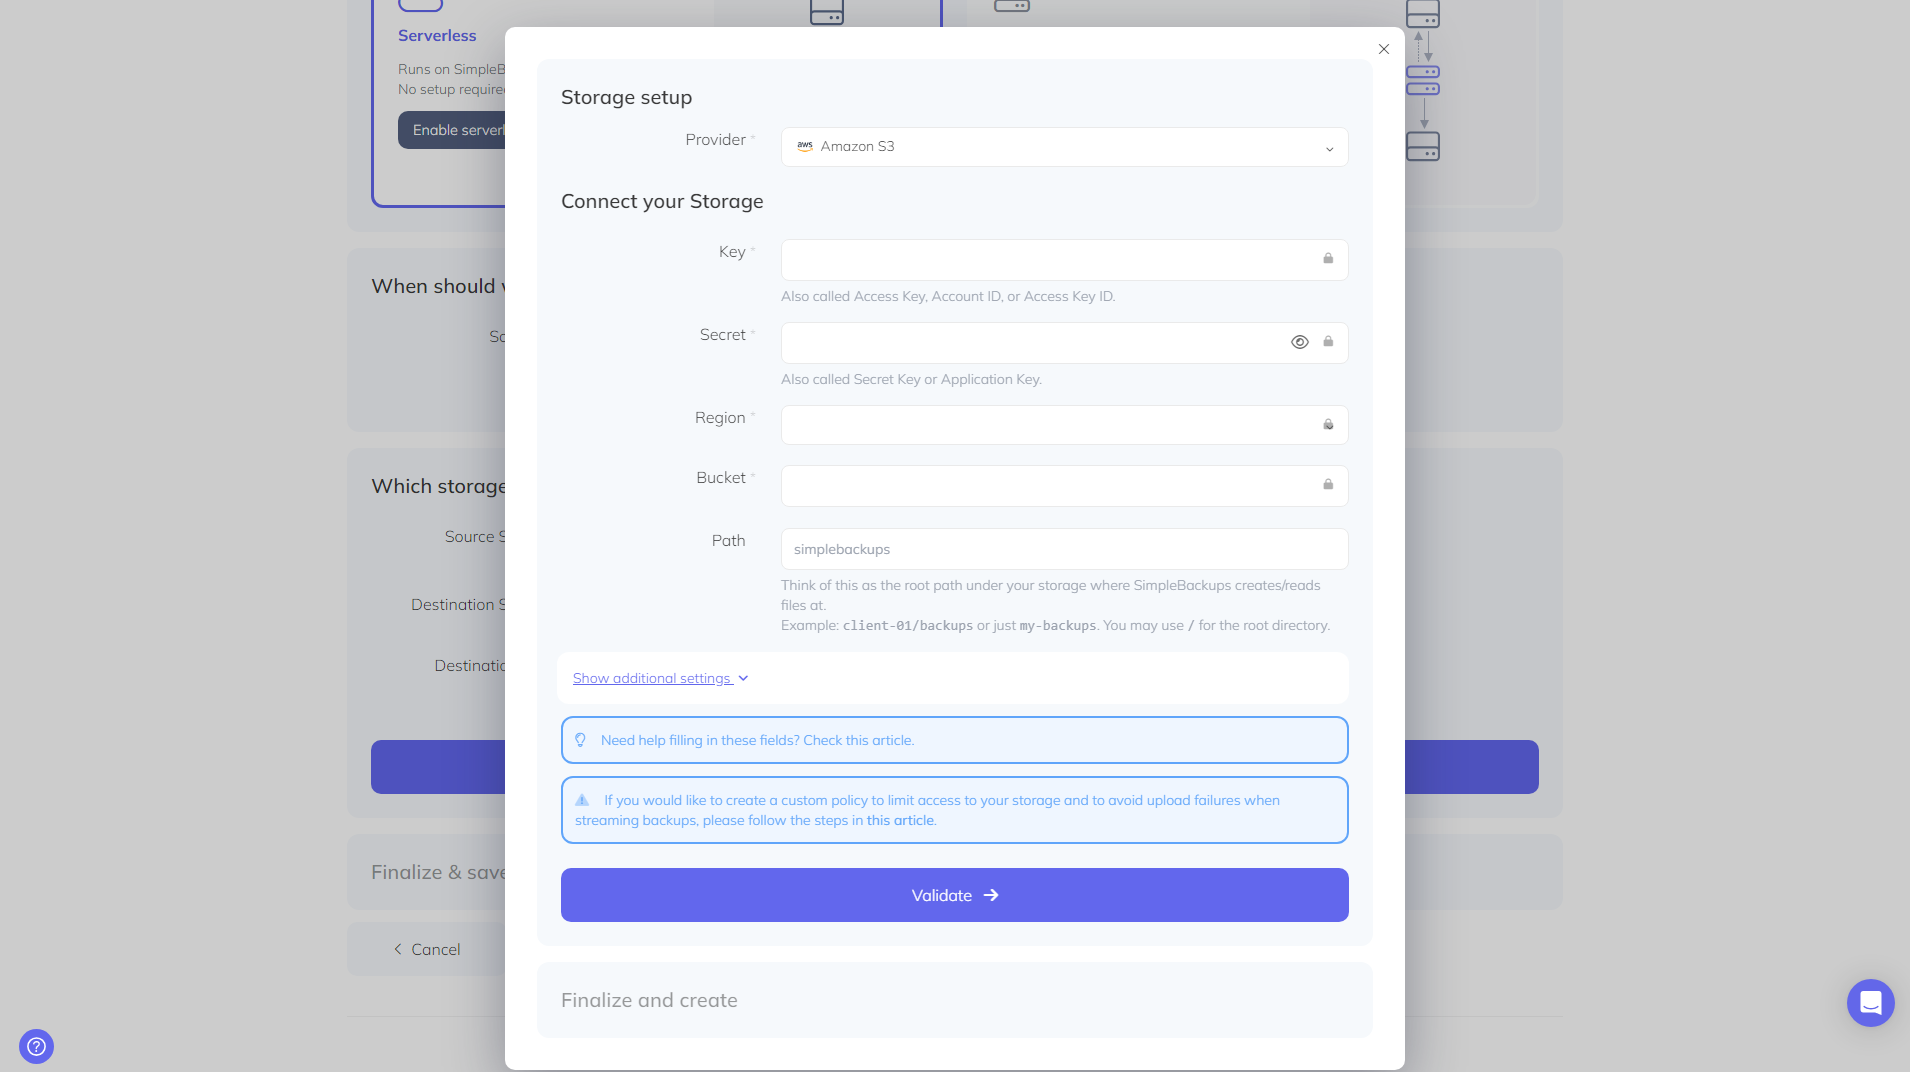
During the next step, you’ll choose both your source and destination storage providers. Because you’ve only set up your storage buckets during the earlier steps, you’ll need to connect them first. To connect your AWS S3 bucket as Storage Source:
- Click on Connect storage.
- Choose Amazon S3 as the provider in the dialog box that opens.
- Enter the bucket’s information and the credentials you obtained earlier.
- Once done, click on Validate and then on Save Storage.
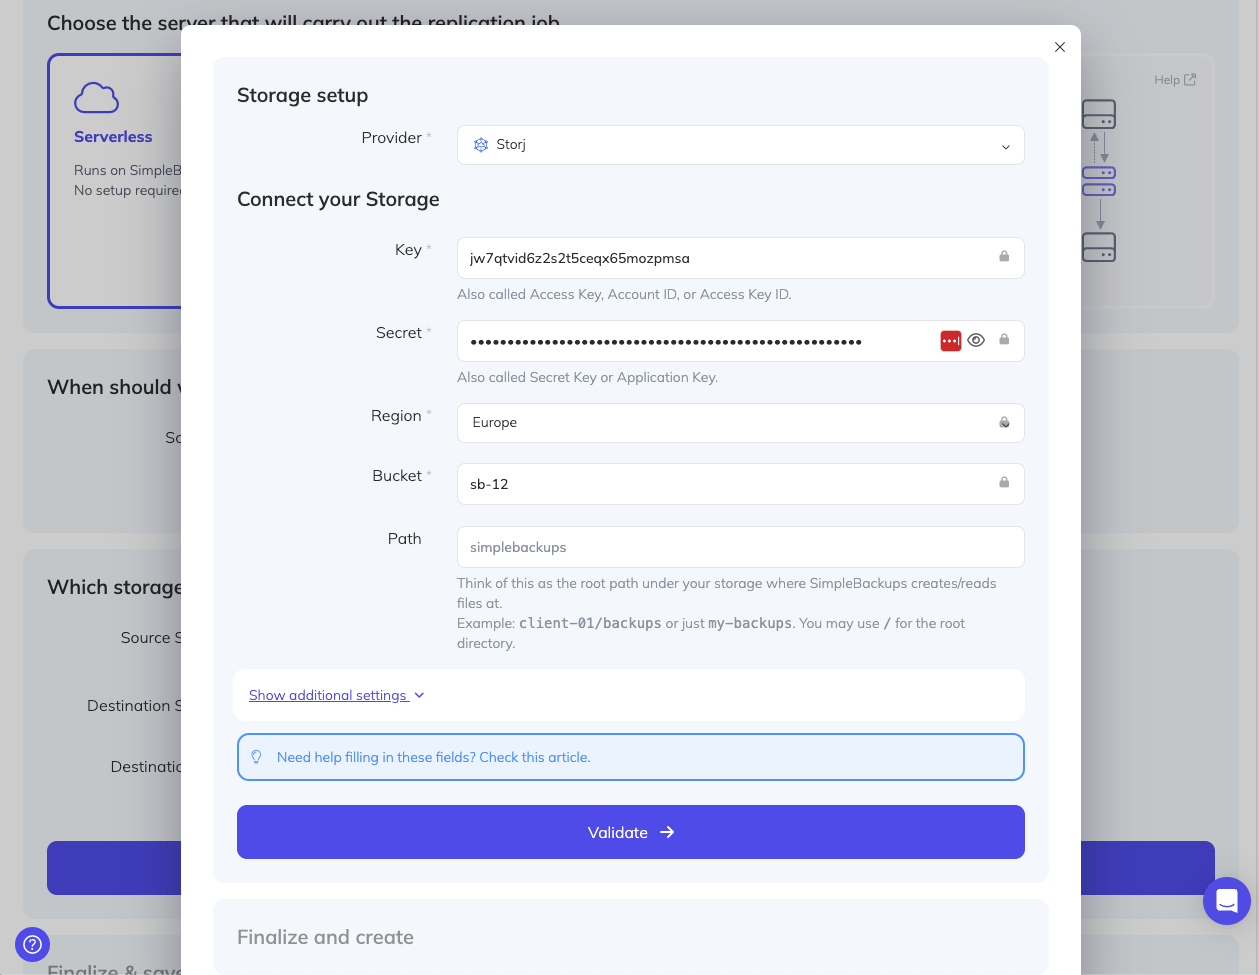
You’ll follow the same process to connect your Storj bucket as Destination Storage. So, you’ll:
- Click on Connect storage.
- Choose Storj from the drop-down list in the dialog box.
- Enter the bucket’s information and credentials.
- Once done, click on Validate and then Save Storage.
Once you’ve connected both buckets to SimpleBackups, click on Validate to validate the connection.
Finally, you’ll give your backup a name. In this example, name it S3toStorjBackup.
Once done, click Create Storage Sync to finalize your backup.
Wrapping up
Ensure your data is always accessible with data replication backups – your essential safeguard against cloud storage disruptions. This post demonstrated the ease of setting up backups between Amazon AWS S3 and Storj.
The next step is simple: try SimpleBackups!