The following guide will help you, step by step, automate your AWS EC2 server snapshots & volume backups.
Afterwards, you will be able to take snapshots, automatically on your own terms, whether you need to take them daily, weekly, every couple of hours or on-demand using our API.
You will also have the option to choose the number of snapshots to keep on your provider to save snapshot storage cost.
Table of Contents
Prerequisites
- Have a SimpleBackups account account ready
- Have a AWS account with an EC2 instance
Create your AWS credentials
In order for SimpleBackups to manage your AWS EC2 Snapshots, a IAM Users to be created with the right policies.
- Connect to your AWS Console
- Head to IAM/Users management page
- Click on "Add users"
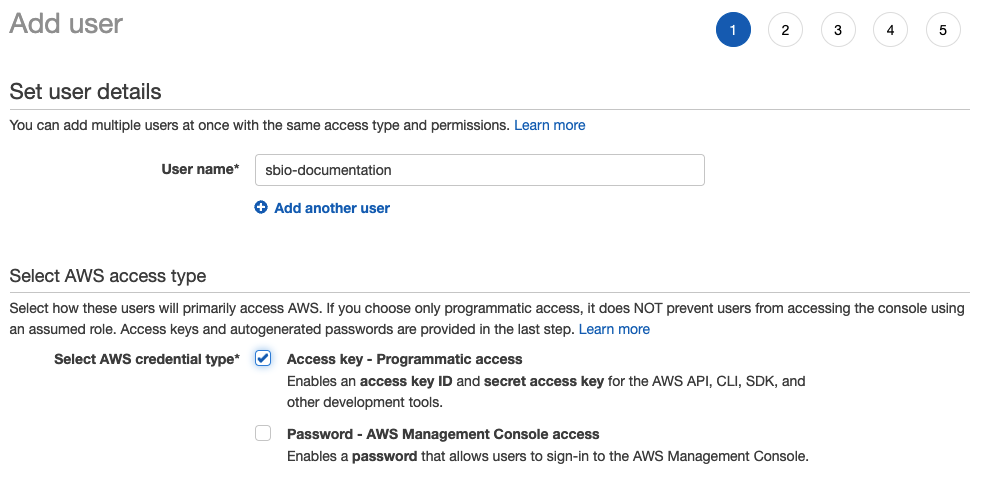
- Step 1:
- Define a name to your user.
- Choose "Access key - Programmatic access" for "Select AWS Credential type".
- Step 2:
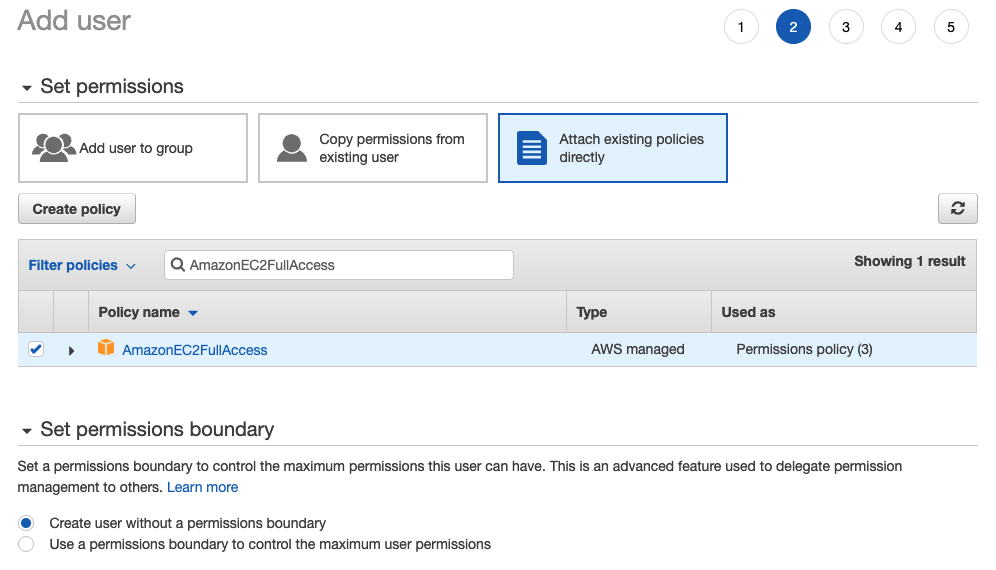
- Select "Attach existing policies directly" and select "AmazonEC2FullAccess".
- Select "Create user without a permissions boundary" in the "Set permissions boundary" section.
- **Step 3: ** You don't have to add any specific tag, just click "Next".
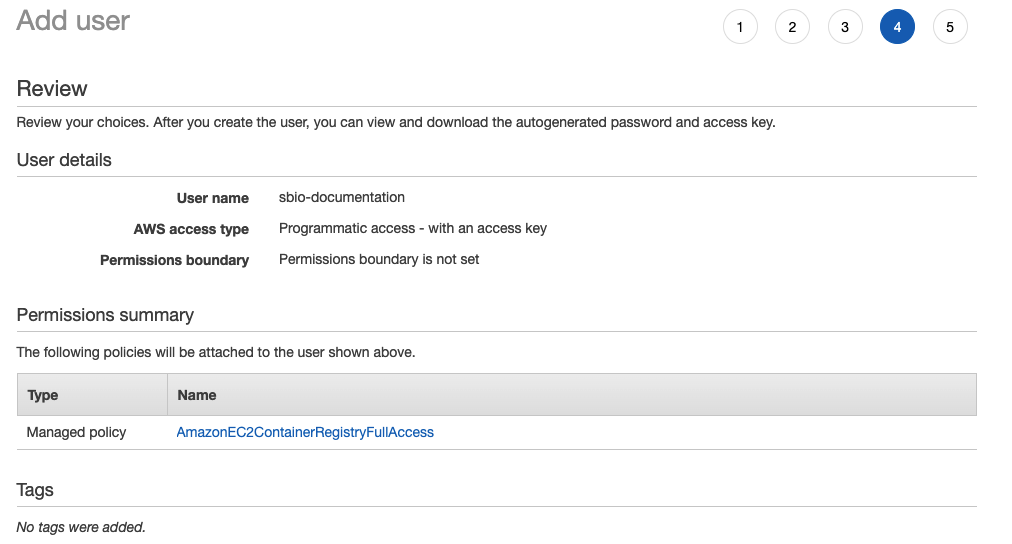
- **Step 4: **
Review and create the user.
- **Step 5: **
Copy your "access key id" and secret "access key".
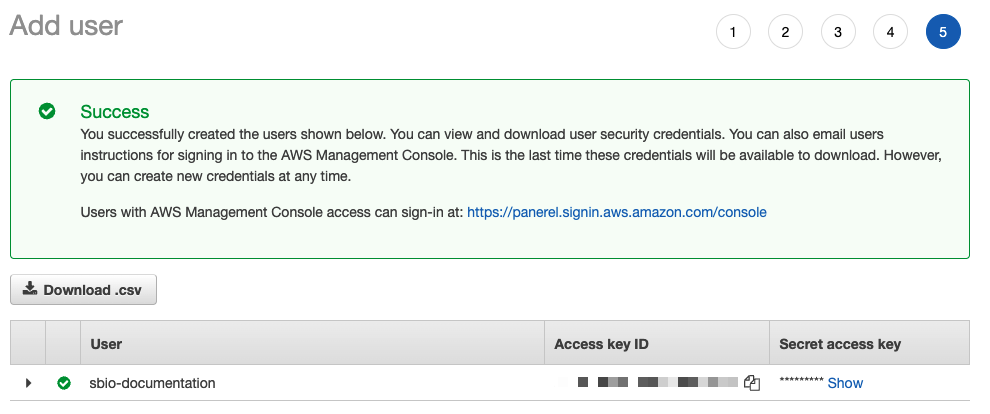
With this done, you know have a IAM User with an access key and secret that we'll be able to use in SimpleBackups to automate your AWS EC2 Snapshots.
Connect your AWS Account to SimpleBackups
We now have everything we need to connect your AWS account to SimpleBackups.
- Connect to your SimpleBackups account
- Head to the Snapshots/Create page
- Click on "Connect a new provider"

- Provider: Select AWS EC2
- Name: Internal name. It doesn't necessarily have to match your AWS IAM User Name
- Enter the "Access Key" and "Secret" generated in the previous step
- Save
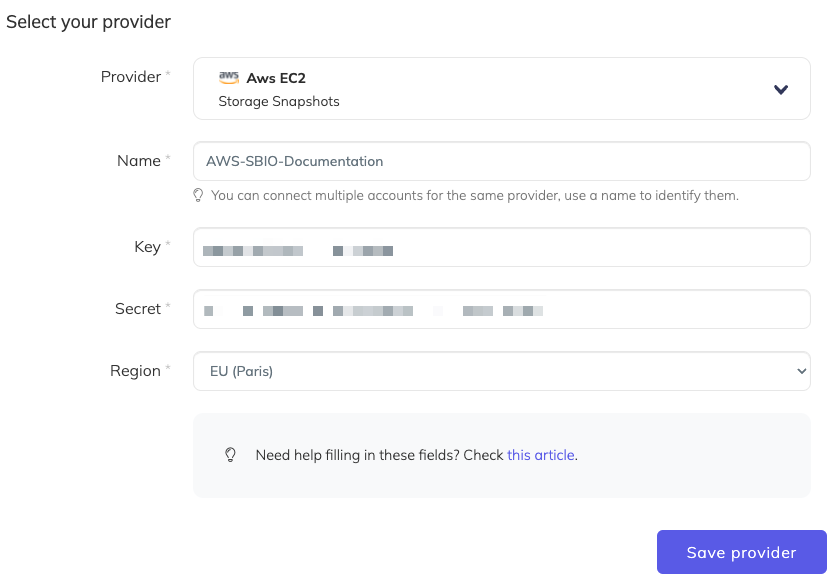
If saving this provider returns an error, make sure to validate that the IAM User associated to the Access Key you used has the right priviledges.
You're good to go! You can now configure and schedule your AWS instance & volume snapshots.