GitLab is a powerful, self-hosted Git service for managing code repositories. It gives you complete control over your data and processes, making it a popular choice for teams of all sizes.
However, self-hosting means you're responsible for ensuring your GitLab data is secure and recoverable.
In this post, we'll delve into backing up your GitLab data using SimpleBackups, a versatile backup solution.
The Importance of GitLab Backups
Even robust systems like GitLab are susceptible to issues like:
- Accidental data deletion
- Configuration errors
- Hardware failures
- Security breaches
A comprehensive backup strategy ensures that you can restore your GitLab instance, preserving your valuable code and project history.
What Data Can You Back Up?
Before looking at the backup process in more detail, let’s first look at what data you should back up. Ideally, to ensure your data is properly protected, you should back up all your repositories, including their related metadata.
- Git repositories
- Snippets
- Merge Requests
- Issues
Backing Up GitLab with SimpleBackups
Here's a step-by-step guide to streamlining your GitLab backups with SimpleBackups:
Creating your Gitlab tokens.
Go to the Application / Manage Token page
Once you are logged in, navigate to your user settings by clicking on your profile picture in the top-right corner of the left navigation panel. From there, select “Edit Profile”
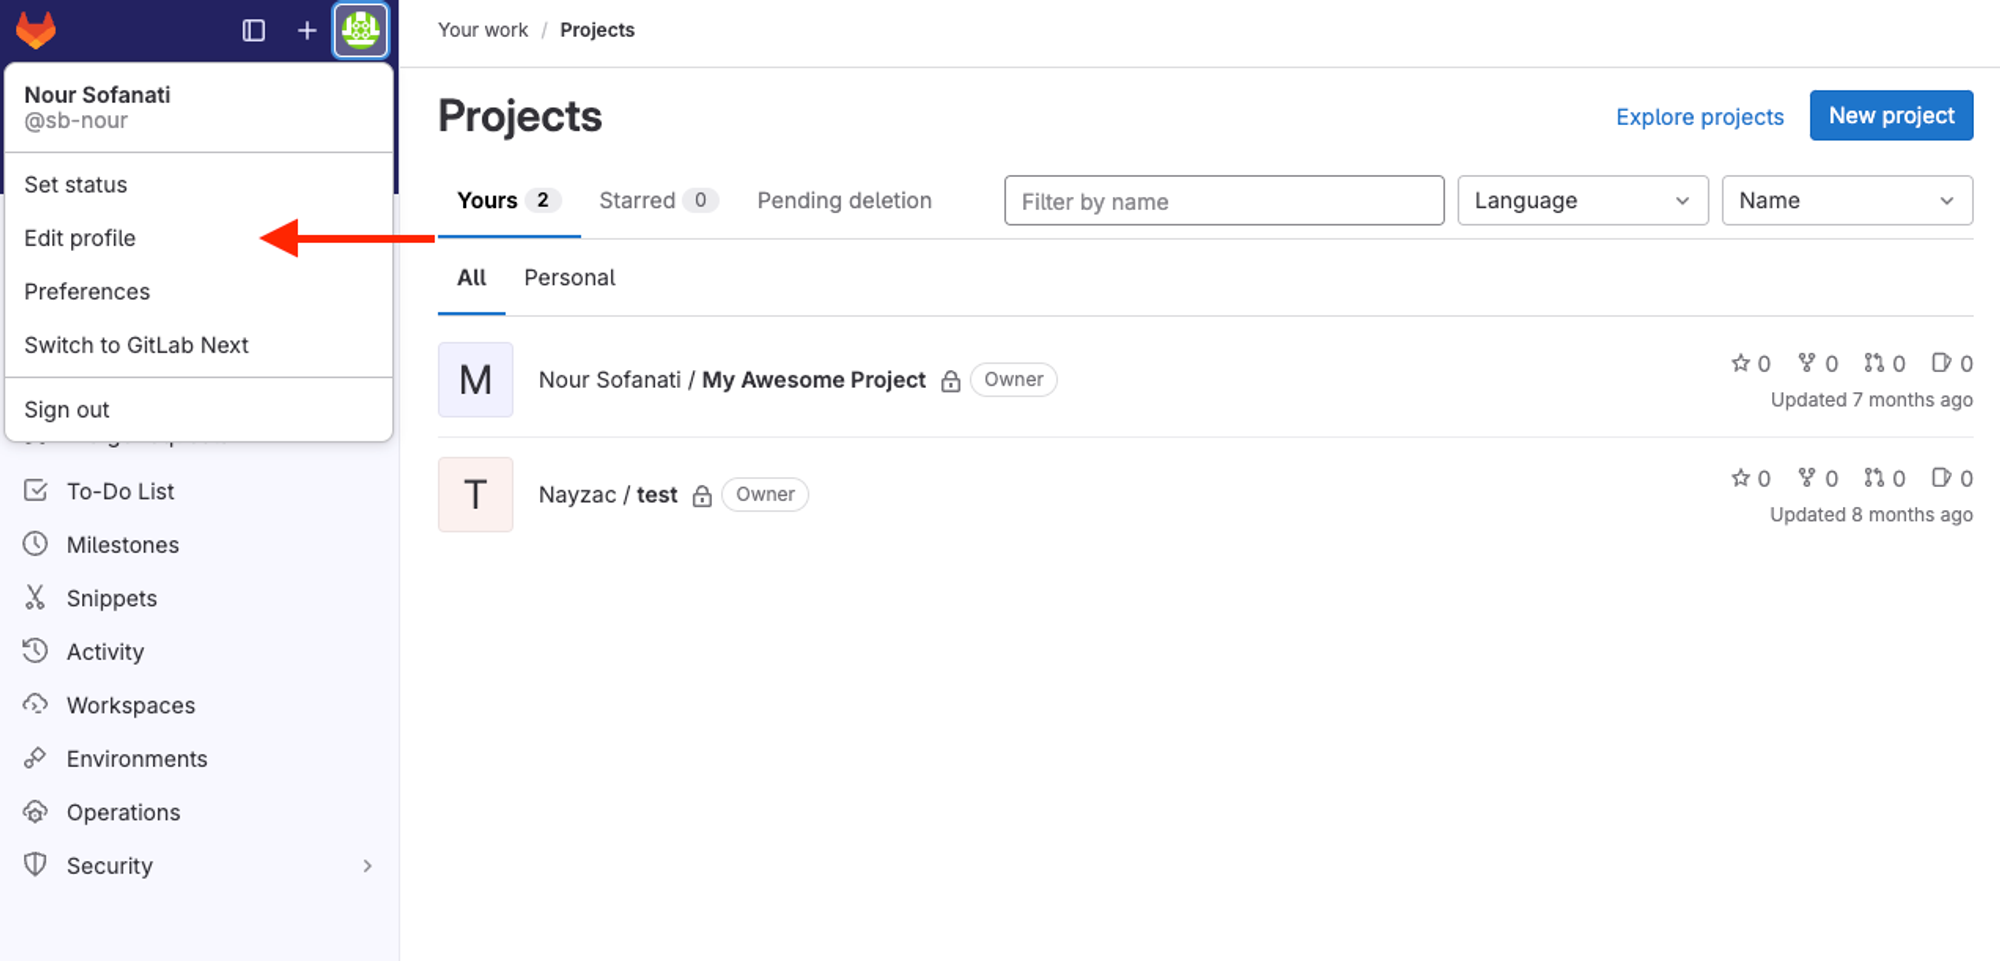 In the left-hand menu, click on "Access Tokens".
→ This will take you to the Access Tokens page.
Create a new token
On the Access Tokens page, click on the "Add New Token" button.
This will open a new window where you can configure your new access token.
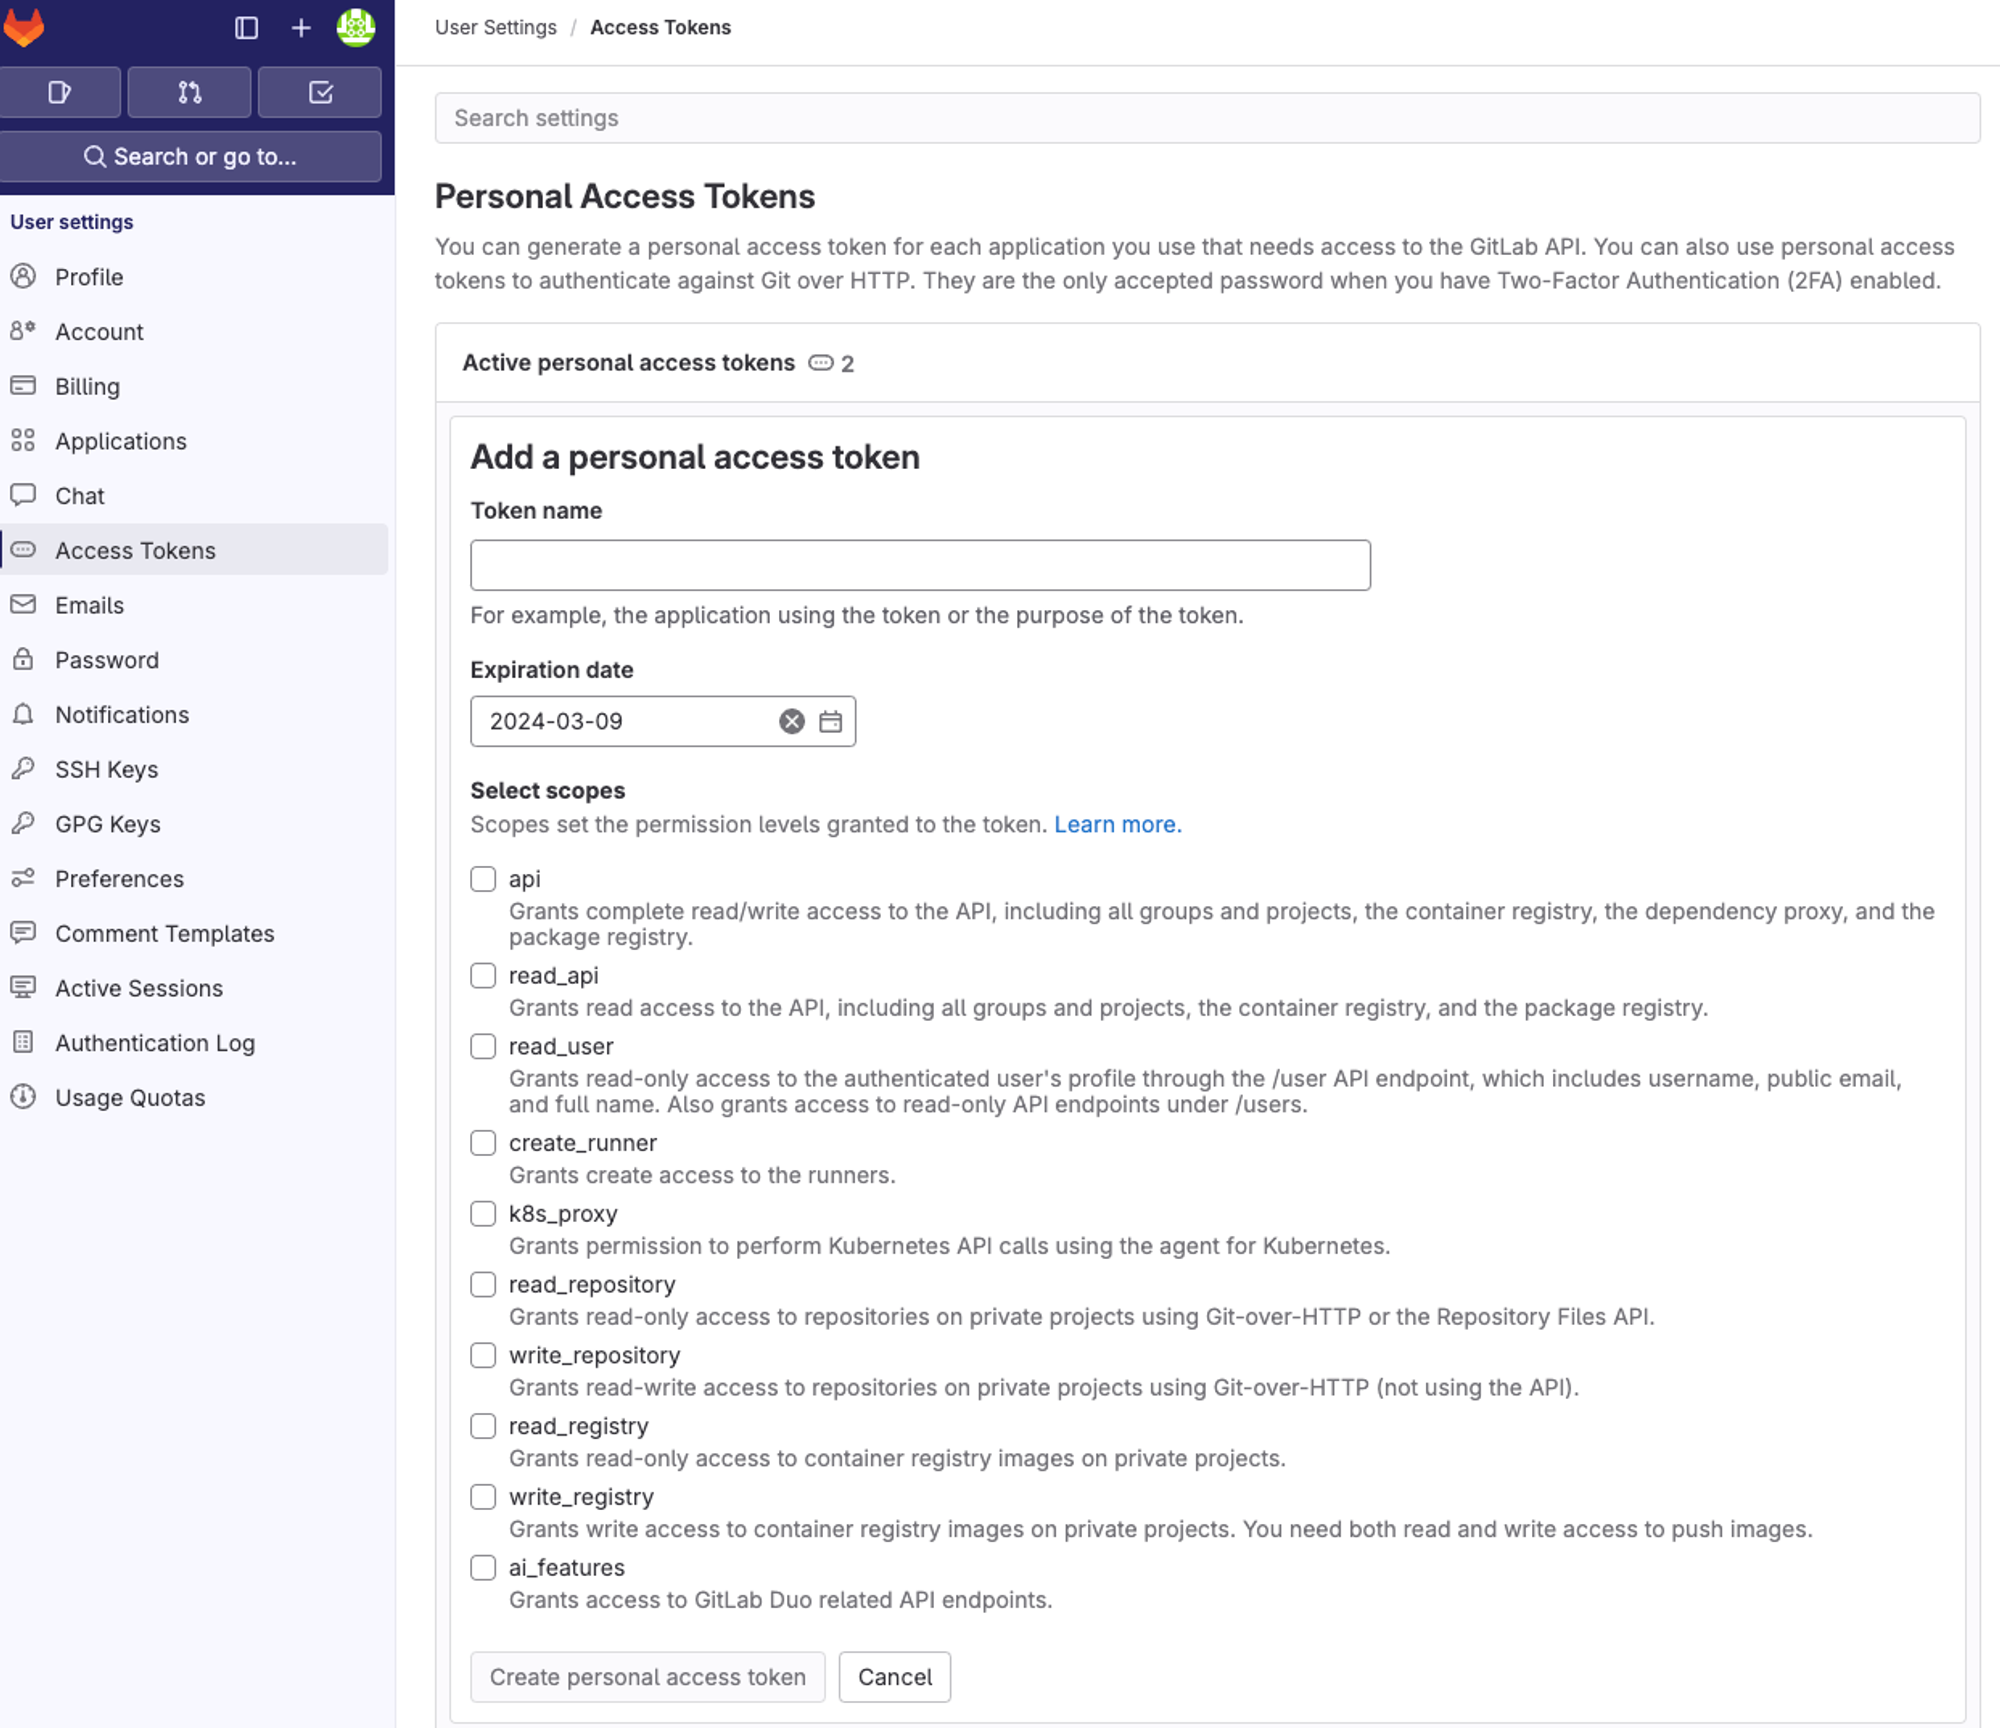 In the "Token Name" field, enter a descriptive name for your token. This will help you identify it later.
Once you have configured your access token, click on the "Create personal access token" button to create it.
Copy your token
After you click the "Create personal access token" button, gitlab will generate a new access token for you. This token will be displayed on the screen.
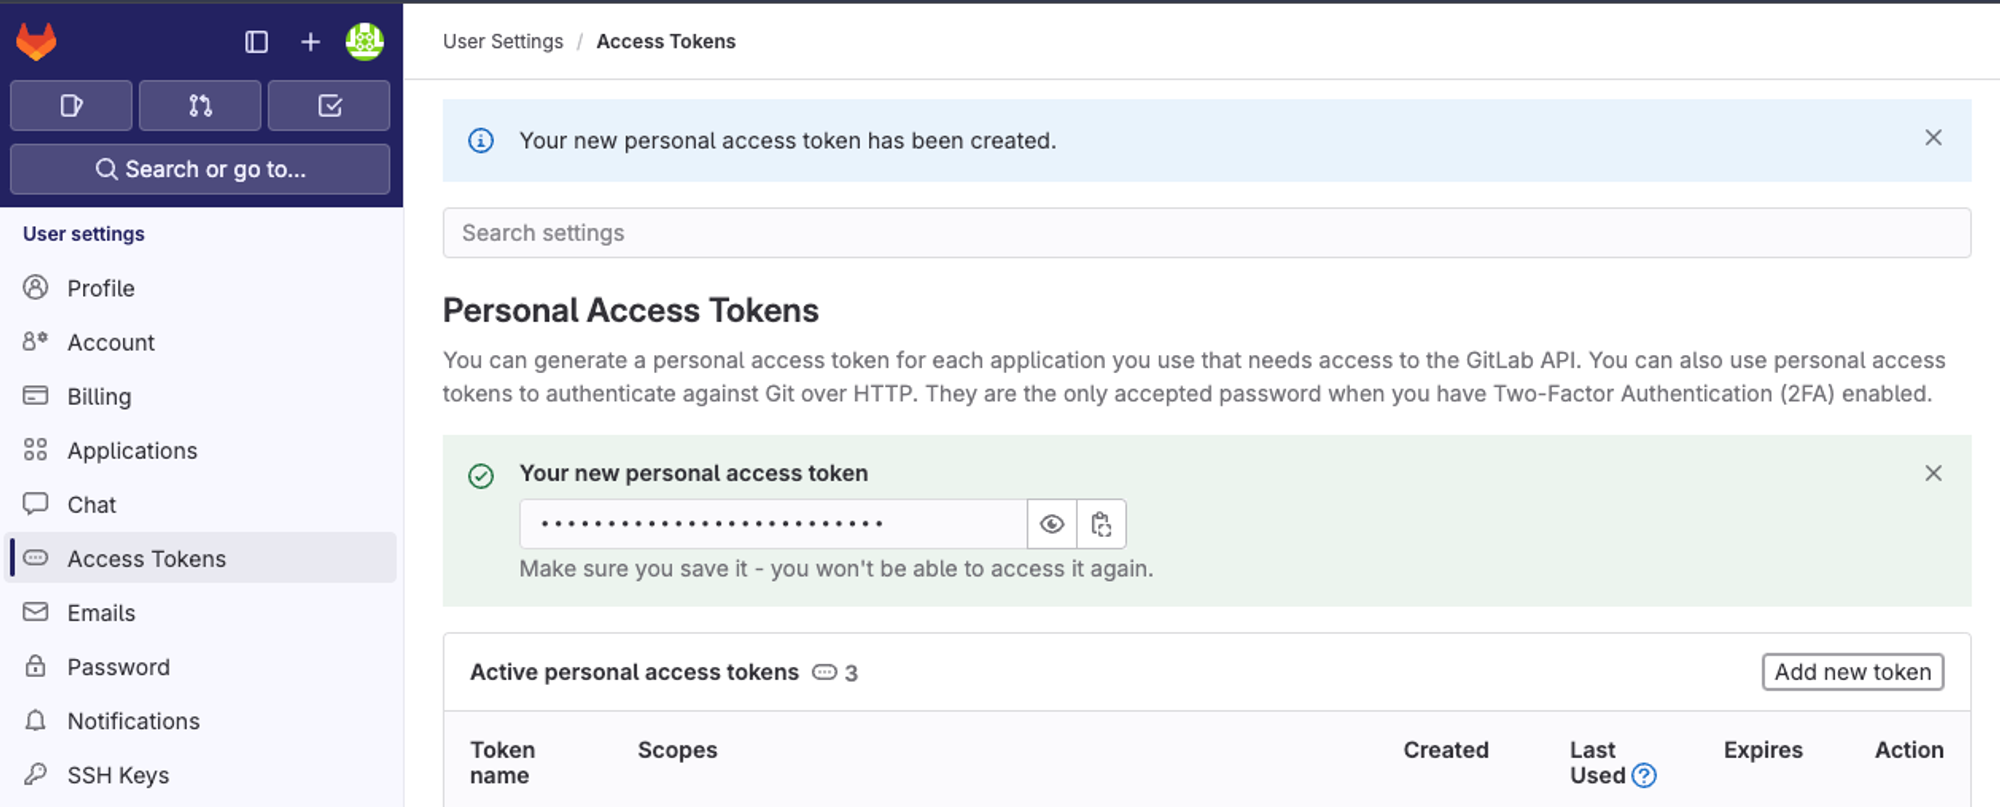 Copy your access token and store it in a safe place. You will not be able to retrieve it later.
Configure the Recipe
Provide Details: Input your GitLab instance's URL, your username, and the generated personal access token.
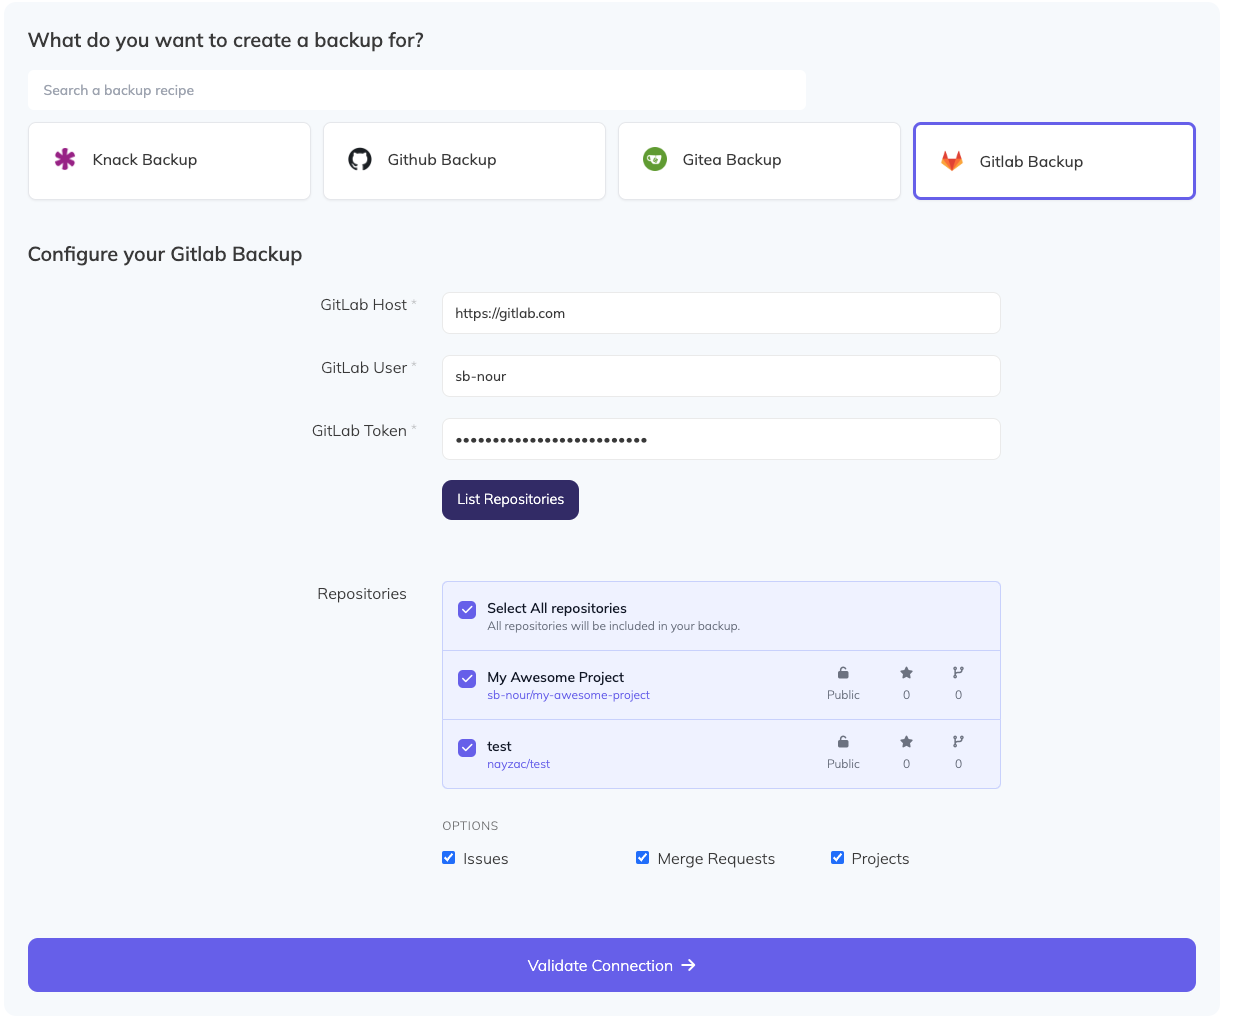
- Click on "List Repositories" to select the repositories you want to back up.
- Click on Validate Connection to validate the connection to your GitLab instance.
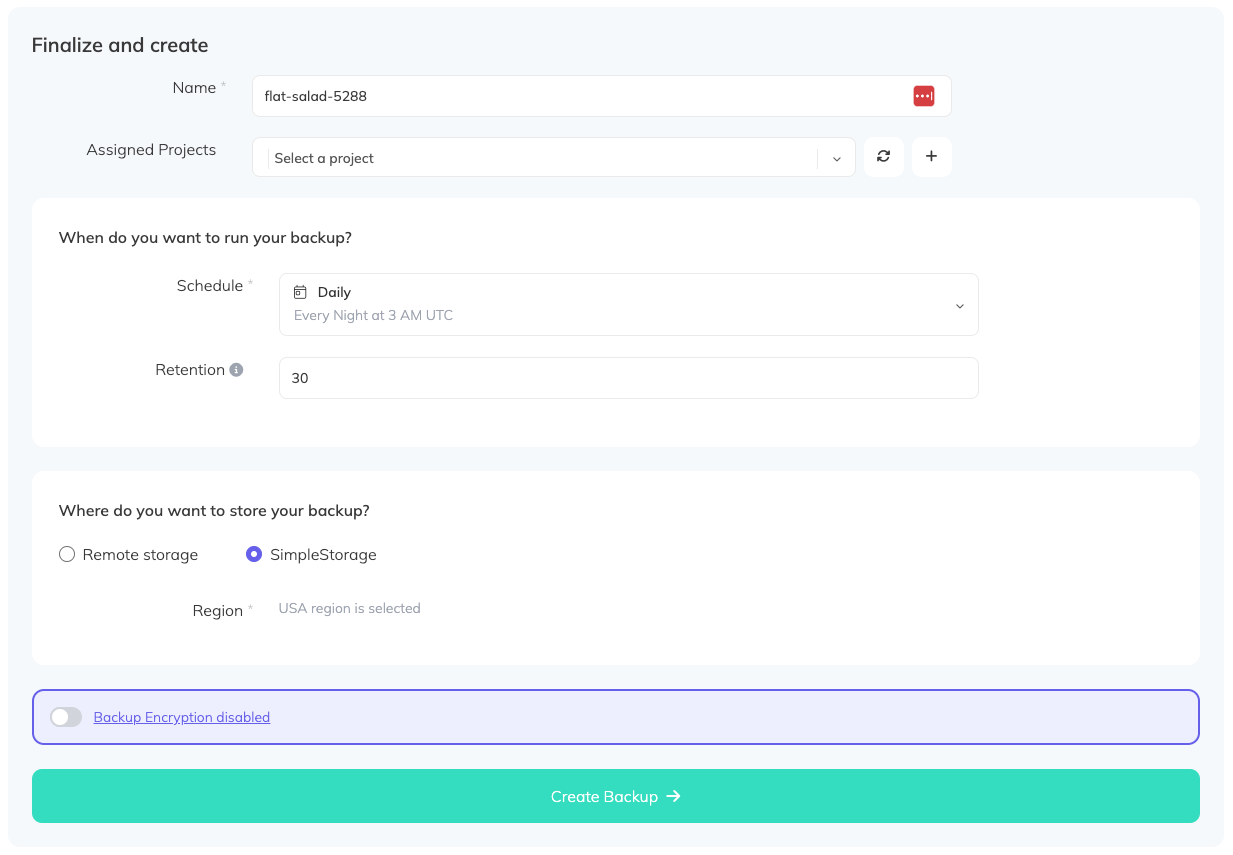
- After the connection is validated, you can set up a schedule, retention and a name for your backup. and click on Create Backup.
Why Choose SimpleBackups?
Flexible Storage: Store backups wherever you desire. Notifications: Receive backup status updates. Control: Tailor backup frequency and data selection.. Ease of Use: Intuitive interface simplifies the process.
Start Protecting Your GitLab Data
Don't risk losing your critical code and project data. Sign up for a free SimpleBackups account: https://my.simplebackups.com/register and establish a reliable backup strategy today.