1. Create your DigitalOcean Spaces
-
Create a new "Spaces" using the create menu at the top right
-
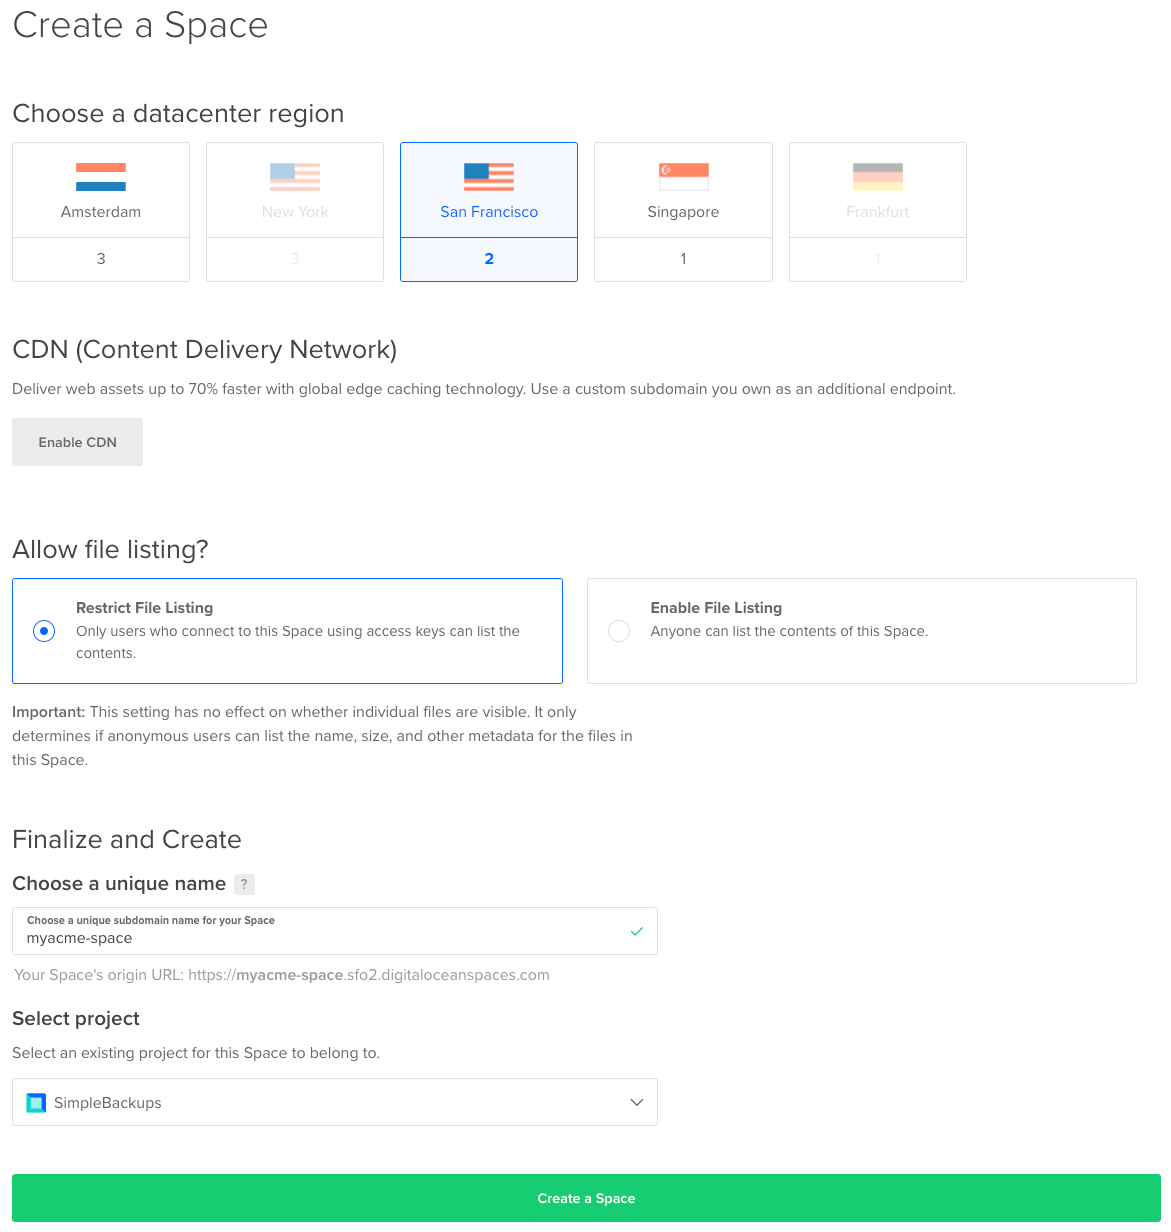
Fill in the "Create Spaces" form
-
Pick the region you need (think about GDPR rules, if you're an EU company)
-
Select "Restrict File Listing"
-
Pick a name you like and link it to your DigitalOcean project (doesn't really affect us)
That's it! Your DigitalOcean Spaces is now created.

Don't leave the DigitalOcean interface, we'll now have to create your credentials.
Information you'll need in step 3:
- Your "Spaces" name, in this case "myacme-space"
- Your "Spaces" Region, in this case "San Francisco 2", which you can also see in your DO Space url
2. Create your DigitalOcean Credentials
Getting your DigitalOcean Spaces setup, was easy, ... and so will be getting your credentials! We've covered how to get this done in a how to create a DigitalOcean Spaces credentials. Follow this simple article and you'll get the access created in ... less than 2 minutes.
Information you'll need in step 3:
- Key
- Secret
3. Connect your Space to SimpleBackups
- Log into SimpleBackups and head to the connect your storage page
- Pick "DigitalOcean Spaces" as storage provider and fill in the "Connect your storage" form with the information from step 1 and 2.
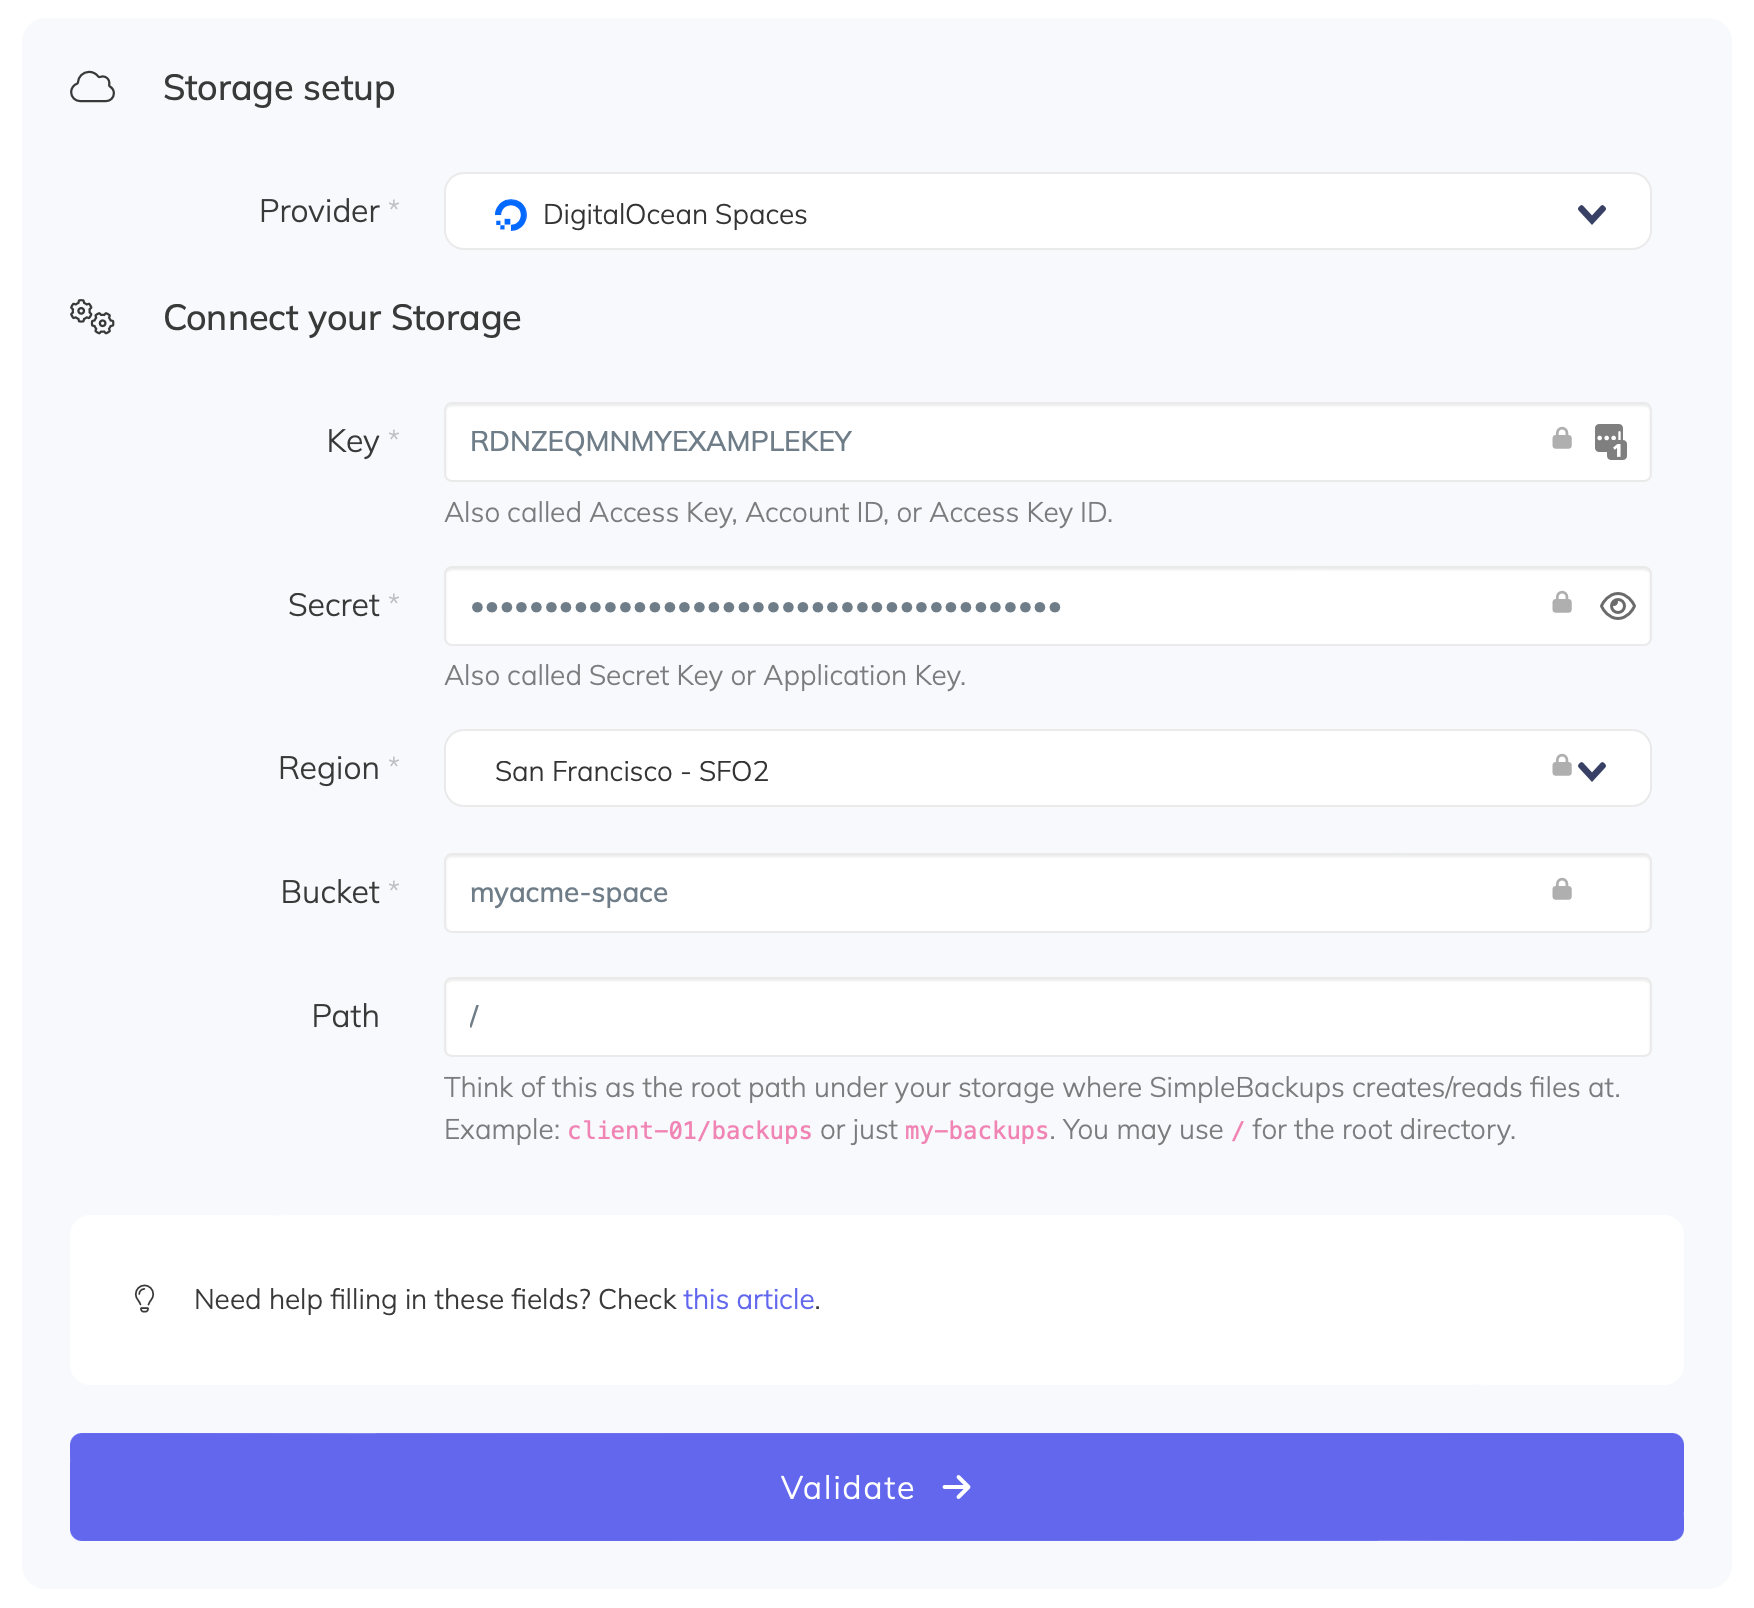
You'll have to input :
- Key: Key described in (step 2)
- Secret: Secret described in (step 2)
- Region: Spaces region described in (step 1)
- Bucket: Spaces name described in (step 1)
- Give your storage a name (usually we like to use the Spaces name) and click on "Save new storage".
You'll be redirected to the list of storage where you'll find your newly connected storage.