Backups have always been essential to every security and disaster recovery strategy. However, due to the ever-increasing risks of data loss and breaches and because backups contain most, if not all, of your business’s data, encryption is now also an important consideration.
But here’s the thing. Encrypting your backups is tedious and can take the time you could instead spend on running your business. Luckily, there is a more efficient option, and in this post, we’ll show you how you can encrypt your backups quickly and easily with SimpleBackups.
Table of Contents
Encrypting Your Backups Using SimpleBackups
To encrypt your backups using SimpleBackups, you’ll either create a new backup or edit an existing one you’ve already made. To illustrate the encryption process, however, we’ll use the process of creating a new backup.
Creating a New Backup
So, to start, let’s first create a new backup. You’ll log into your SimpleBackups account and select BACKUPS on the navigation menu.
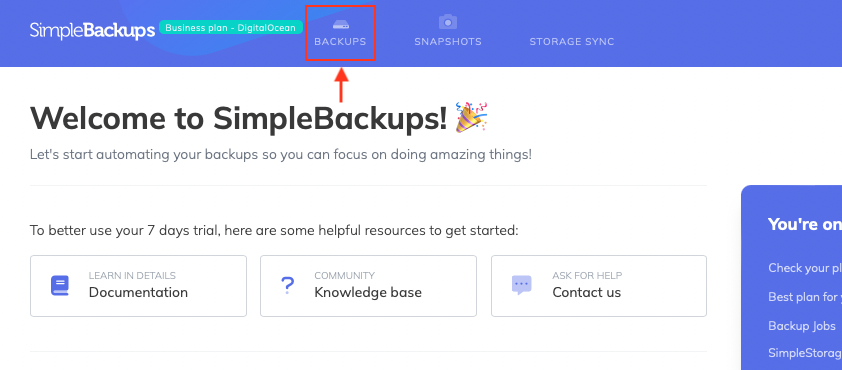
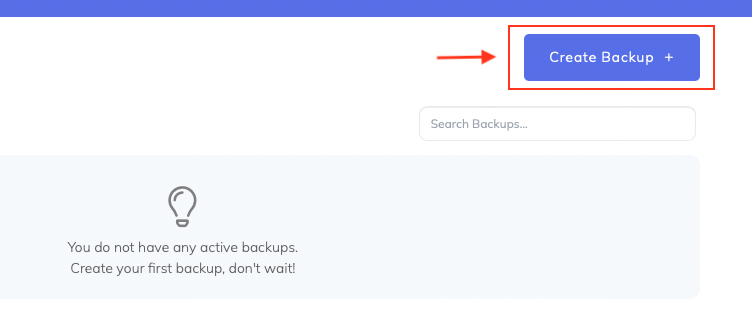
On the Backup Jobs screen, you’ll click the Create Backup button.
On the Create Backup screen, you’ll configure your new backup. The first step is to select your backup type and select a server.

If you’ve not connected a server yet, you’ll need to do so by clicking the Connect a new server button. On the dialogue box that opens, you can select your connection method. In this example, we’ll use Automated SSH and, as such, run the command below on our server.

If the command is run successfully, the server will be added, and you can select it in the dropdown box. If not, you might have a firewall, so you’ll need to safelist the provided IP addresses. It could also be that you need a password to connect to your server in addition to your SSH key. In this case, you’ll likely need to use the manual connection method.
For the next step, you’ll need to choose when backups will be made, how many backups you’ll keep, and you can add a pre-backup script. Here, you have several daily, weekly, or monthly options. However, for this example, we’ll use the On demand option.

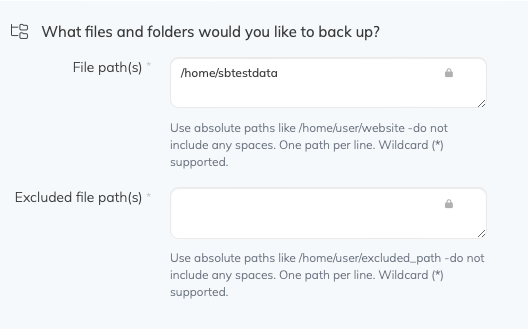
Once you’ve selected your backup schedule, you’ll decide what files and folders you want to back up. For this example, we’ll back up a folder named sbtestdata on our web server by adding the file path to the folder. We can also exclude any folder we want to avoid backing up.
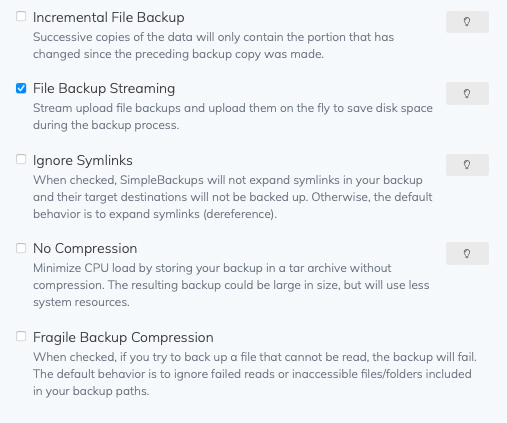
During this step, you can also choose whether you would like to stream file backups, prefer incremental backups, if you’d like your backups to be compressed or not, and more.
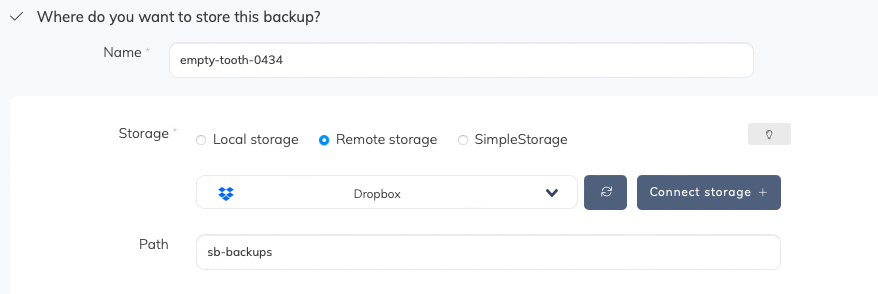
Once you’ve completed all the information above, you can click the Validate button. Once the backup has been validated, you can name your backup and decide where you want to store it. Here, you have a few options, including:
- Local storage. This option will save the backup to your local machine, and when using this option, you’ll need to provide the path to the folder where you would like to save your backup.
- Remote storage. This option allows you to save your backup to external storage solutions like Amazon S3, Google Cloud Storage, Google Drive, Dropbox, and more. When using this option, you’ll need to connect SimpleBackups to the storage provider if you haven’t done so.
- SimpleStorage. With this option, you’ll save your backup to your included SimpleBackups storage, and you’ll need to enable SimpleStorage before doing so.
In this example, we’ll use the Remote storage option and save our backup to Dropbox. We’ll also add the path to where we want to save the backup.
Encrypting the Backup
The final step in encrypting your backups is to select the Enable Backup Encryption option. At SimpleBackups, we use AES-256 to encrypt your backups, which means no one else but you can read these backups. At runtime, we use an RSA asymmetric private key to encrypt a random passphrase and encrypt your backup on its way to storage.
As a result of the above, when you choose to encrypt your backup, you’ll need to provide your RSA public key in PEM format and copy and paste its contents into the dialogue box.
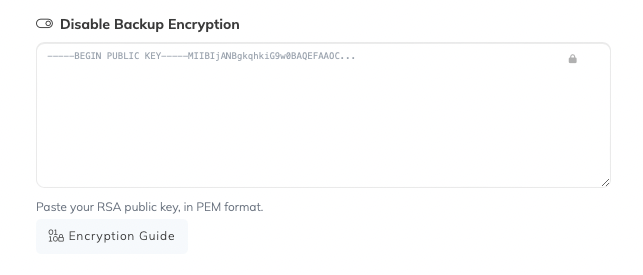
To generate your RSA asymmetric key pair, you’ll run this command in your terminal to generate a private key.
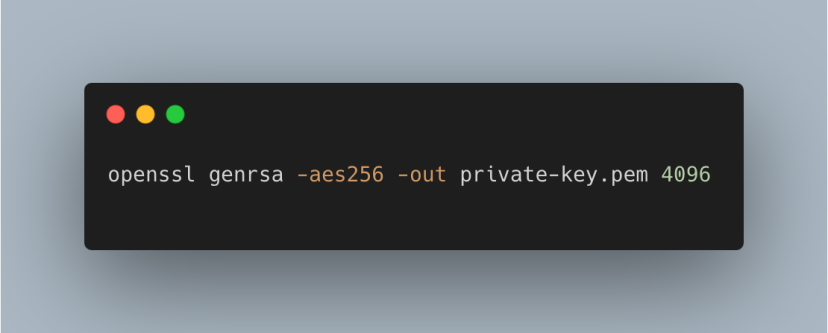
You’ll then need to enter a passphrase to secure your private key.

Once your private key is generated, you’ll need to obtain the public RSA key to encrypt your backup.

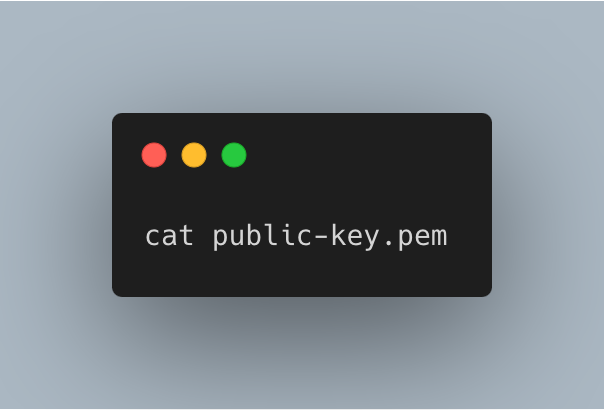
Once your public key is generated, you’ll need to get the content of the public-key.pem file we just created. This command will output the content to the terminal, which you can copy and paste into the earlier dialogue box.
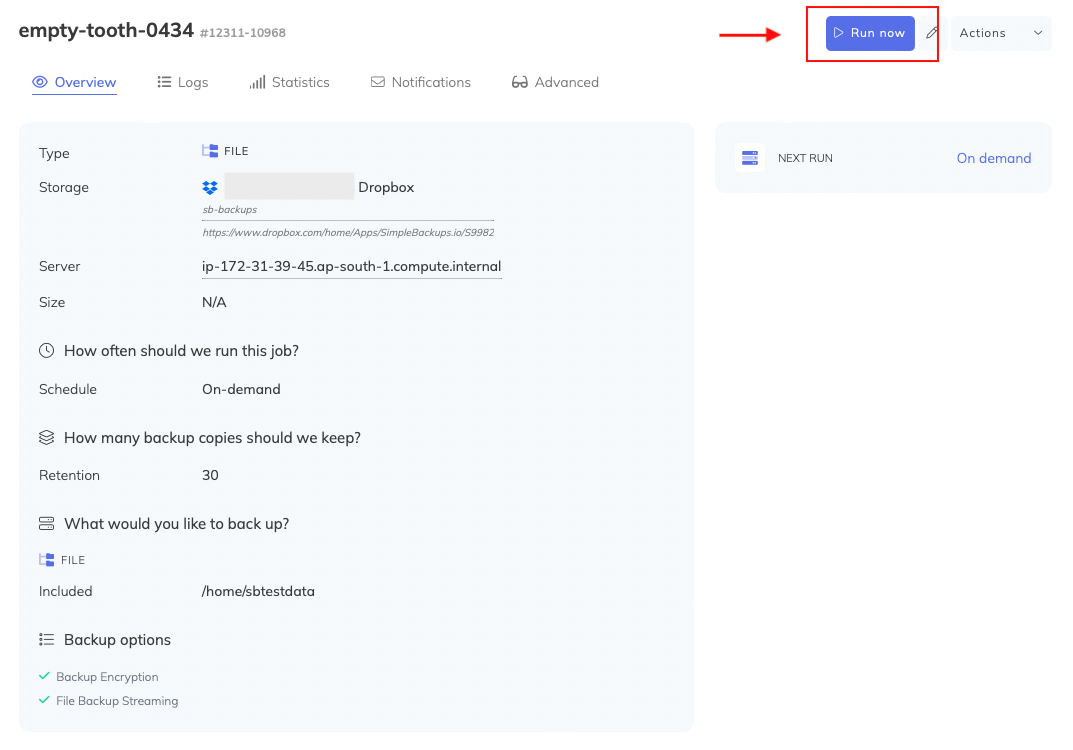
Once you’ve pasted the file's contents into the dialogue box, you can click on Create Backup. Once created, you’ll be taken to the Overview page of your backup. And, because we chose the On demand option earlier, we can now run the backup by clicking on the Run now button.
Decrypting Your Backup
After you’ve run your backup, you’ll find it in the storage option you chose. In this example, we used Dropbox, so if we go to Dropbox, we’ll see that our backup is stored under a SimpleBackups.io folder.

When we open the folder, we see that two files have been stored. One is the backup archive, and the other is the encrypted passphrase that was generated during the backup.
We’ll download both the encrypted backup and the encryption passphrase to decrypt the backup. We’ll then decrypt the passphrase using the RSA private we generated earlier.

In this command, the filename file.empty-tooth-0434.b10968.22-08-16 _090622.tar.gz.pass is unique to this backup and will differ for each backup. Once we’ve decrypted the passphrase, we can then decrypt the backup.

As is the case with the passphrase, the file.empty-tooth-0434.b10968. 22-08-16_090622.tar.gz filename in the command is unique to the backup we just created, and the file name will differ for every backup. After this process, you’ll have access to your backup’s data.
When encrypting your backups, you should keep a few things in mind, though. Firstly, once you’ve created and run a backup, you’ll be unable to change the encryption key. In this case, you’ll need to clone or duplicate your backup to use another encryption key.
Also, if you lose your encryption key, you won’t be able to decrypt the backup, and you’ll lose access to it and, by implication, your data. For this reason, it’s vital that you keep your private key safe and never lose it.
Encrypt Your Backups Today
There you go; now you know how to encrypt your backups quickly and easily with SimpleBackups. Whether you’d like to back up your website data or database, get server and volume snapshots, or simply replicate storage from one cloud service to another, SimpleBackups is the tool you need to keep your data safe.
To learn more about SimpleBackups and how it can help you, create your first backup for free today.