This week, we decided to create an integration between Intercom and our Notion database used to track Customer Support requests. This was easy to set up (took a few hours) and it helps us in our day-to-day Customer Support effort, so we decided to share our insights in this article.
Want to go straight to the code? Check out our app repository.
Customer Support, tools & systems
Intercom for interacting with users
At SimpleBackups we have been using Intercom for a few years, and we love it! This tool became our go-to users and leads management tool and we extensively use it daily. Our customers can reach out to us via chat or email, to ask questions, report an issue, or request new features.
Notion for everything else
We are also big Notion fans and are extensively using since they released their first version (#fanboys). We use it for note-taking, to describe our internal systems, keep track of all our ideas, but also use databases to record and track marketing efforts, and more recently for Customer Support.
Our Customer Support System
SimpleBackups grew a lot recently, and dealing with support, with multiple team members requires a system in place to avoid missing frequent frictions, or helping identify product improvement opportunities.
The goal for us is to have one central place, where all interactions with users are recorded. This has to be structured and searchable, with clear categorizations of what requests are about (bug, feature, product question, UX issues ...).
Our Notion Customer Support database
If you're not familiar with Notion, you have to give it a try and start playing with it. It's very easy to get started and offers a lot of flexibility.
Our Customer Support database looks like this:
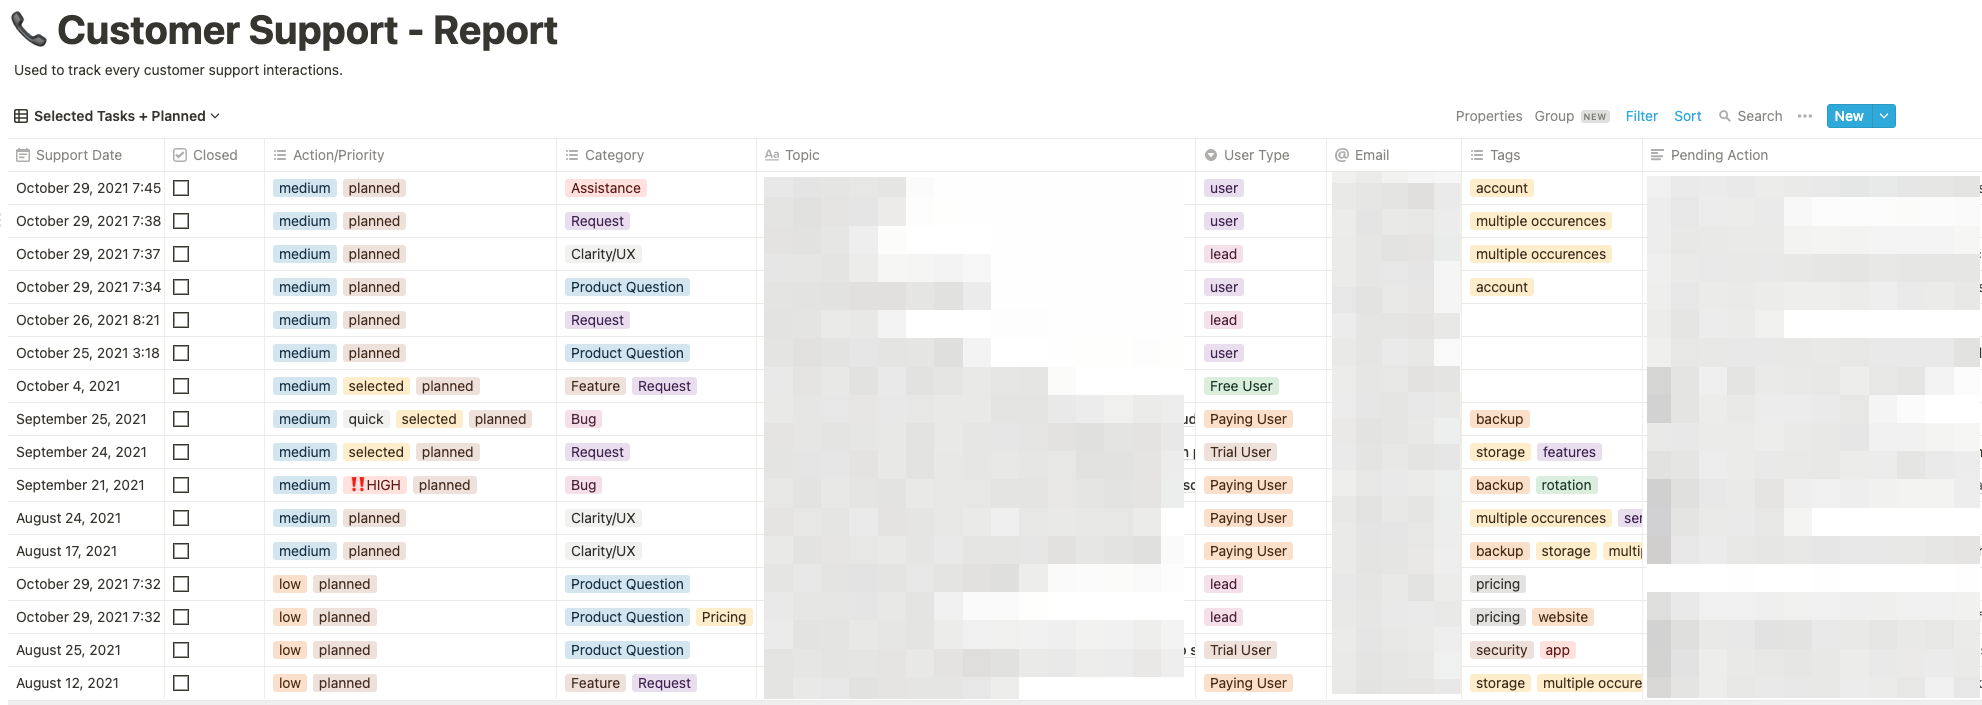
And each request is documented as below:
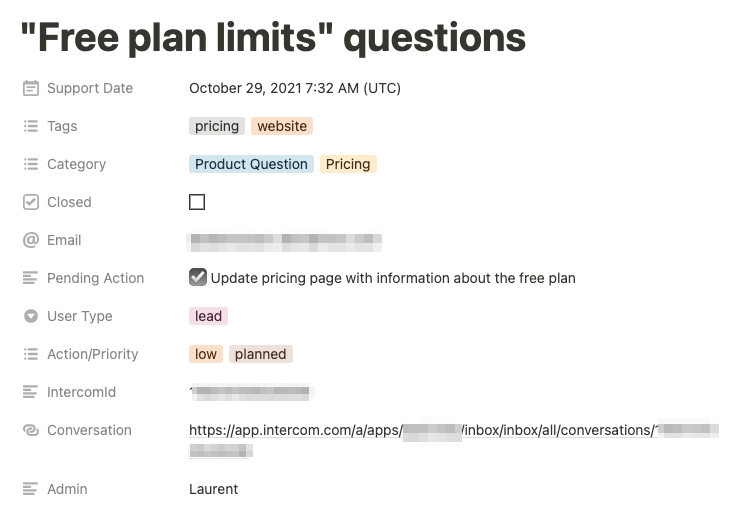
In addition to the common fields helping us identify the user and the intercom conversation. We also include the below attributes for every request:
- Tags: this is used to filter requests when we do some longer-term analysis
- Category: "Pricing", "Feature Request", "Clarity/UX", "User mistake", "Expected Manual task", "Product Question", "Admin", "Assistance".
- Action/Priority: "Low", "Medium", "High", "no action", "Won't do"
- Pending action: For every request, we think an improvement in our product or content could prevent this request to be asked again, we list the actions that would have to be taken
How does our Customer Support system work?
Our approach is very simple: we kept the tools we were already using, added some structure and a quick tool to bridge them together.
Our system goes as follow:
-
Users reach out to us via Intercom (chat and email)
-
We answer their questions/requests right away
-
We fill in our Intercom to Notion bridge application with the right categories, tags, priority, and pending actions
-
On a bi-weekly basis, we review our notion "Customer Support - Report".
- we identify the requests with pending actions
- we identify the requests with multiple occurrences
- we review/assign the right priority
Our main goal during that session is to identify what should be worked on next.
With this system in place, when we work on our "sprint planning", we have a clear and up-to-date view of all the requests, that if addressed will improve the overall experience for our users. Of course, this had to be balanced with our roadmap, and the ideas we want to bring to life as well.
Lack of integrations leads to broken systems
For a few months, we worked without any integration between Intercom and Notion. We manually created each request in notion. The problem with this was that we ended up not closing Intercom conversations until they were documented in Notion, which lead to conversations not being dealt with the right way and time wasted reviewing each conversation at the moment we logged them in notion.
In this context, creating an integration helped a lot, it was very simple to set up and streamline the system avoiding any friction in the way we used it.
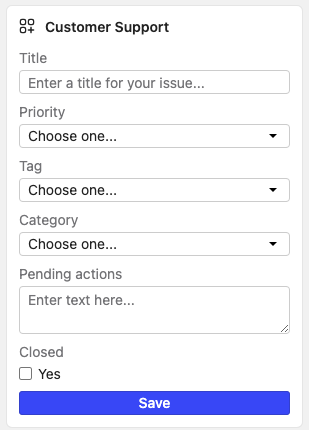
I'll share below how this integration was built!
Intercom to Notion bridge
We built one very simple Node application with 2 endpoints. The first one (/initialize) is used by Intercom to define how the built-in app should work. The second one (/submit) is used to handle to map ou newly built Intercom app to a Notion database, using their API.
I won't cover how to get started with Node in this article, but one quick way to test all of this without having to build your own server/endpoint is to use a service like https://glitch.com.
Create your Notion API access
Head to https://developers.notion.com, login, and create a new integration. Copy your secret key, this will be used in our node app to connect to the API. The integration will now show up as a user you can share access to.
Create your Notion Database
To create your notion database, simply create a new page of type "Table". Once created, you'll need to get its ID. Open the page and use the Share menu to Copy the link. Now paste the link in your text editor so you can take a closer look. You'll get an URL like https://www.notion.so/workspace_name/PAGE_ID?v=some_version_id, where the PAGE_ID is what will help us identify the database.
→ This is well described in Notion Documentation
You'll now need to give access to your API user. Go to the sharing settings of your page and select the integration user from the list (the one created in the previous step).
That's it you now have everything you need to use Notion API in our Node script. Create a .env file, which will contain our NOTION_KEY and the NOTION_DATABASE_ID.
NOTION_KEY=secret_ABCD
NOTION_DATABASE_ID=PAGE_ID
Create the Intercom App
Ok so the notion part is ready, we now need to follow the steps defined on this page. Two endpoints have to be accessible and defined in your Intercom Application configuration (note that a DNS is required as Intercom doesn't accept IP addresses).
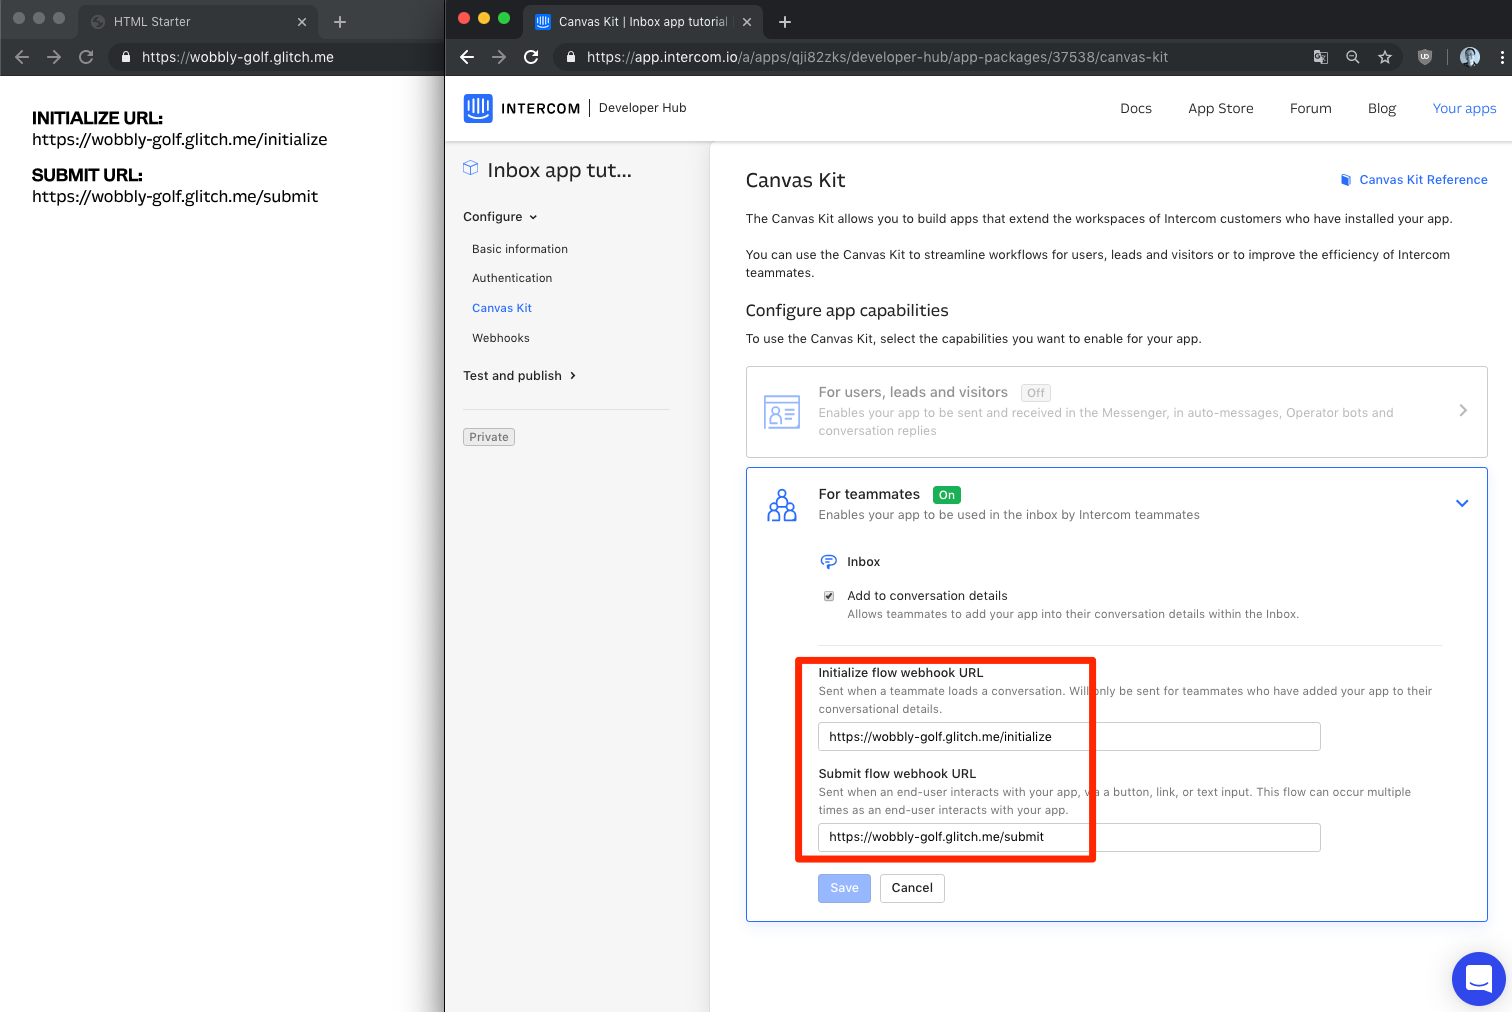
Initialize endpoint (/initialize)
Will define the application structure (form, labels, buttons ...) using Intercom Canvas Kit. You can create your form based on our GIST, it's really simple to customize.
Make sure your code is deployedn, Intercom will query that endpoint everytime a conversation is loaded.
app.post("/initialize", (request, response) => {
	const body = request.body;
	response.send(canvas);
});
→ check the repository
Submit endpoint (/submit)
Intercom will post data to that endpoint, once you click on your form "submit" button. You'll have to manipulate Intercom data stucture which includes your form data together with data about the conversation the form is sent from.
exports.addItem = async function (item) {
try {
	const object = buildObject(item);
	const response = await notion.pages.create(object)
} catch (error) {
	console.error(error)
}
→ check the repository
Add the application to the Intercom interface
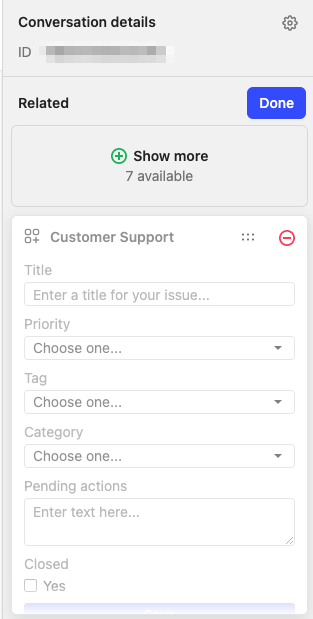
That's it! You now have an Intercom Application interacting with your Notion Customer Support Database!
Let us know if you want us to write more about the internal tools and systems we use in SimpleBackups!