How to Back Up Your DigitalOcean Managed PostgreSQL Database


In this post, we’ll look at a simpler solution for backing up your DigitalOcean PostgreSQL backups.
Creating Your Backups on the DigitalOcean Platform
Let’s first look at how you’ll create your database backups on the DigitalOcean platform. Luckily, you don’t have to do much; free, automatic backups are included in the managed backup solution. So, to create your backup, you simply need to create a database.
Creating Your Database
Here are the steps you’ll follow to create a new PostgreSQL managed database:
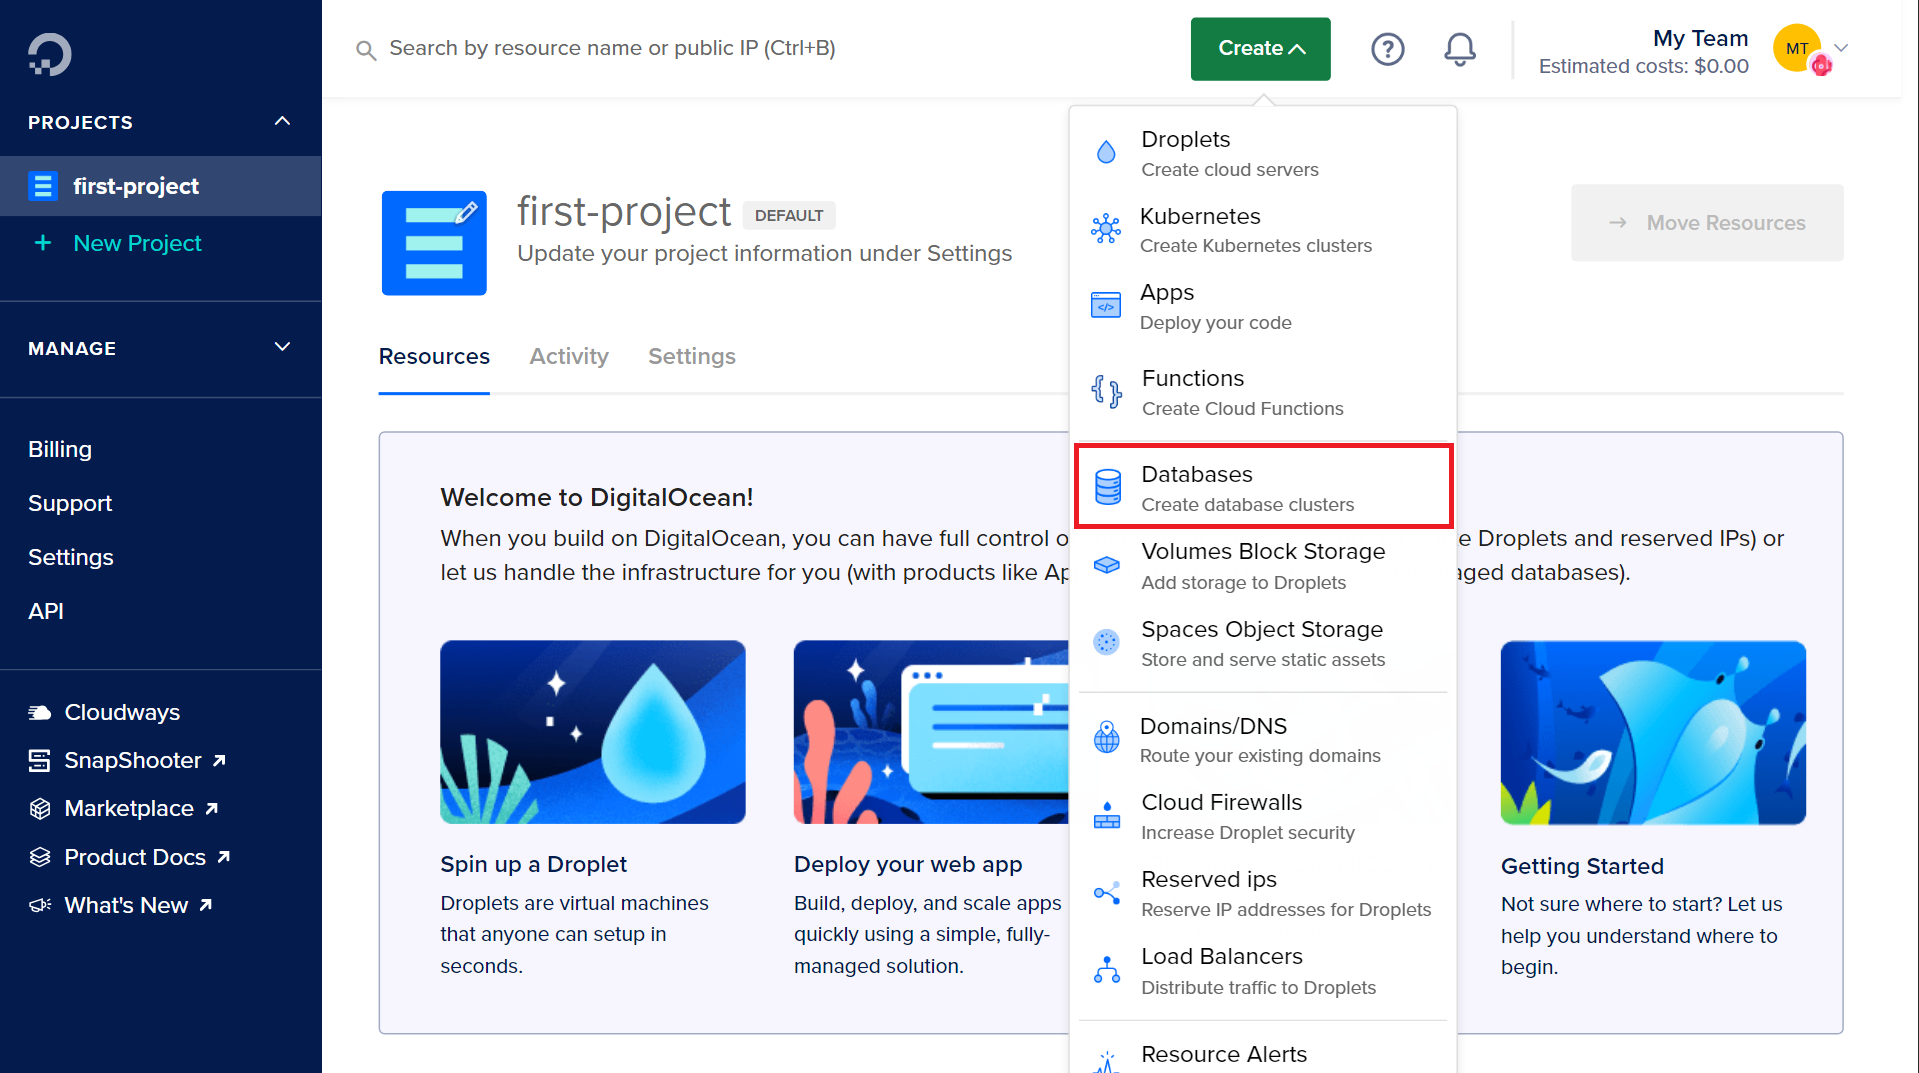
- Click on Create on your DigitalOcean Control Panel and select Databases in the drop-down menu.
- On the Create a Database page, you can choose your database’s configuration.
- Select the data center for your database cluster in the Choose a data center section.

- Choose PostgreSQL in the Choose a database engine section.
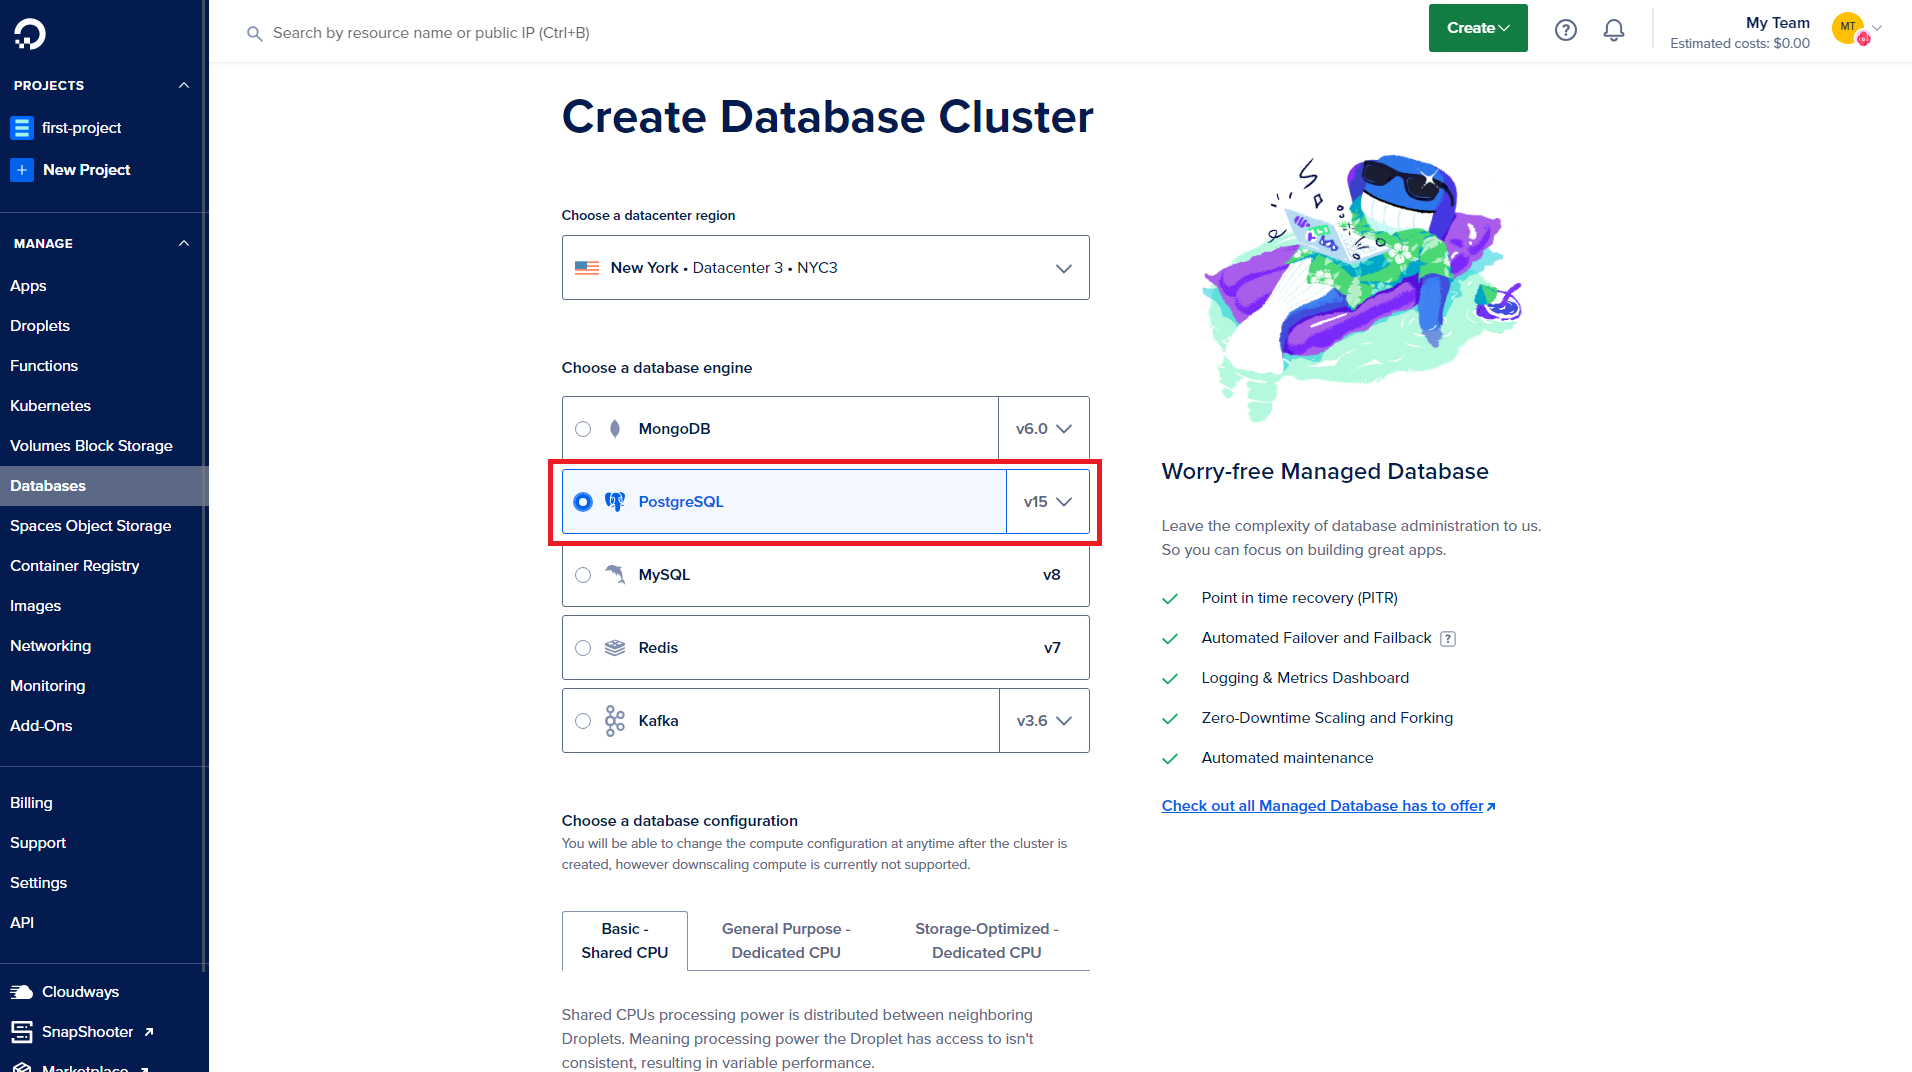
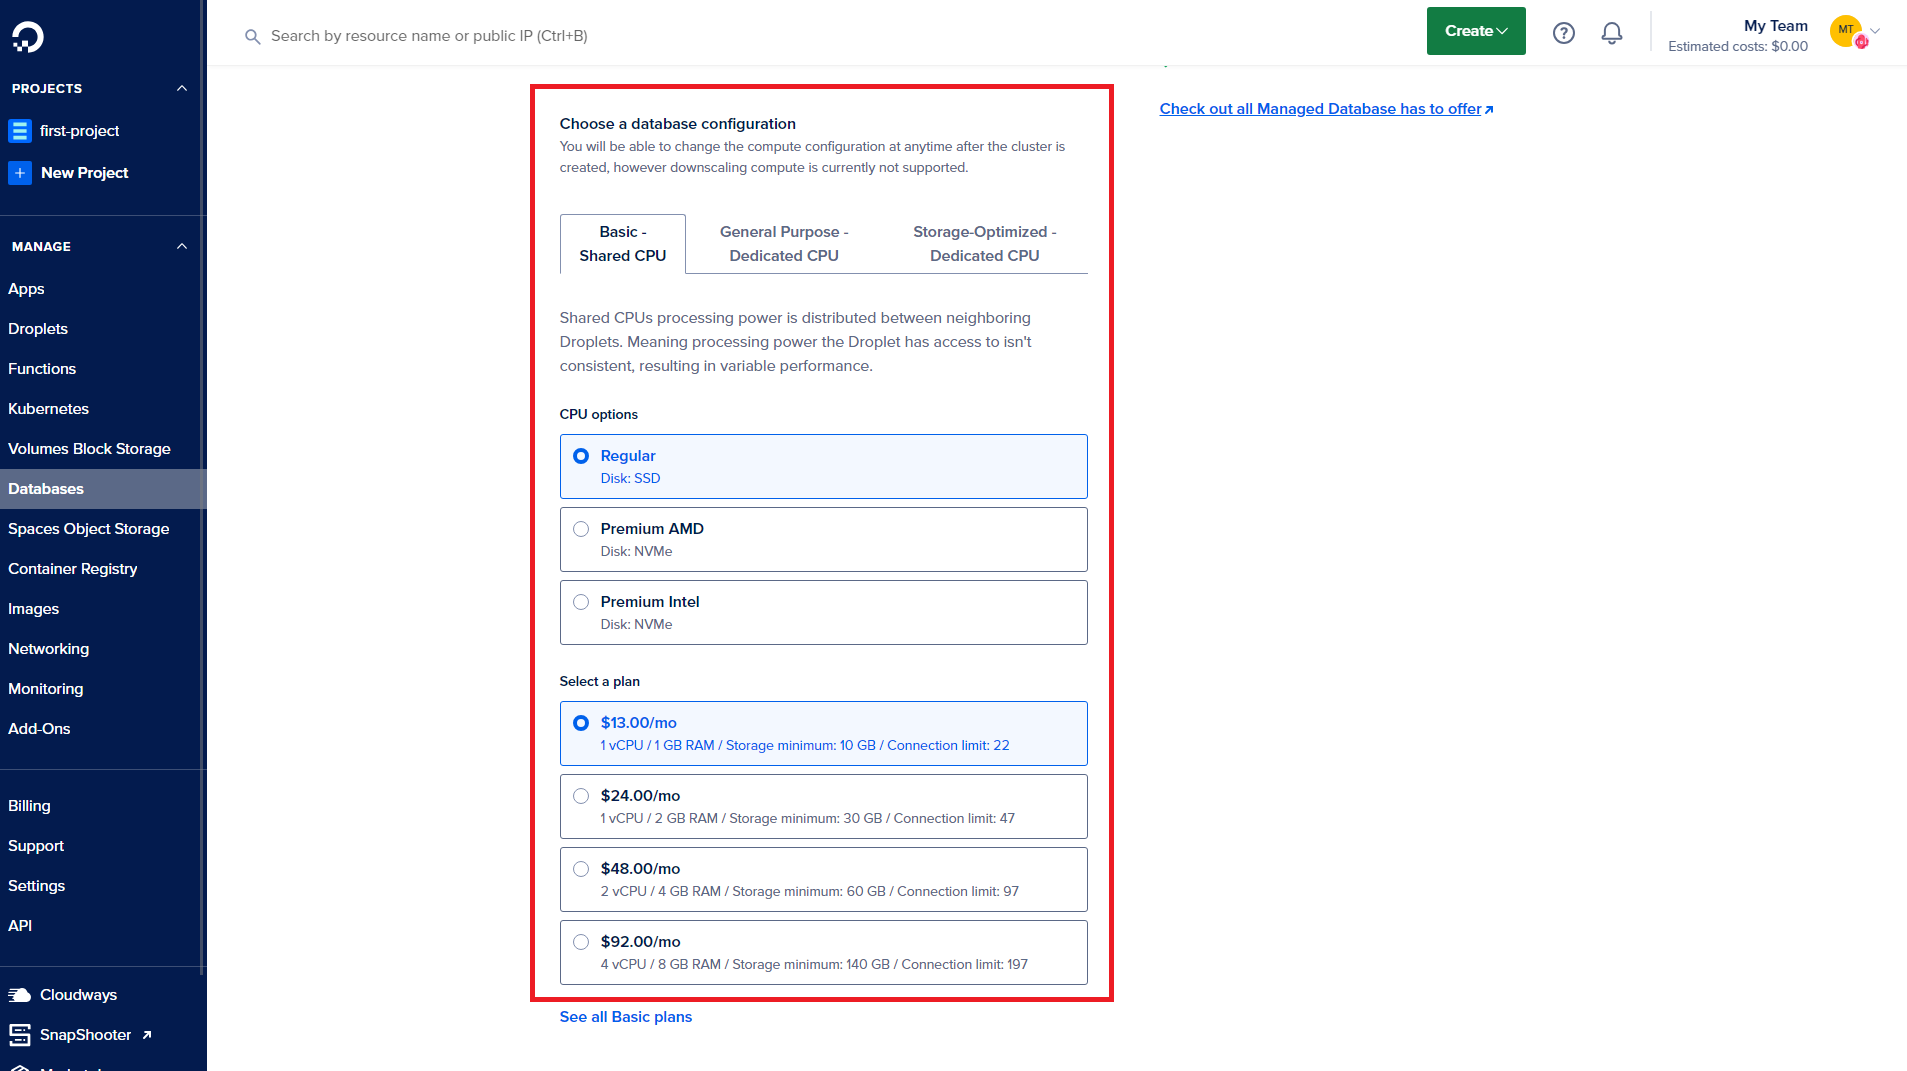
- Finally, choose the machine type, the number, and the size of the database nodes in the Choose a database configuration section.
- Once you’ve configured the database the way you’d like, you can choose a name for your database, the project you’d like to add it to, and add any tags in the Finalize and Create section.
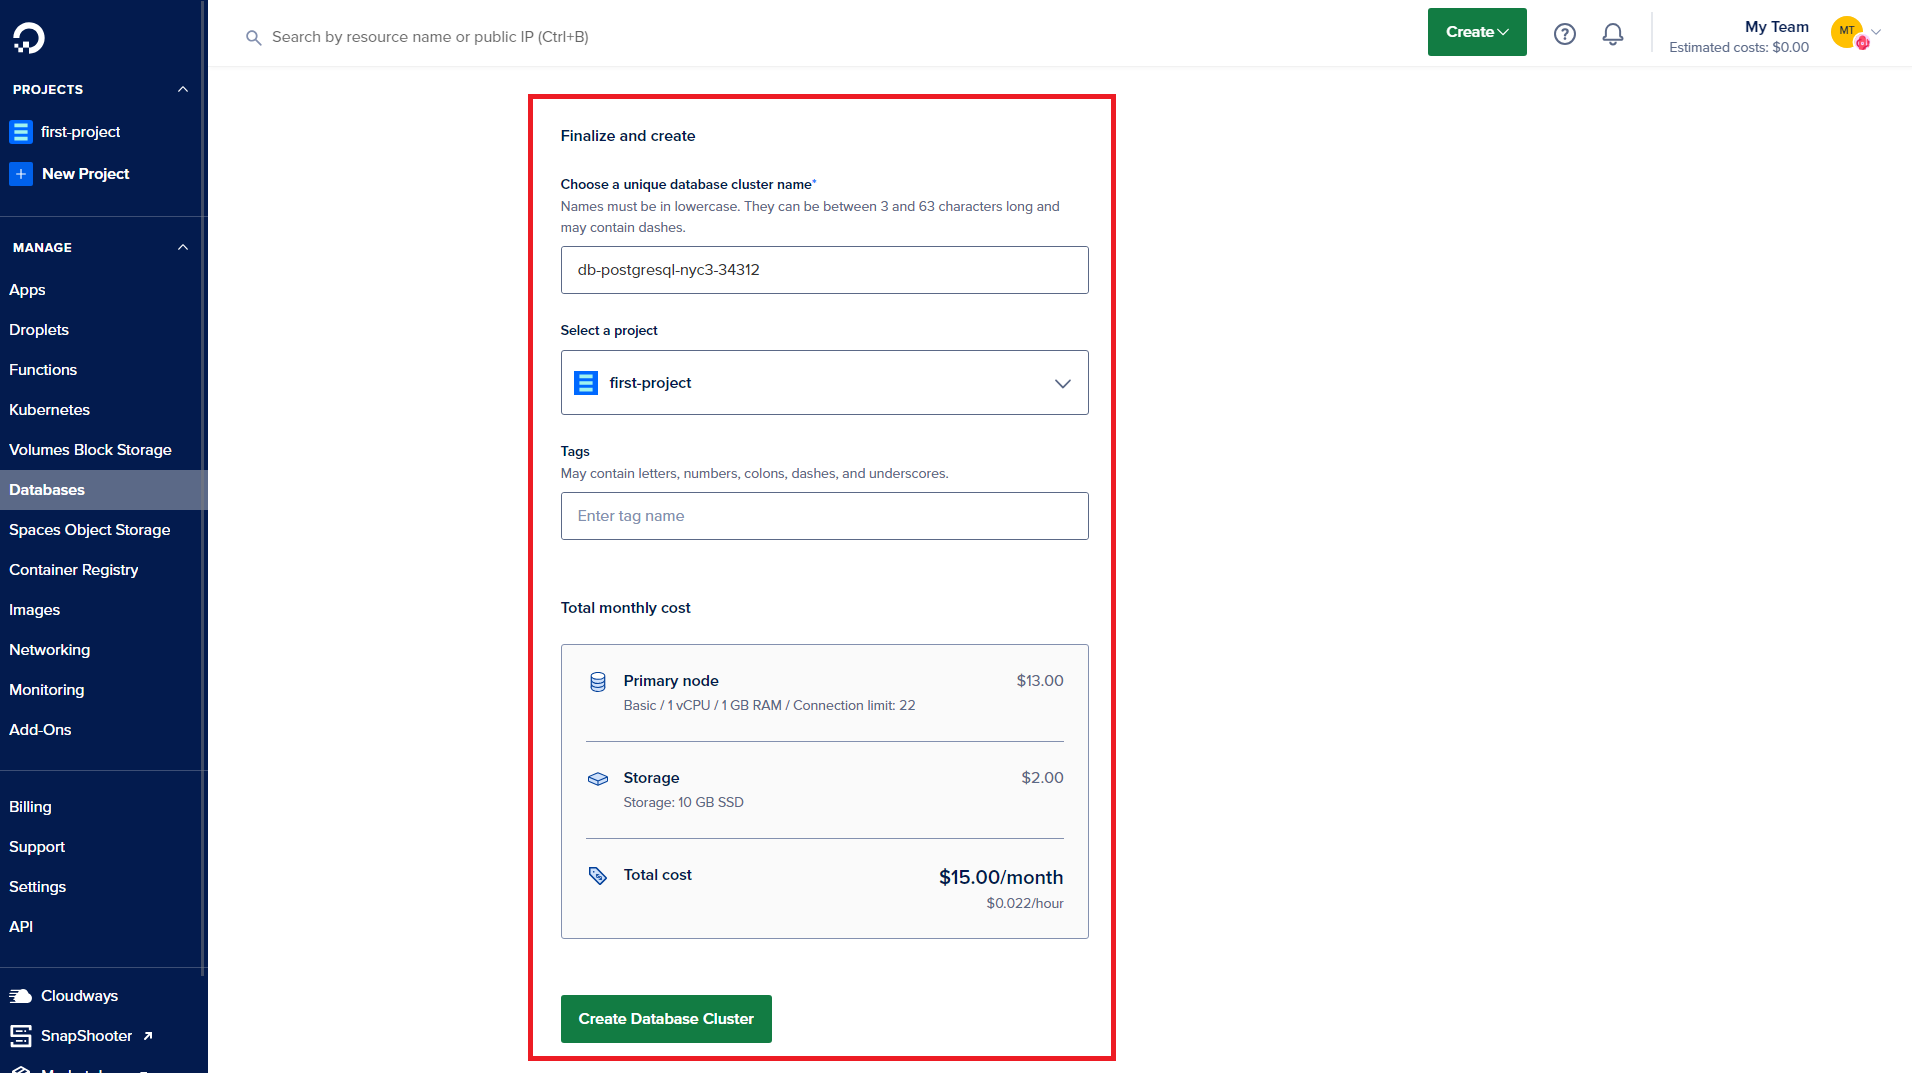
- To create your database, click the Create Database Cluster button.
Restoring Your Backup
DigitalOcean’s Managed Databases automatically handle data recovery due to hardware and software failures. It does this by replacing degraded nodes with new ones that resume where the previous ones failed. However, you can also manually restore PostgreSQL database backups.
To do this, you’ll:
- Click on the name of the PostgreSQL database you’d like to restore from the Databases page.
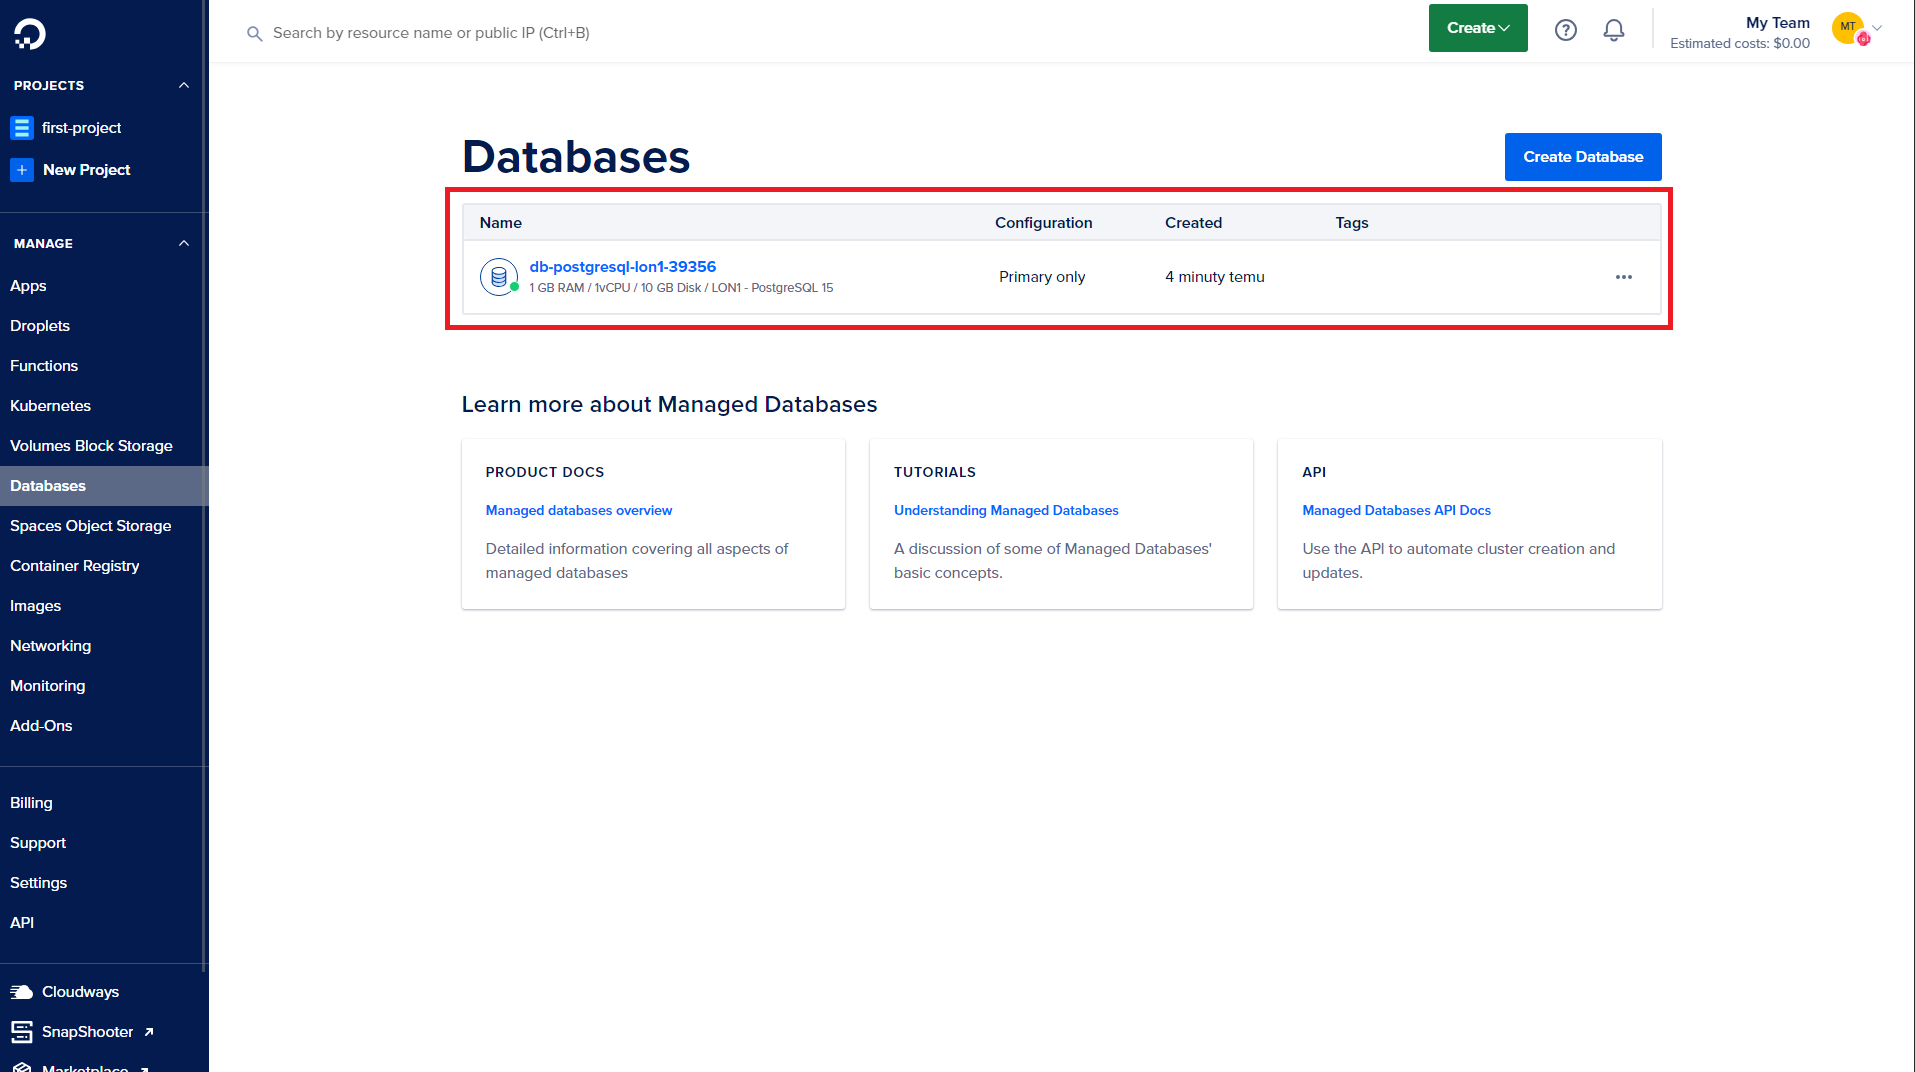
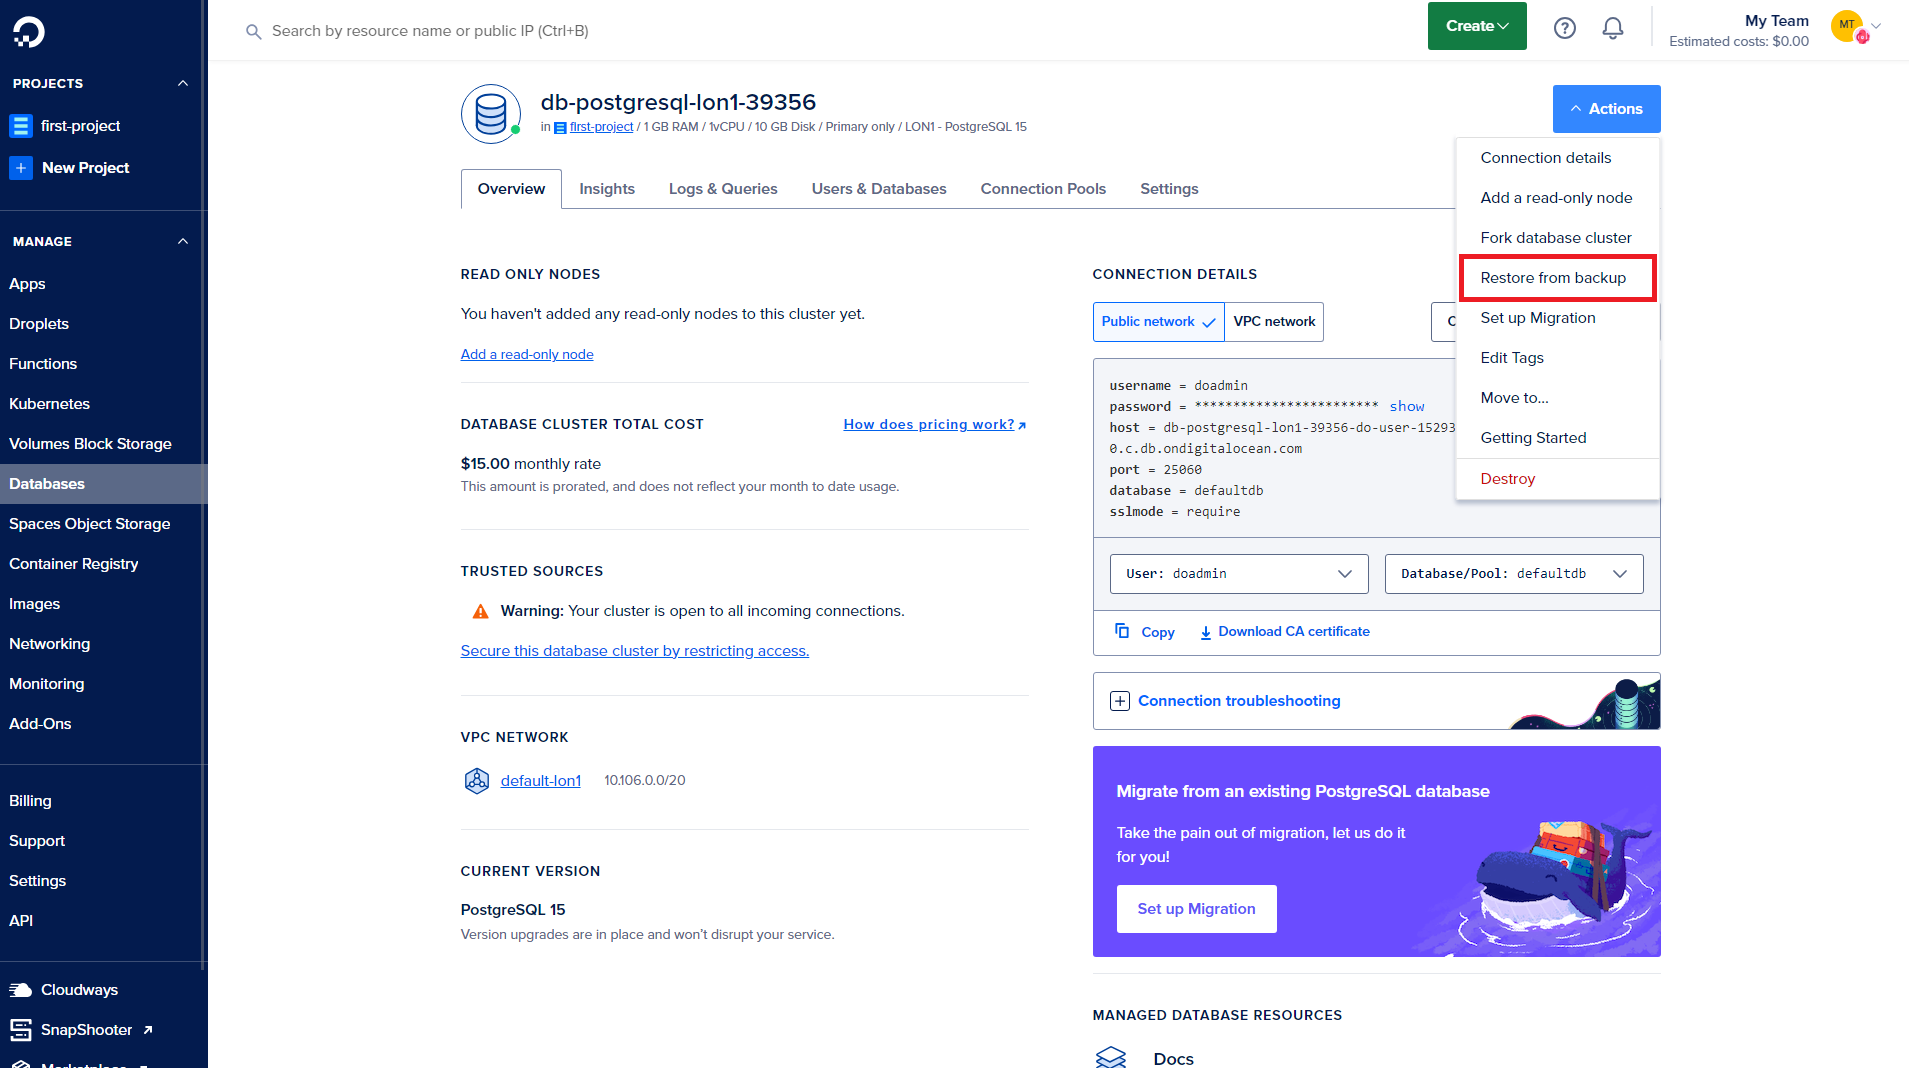
- On the database’s Overview page, click the Actions button and then choose Restore from backup from the drop-down menu.
- A Create a new cluster from a backup window will open. Here, you can choose if you’d like to restore to the latest backup or to a specific moment in time. You’ll also choose a name for the new database.
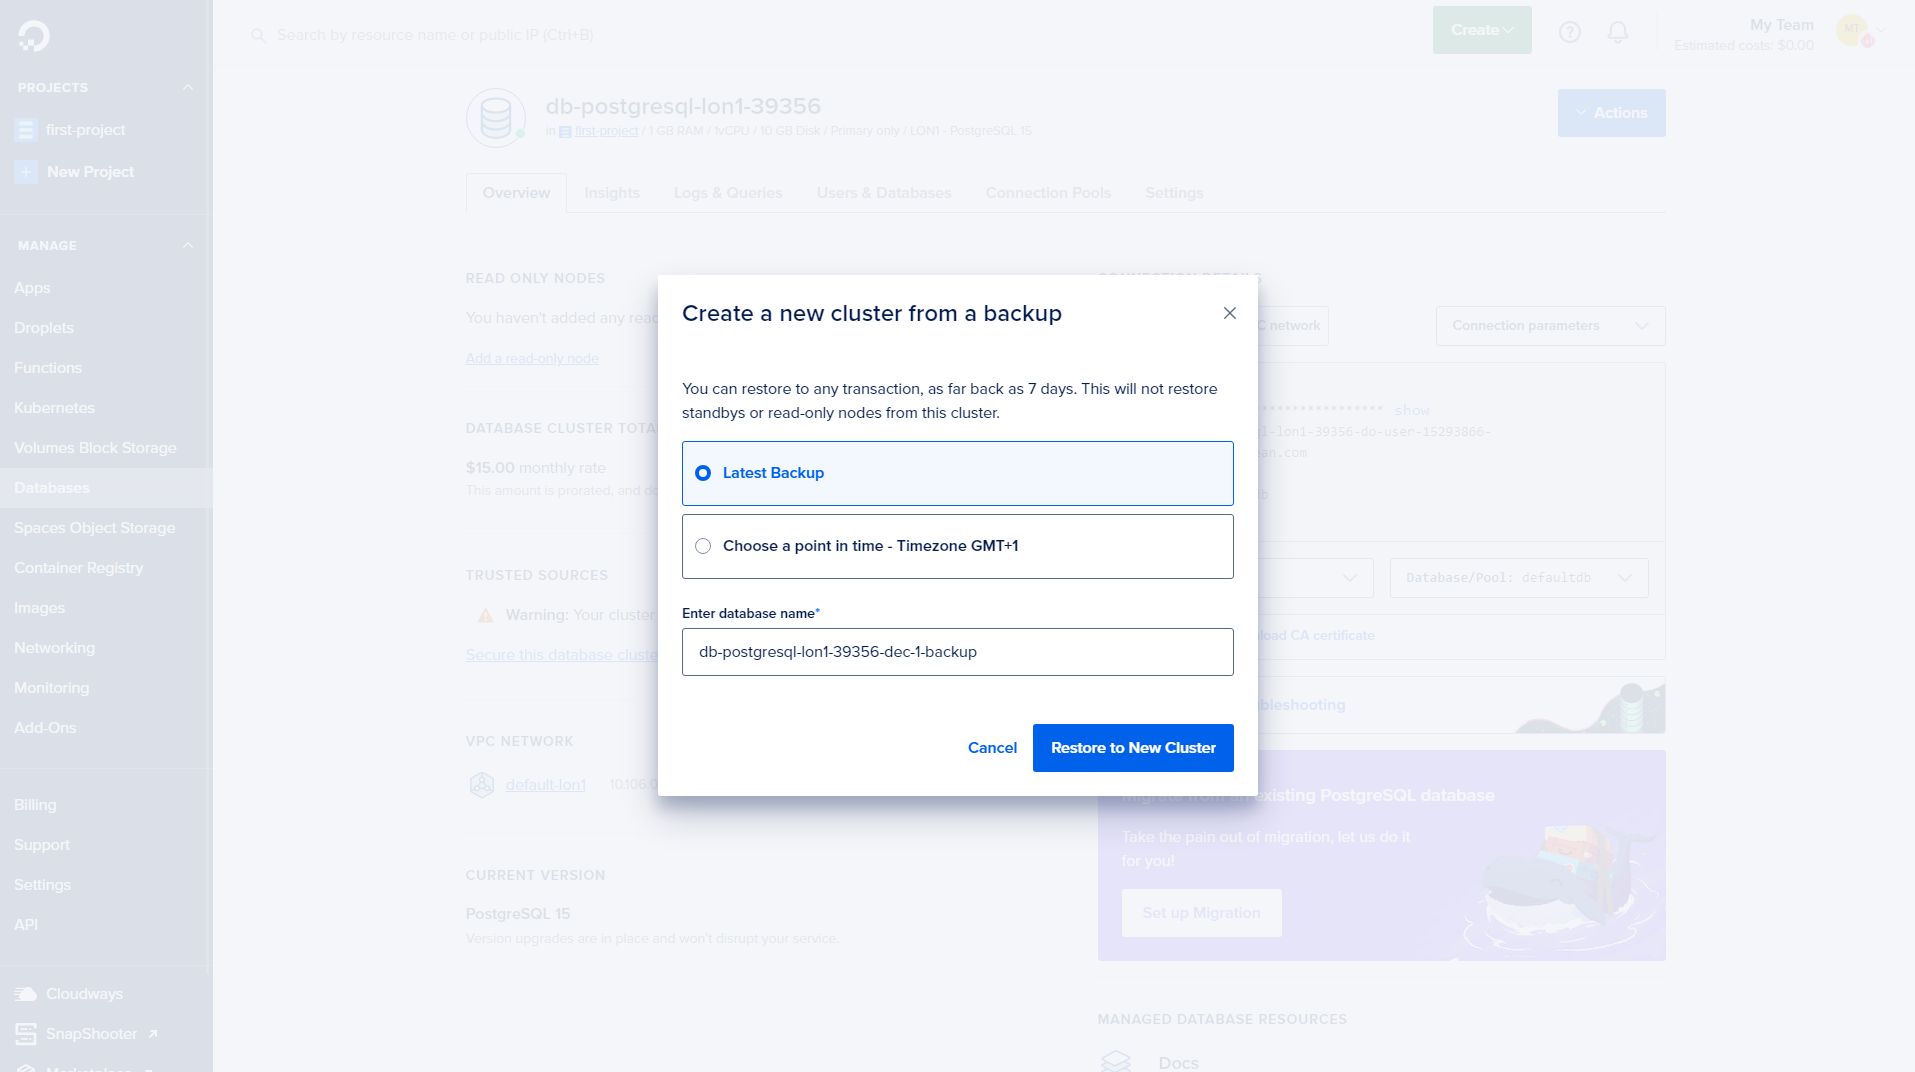
- Once you’ve chosen the options above, click Restore to New Cluster.
Simplify Your DigitalOcean Managed Database Backups With SimpleBackups
DigitalOcean’s Managed Database solution eliminates some of the headaches in managing your database backups, but you should be aware of the cons.
For instance, your backups will be stored on DigitalOcean’s servers. What happens when there’s a complete outage?
DigitalOcean only stores your backups for 7 days. If you’d like to restore backups older than this, this could become an issue.
Fortunately, SimpleBackups offers a solution to these challenges. It allows you to:
- Manage all your backups in one place
- Use the storage solution you prefer
- Choose longer retention periods
Let’s look at how you would set up your backups on SimpleBackups!
Setting Up Your Backup
To set up your database backup, log into your SimpleBackups account.
On your dashboard, you’ll click on PostgreSQL Backup or Database backup.
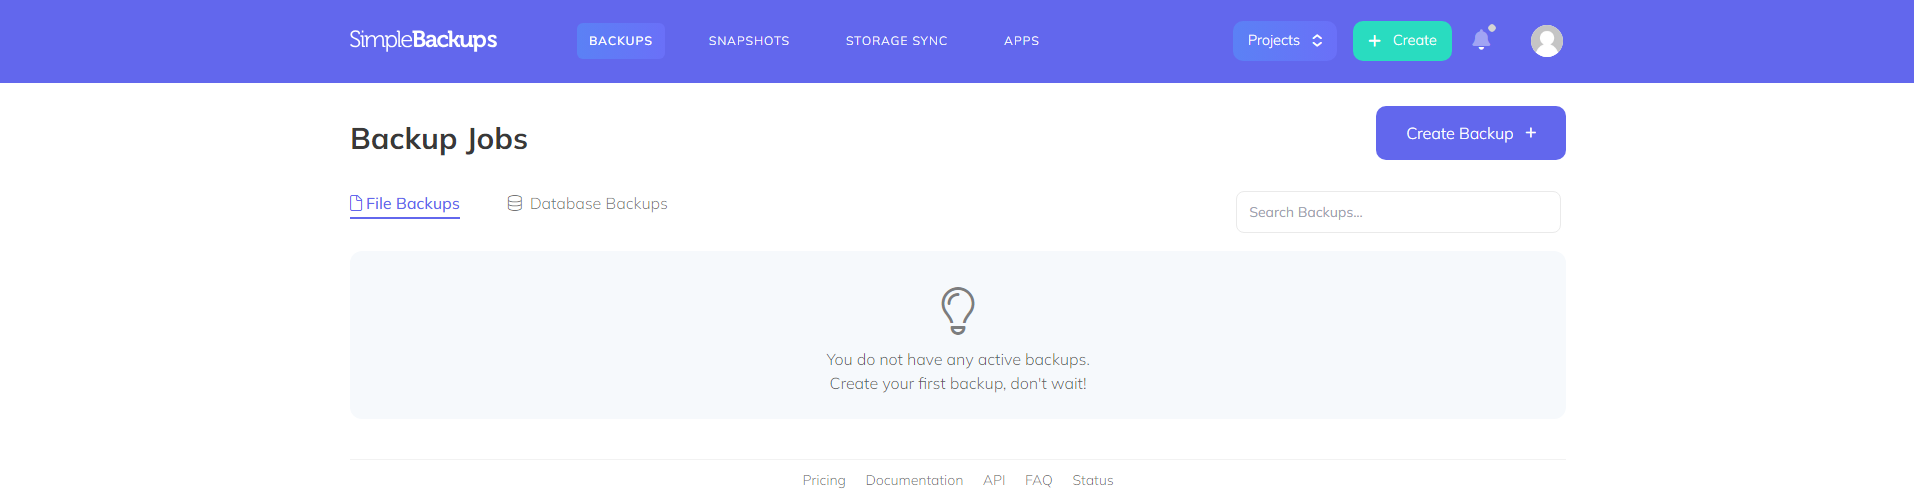
You can also click on Backups in the main menu at the top of the page. This will take you to the page which lists all your backups. Here, click on Create Backup.
No matter what option you use, you’ll be taken to the Create Backup page, where you can configure your backup.
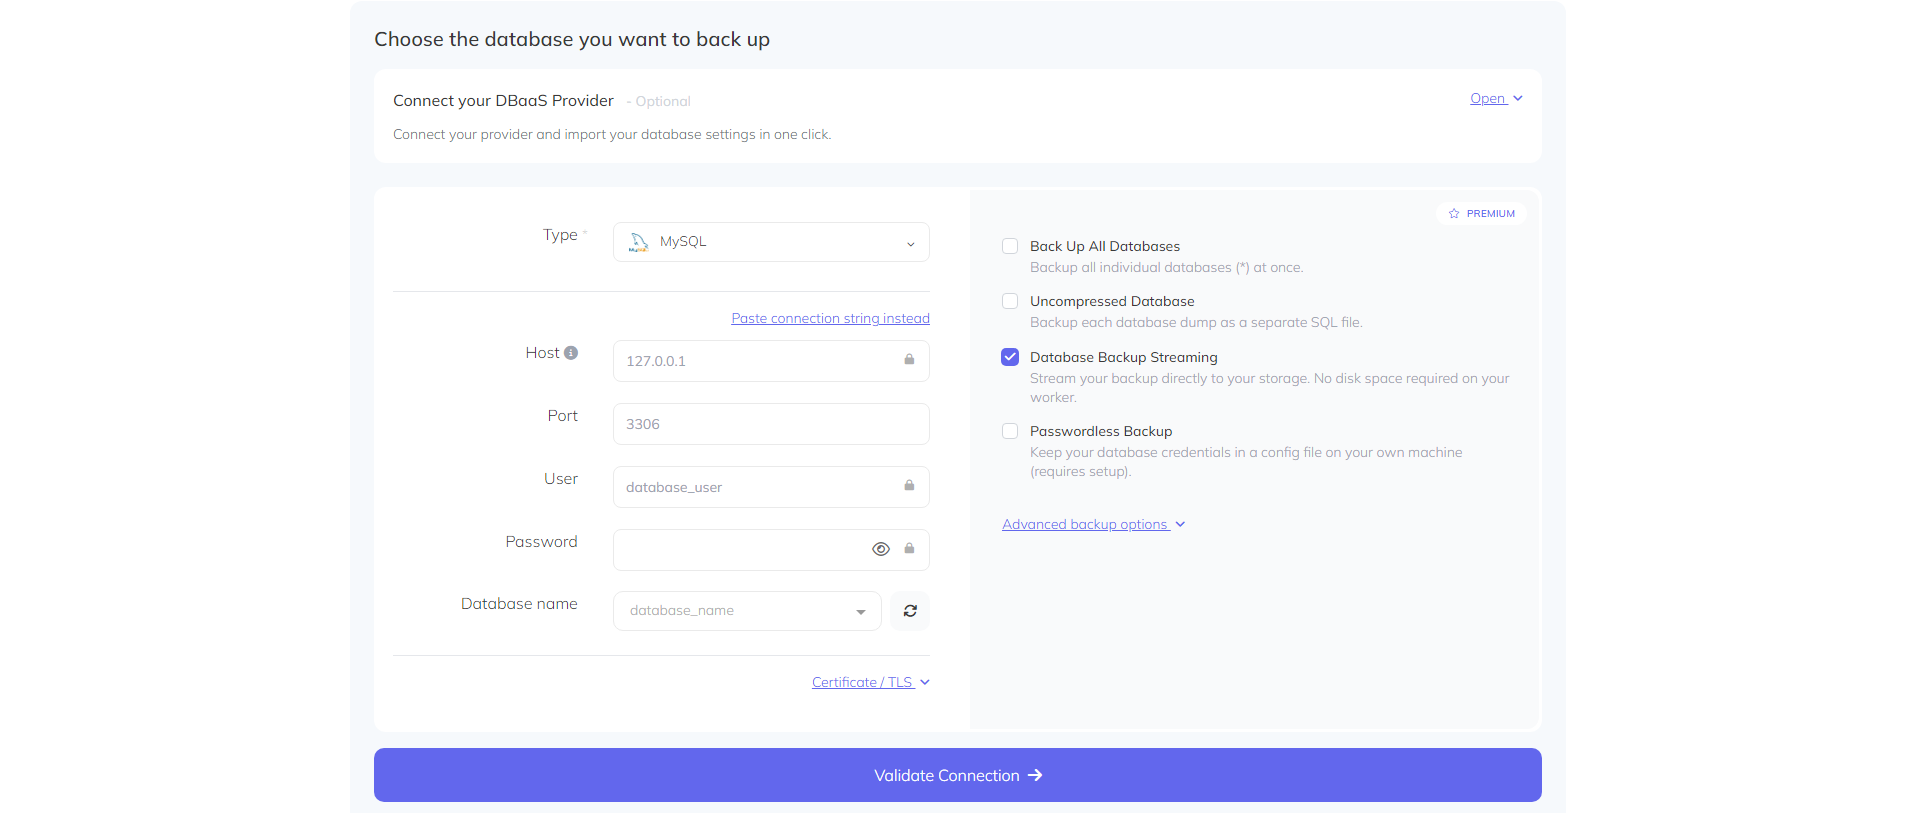
To start, select Databases under ‘What do you want to create a backup for?’

Server Options
Next, you’ll choose the server you want to use to run the backup. You have two options – Serverless or Own Server.
In this example, we’ll use Own Server, which allows you to run the backup on your own infrastructure.
SimpleBackups also allows you to store the backups locally, off-site, or on mounted volumes.

When choosing this option, you’ll also need to choose a server from the drop-down list. If no servers are available, you’ll need to connect one first.
Choosing Your Database
You’ll now choose the database you’d like to back up. Because it’s a DigitalOcean Managed Database, you’ll need to activate the Import managed database (DbaaS) option.
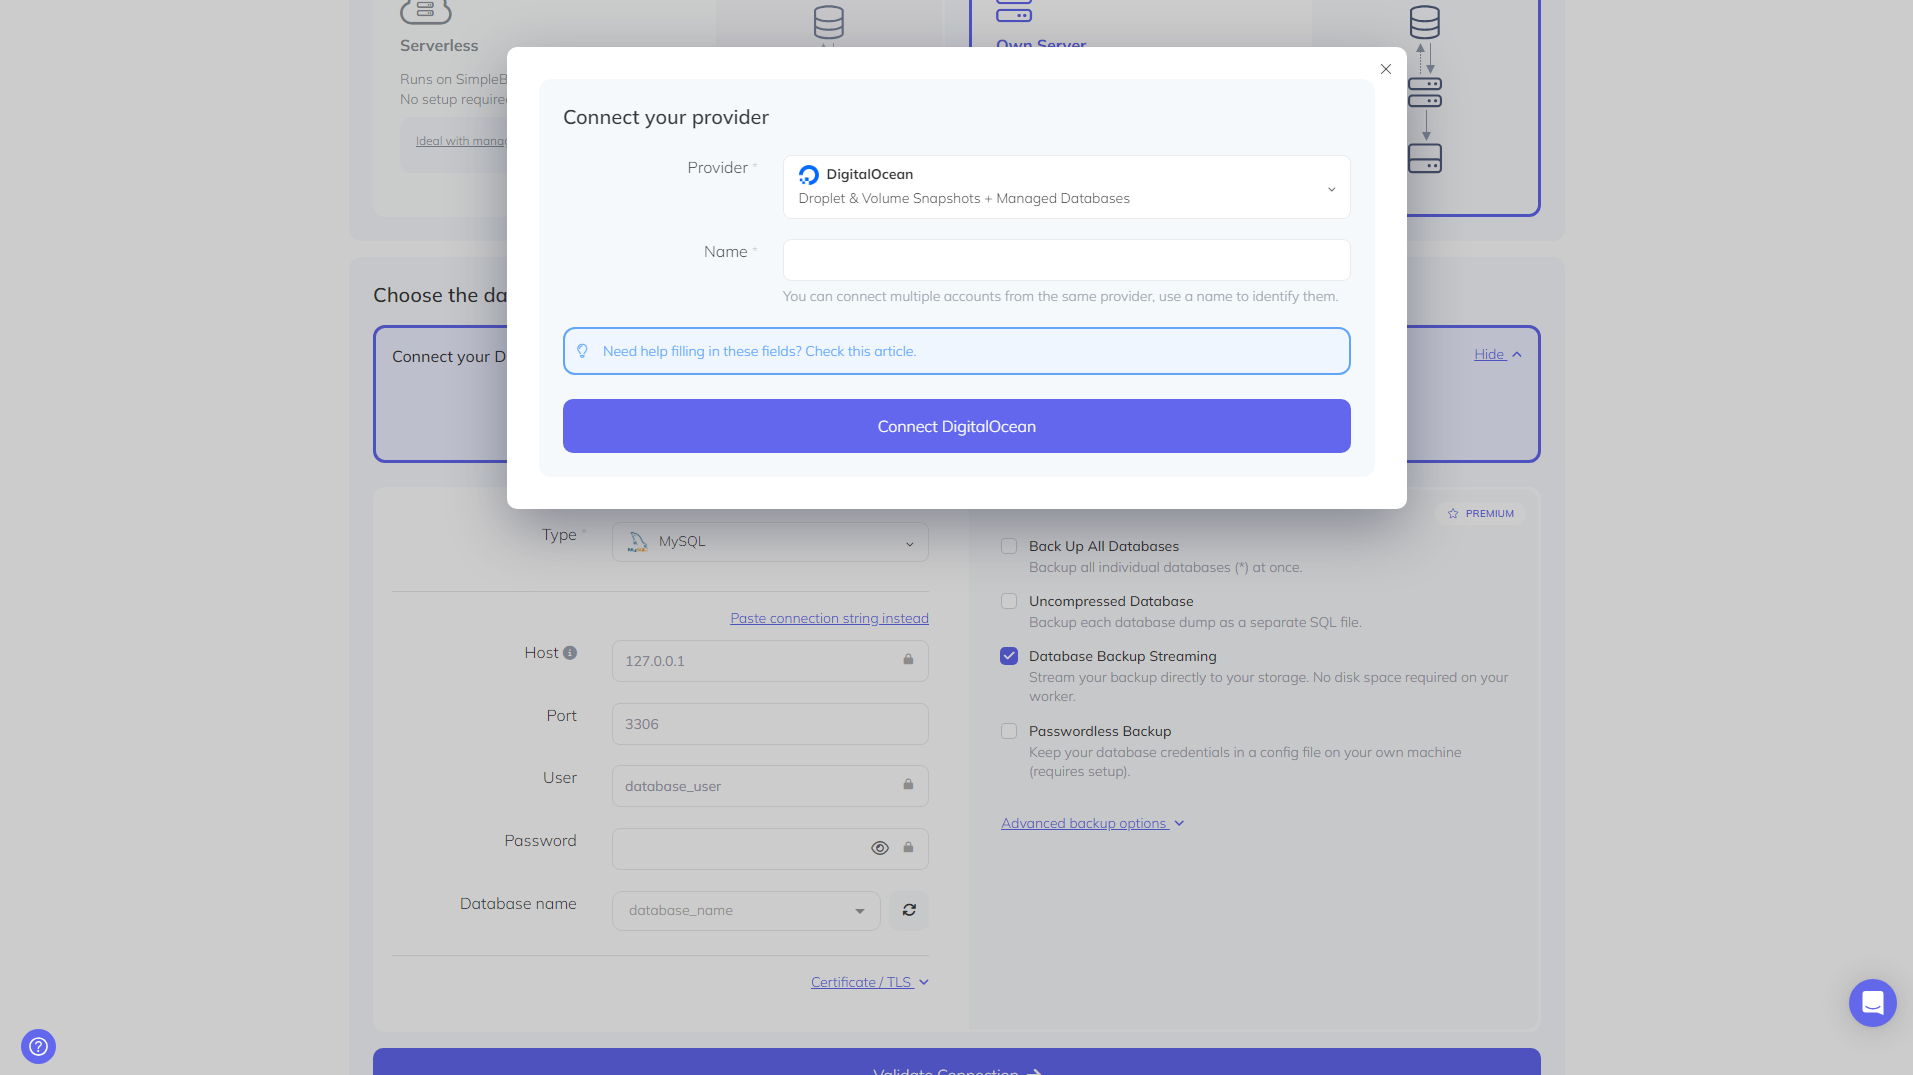
Before you can choose your database, you’ll first need to connect SimpleBackups to your DigitalOcean account. To do this, click on Connect Provider.

In the popup window that opens, choose DigitalOcean as your provider, give the account a name, and then click Connect DigitalOcean. Then, follow the prompts to connect your account.
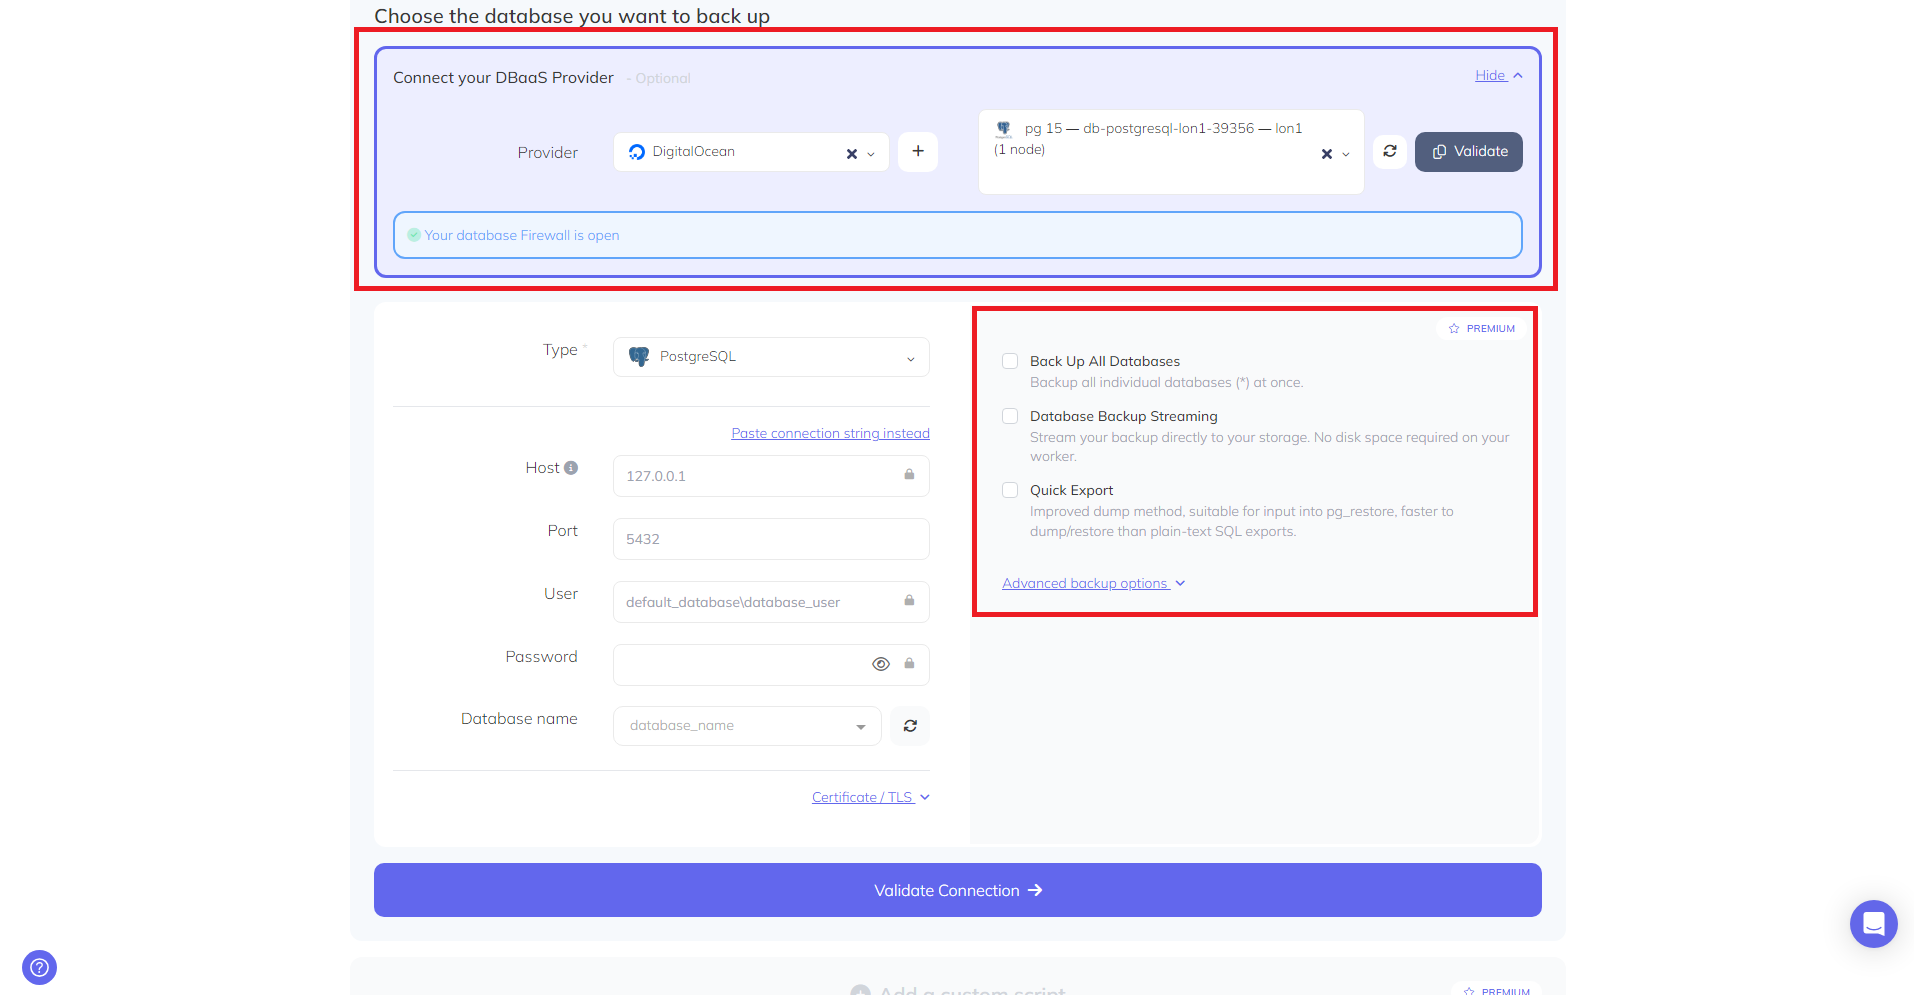
Once your accounts are connected, you can choose your database without entering any further information. Also, choose the type of backup you’d like by checking the appropriate boxes.
Scheduling and Retention
Once you’ve configured your backup, you’ll finalize the backup by providing a name. Apart from this, also:
- Decide on a schedule. You can decide how often your backups will run based on your needs and requirements. Choose between Daily, Weekly, Monthly, Custom, or On Demand.
- Configure the retention period. You’ll also decide how many backups you’d like to keep. Older versions will then be deleted once you reach this number. So, if you run your backups on a weekly schedule and you choose to keep 15 backups, you’ll store backups for 15 weeks.
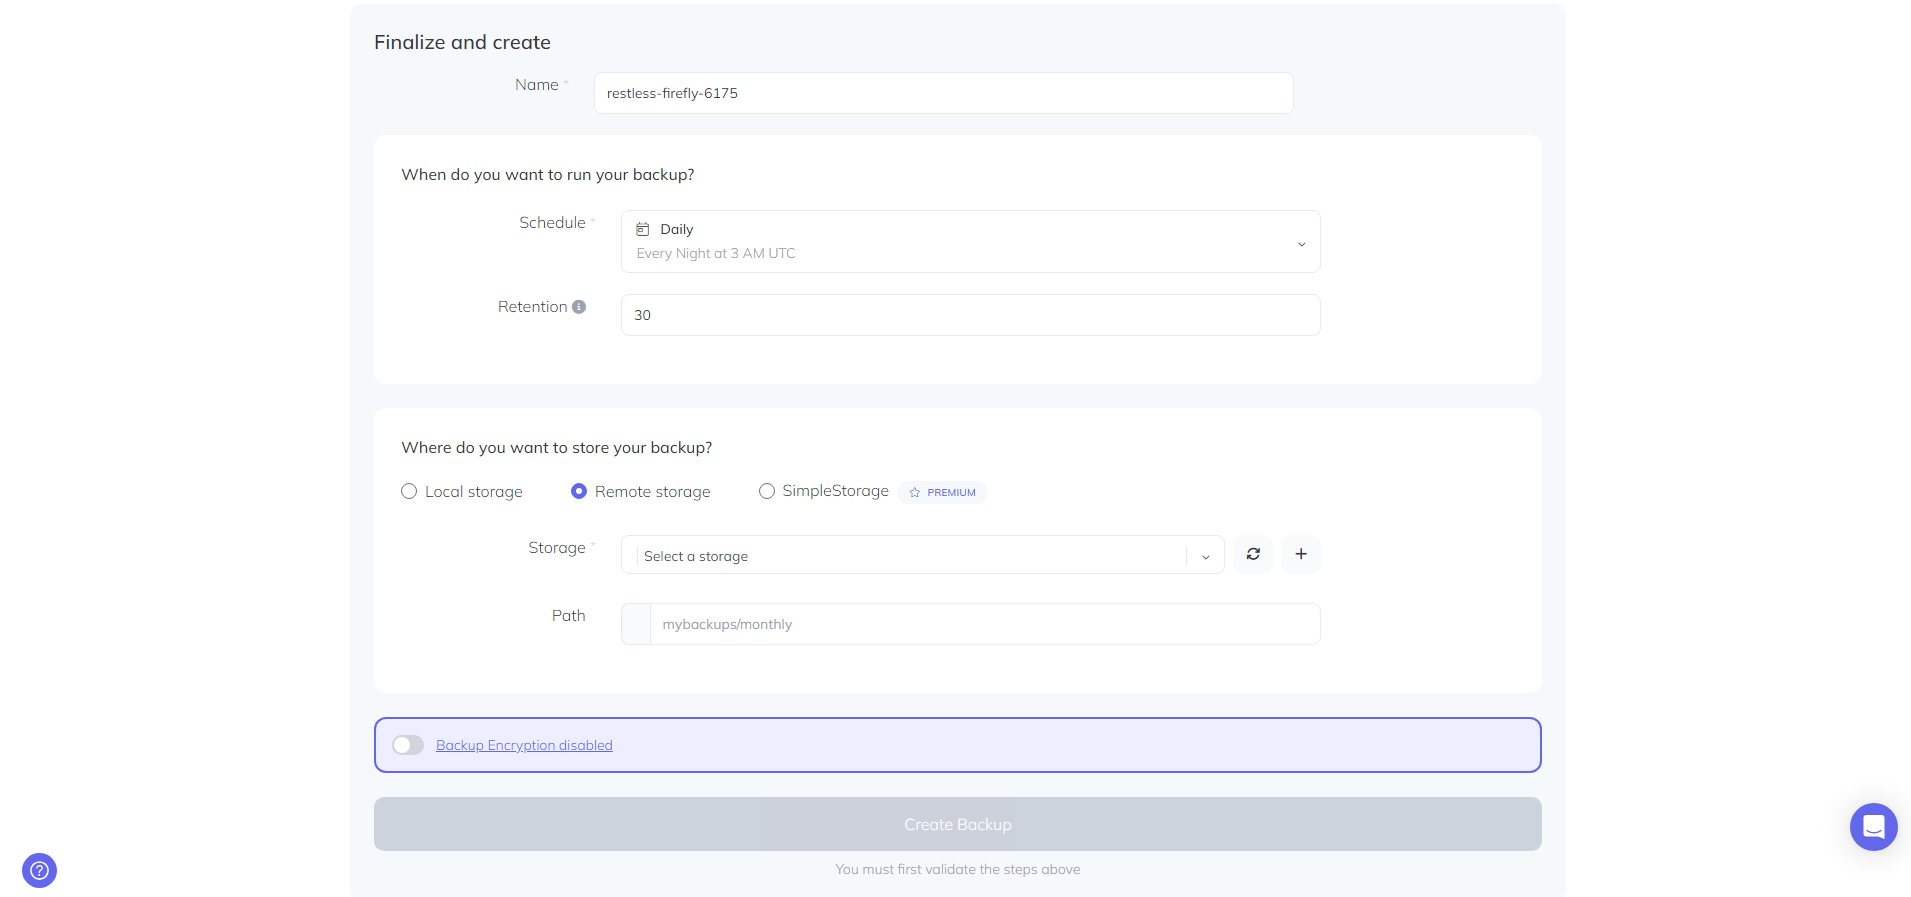
Storage Options
Finally, you can choose the storage option you’d like to use for your backups. Here, you have numerous options, from local storage to remote storage like Google Drive, Dropbox, Amazon S3, and others.
You can also opt for SimpleStorage, SimpleBackups’ own managed storage solution for your backups.
If you choose:
- Local storage, provide the path to where you’d like your backups to be saved.
- Remote storage, choose the provider from the drop-down list. To add additional providers, use the Connect storage option.
- SimpleStorage, you’ll need to enable SimpleStorage first.
Finally, click on Create Backup to create your backup.
Should you need to restore your backup for any reason, simply choose it from your list of backups to go to the backup’s Overview page. Click on Logs, find the version you’d like to restore, and click on the ‘i’ next to the entry. On the dialog box that opens, find the command you can run to restore your backup.
The Bottom Line
Isn’t it time you protected your databases with regular, consistent backups? If it is, then SimpleBackups is worth a look. It helps you manage your backups, no matter what the platform, all in one place. As a bonus, you can get started for free. So, create your first PostgreSQL backup today!
Back to blog
Stop worrying about your backups.
Focus on building amazing things!
Free 7-day trial. No credit card required.
Have a question? Need help getting started?
Get in touch via chat or at [email protected]


