

Automate PostgreSQL database backup directly to your Wasabi storage.
Wasabi provides S3-compatible object storage, which means the bucket, access key and region you create below drop straight into the same fields SimpleBackups uses for AWS S3. Check Wasabi's own pricing page for current rates and egress terms before you commit a destination to it.
Prerequisites
-
Create a SimpleBackups account
-
Make sure you have your server connected to your account (the one on which your PostgreSQL database is hosted)
-
Have a Wasabi account (we'll cover how to create your Wasabi Bucket below)
1. Create your Wasabi Bucket
-
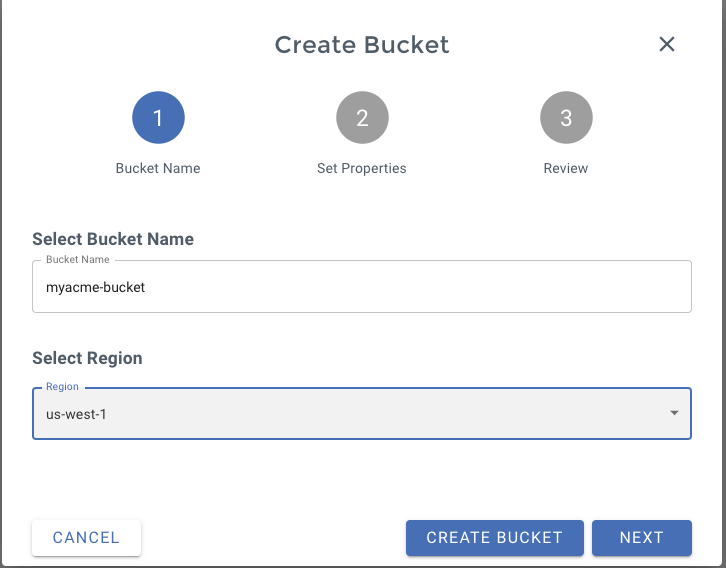
Go to the Wasabi file manager and click on "Create Bucket"
-
On step 1 of the form, define the name of your bucket (we like to use our company name here)
-
Pick the region you need (think about GDPR rules, if you're an EU company)
You can keep default options on step 2 and finally confirm your Bucket creation on step 3.
And that's one good thing done, your Wasabi bucket is created!
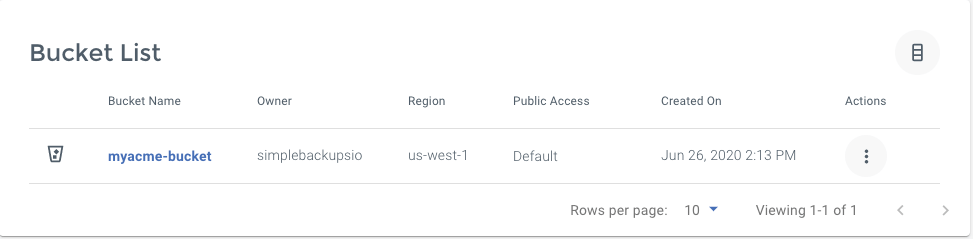
Don't leave the Wasabi interface, we'll now have to create your credentials.
Information you'll need in step 3:
- Your "Bucket" name, in this case "myacme-bucket"
- Your "Bucket" Region, in this case "us-west-1"
2. Create your Wasabi Credentials/Access Key
In order to grant access to your bucket, we'll need to create an Access Key.
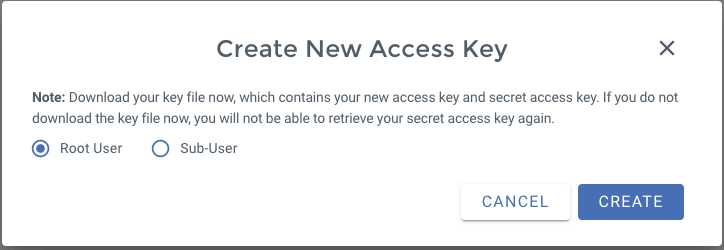
- Go to the Wasabi access keys page and click on "Create New Access Key"
- You can go with the default options and pick a "Root User"
That's it you Access Key and Secret Key will be generated, make sure to write them down.
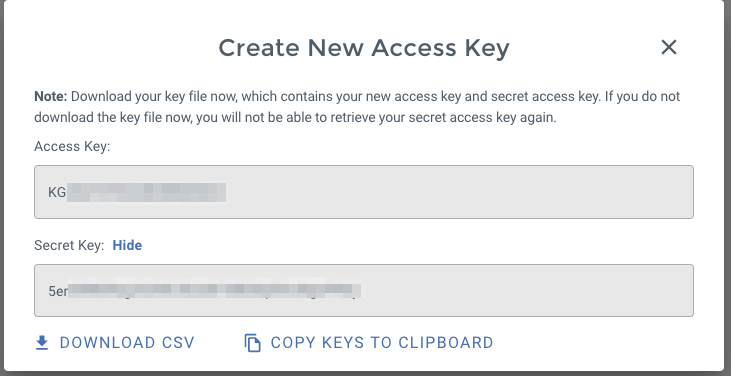
Information you'll need in step 3:
-
Access Key
-
Secret Key
3. Connect your Wasabi bucket to SimpleBackups
- Log into SimpleBackups and head to the connect your storage page
- Pick "Wasabi" as storage provider and fill in the "Connect your storage" form with the information from step 1 and 2.
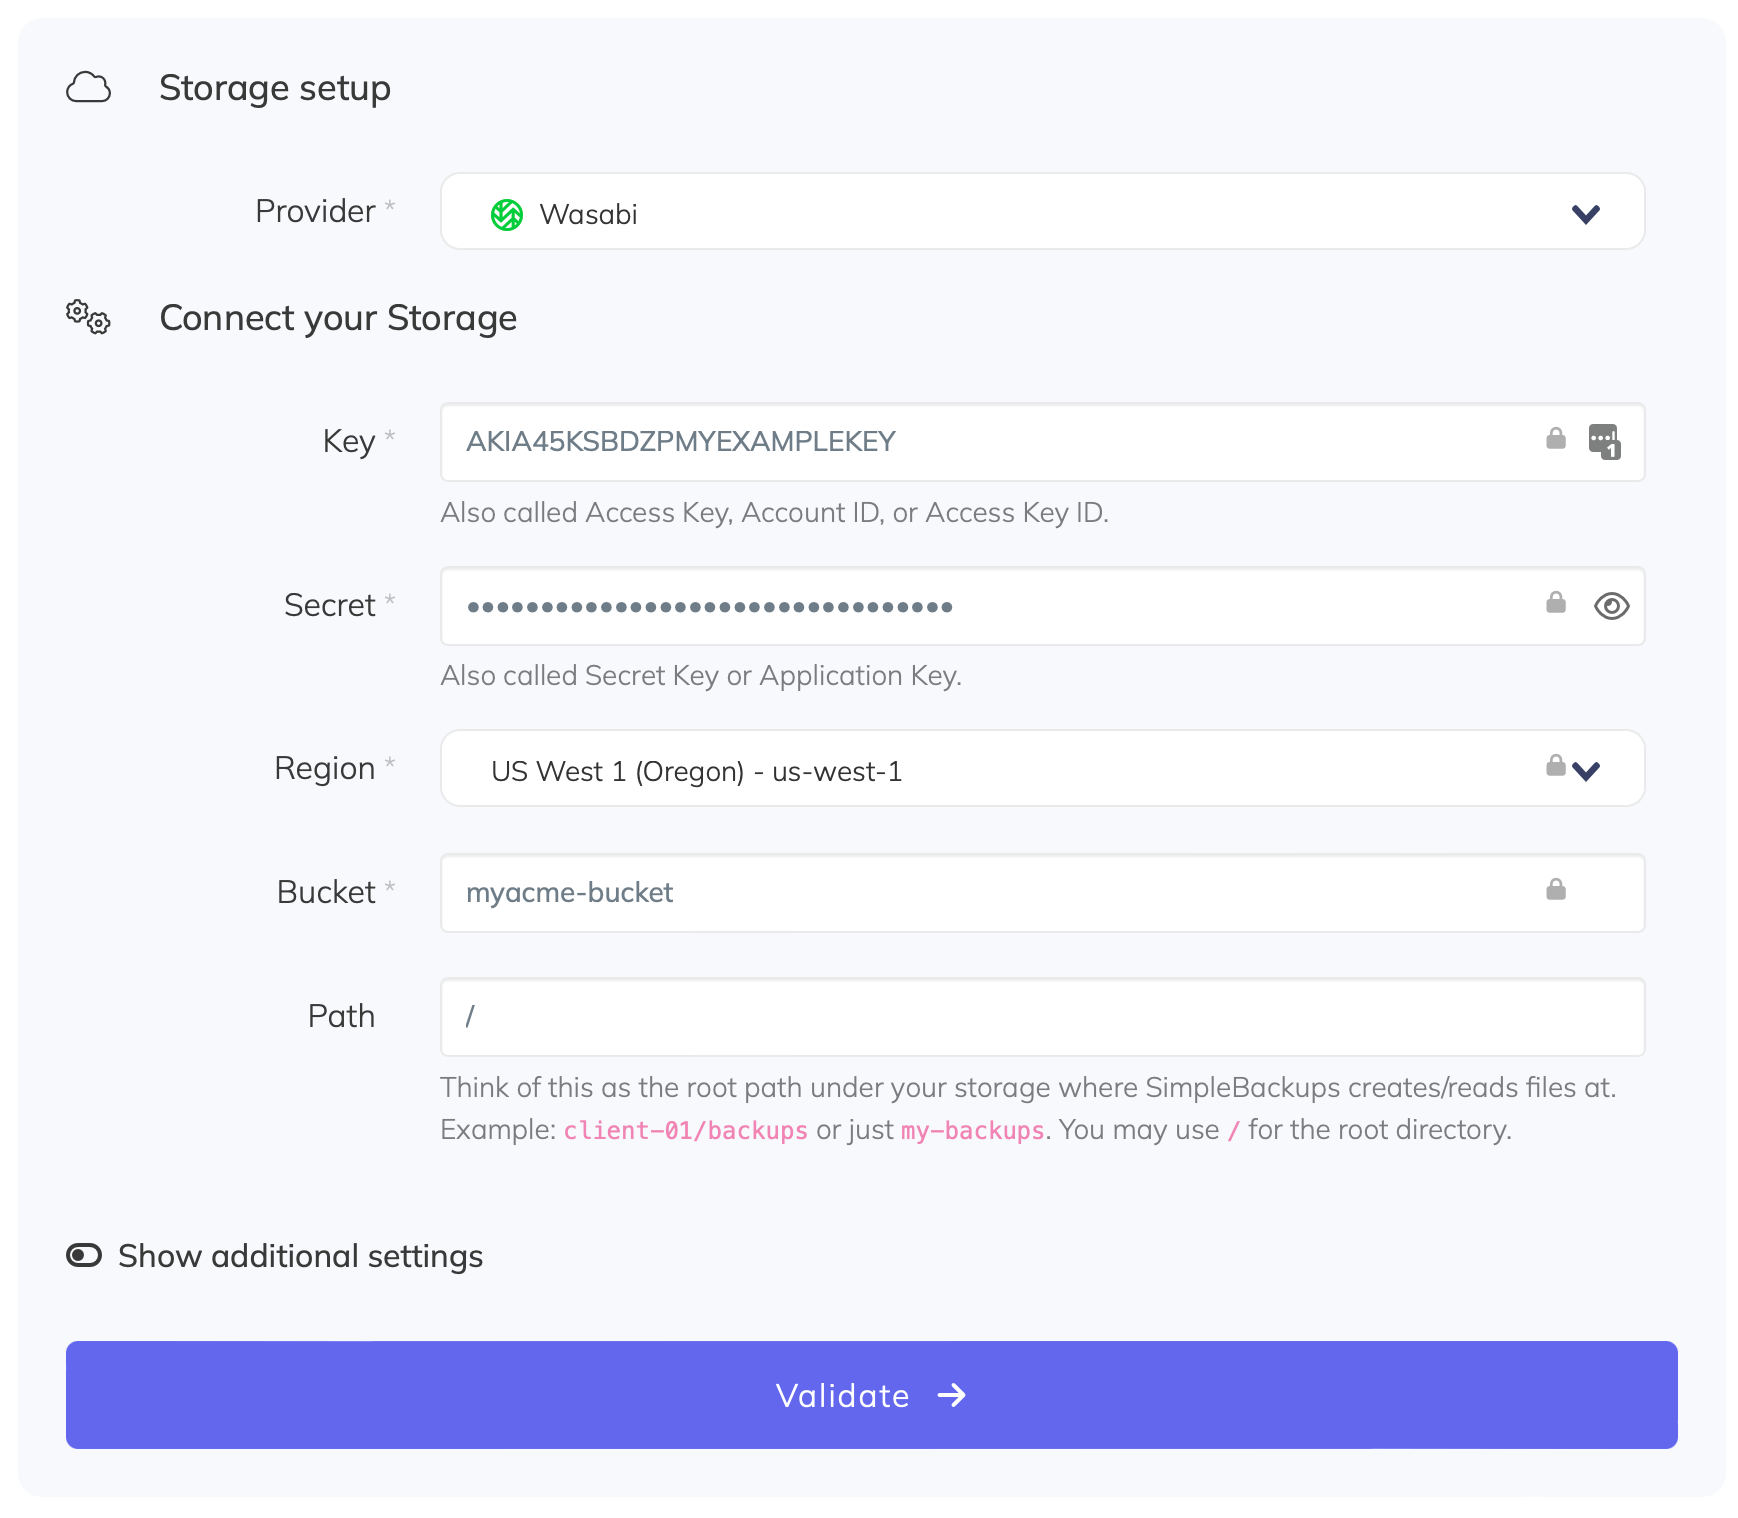
You'll have to input :
- Key: Access Key described in (step 2)
- Secret: Secret Key described in (step 2)
- Region: Bucket region described in (step 1)
- Bucket: Bucket name described in (step 1)
- Give your storage a name (usually we like to use the Bucket name) and click on "Save new storage".
You'll be redirected to the list of storage where you'll find your newly connected storage.

4. Final step: Create your PostgreSQL backup
Now it's time to head to the create backup page.
From this screen you'll be able to configure what data you're backing up (PostgreSQL in this case), where you want it to be saved (in this case your Wasabi Bucket), and how often you want this to be done.
FYI this section will be the same, no matter what storage you pick. And that's the beauty of it, if you want to change storage, just select another one from the list (Wasabi, AWS, or whatever you might prefer) and you'll be good to go.
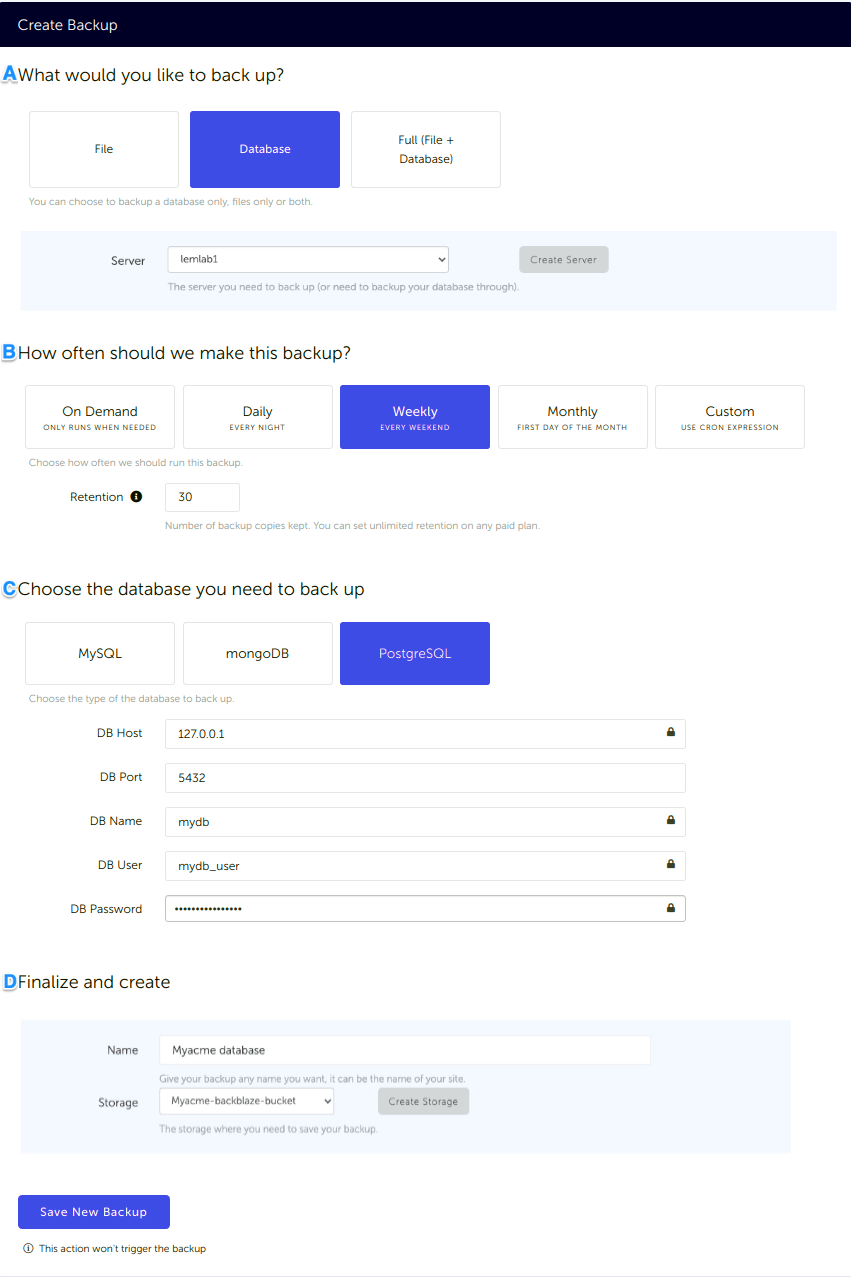
What would you like to back up? (A)
- Select "Database" (in this article we're creating a PostgreSQL backup only)
- Select the server on which your database is hosted
How often should we make this backup? (B)
-
Select your schedule option (here we picked a daily schedule)
You can select a pre-defined schedule (daily, weekly, monthly) or a custom option allowing you to schedule it whenever you want to use CRON syntax.
-
Example of CRON schedule for "20:00 every Tuesday" =
0 22 * * 2Finally, the "On demand" option won't schedule anything but will allow you to trigger the backup manually or using our API.
-
Define the backup retention, which is the number of backups you want to keep (kind of the history length of your backup if you prefer)
Choose the database you need to backup (C)
- Select the type of your database, in this case "PostgreSQL"
- Fill in the database connection form
Finalize and create (D)
- Pick the name of your backup (this is how it will be displayed in SimpleBackups interface) and where you want to store it.
- Select your Storage (step 3)
Congratulations, you now have your PostgreSQL database, backed up on Wasabi!
Run it once manually (using the "Run" backup button from the backups list) and you'll trigger your first backup!
FAQ
Which Wasabi credentials does SimpleBackups need?
An access key and a secret key, created from the Access Keys page in the Wasabi console. Together with the bucket name and the bucket region they are everything the storage connection form asks for.
Where do I find my Wasabi bucket region?
The region is shown on the bucket details page and appears in the bucket endpoint, for example us-west-1 in s3.us-west-1.wasabisys.com. SimpleBackups needs it alongside the bucket name.
Is Wasabi S3-compatible for PostgreSQL backups?
Yes. Wasabi exposes an S3-compatible API, so the same key, secret, region and bucket fields used for AWS S3 apply, and any tool that can write to S3 can write to Wasabi.
How do I restore a PostgreSQL backup stored on Wasabi?
Download the dump from the bucket, then restore it with psql for a plain SQL file or pg_restore for a custom-format archive. The restore guide covers both paths and the errors that come up most often.
Keep learning
- The ultimate PostgreSQL backup script, if you would rather own the
pg_dumpand upload pipeline yourself. - pg_dump and pg_restore guide, for the dump options behind whichever route you pick.
- How to restore a PostgreSQL backup, because a backup you have never restored is an assumption.
Scheduling, retention and restores across every destination are covered on the managed PostgreSQL backup page.
This article is part of The complete guide to PostgreSQL backup, an honest, practical reference from the team that backs up PostgreSQL every day.