Appearance
Amazon RDS
How to back up and restore AWS RDS managed databases via SimpleBackups.
Amazon RDS is a managed relational database service that supports MySQL, PostgreSQL, Aurora MySQL, and Aurora PostgreSQL. Connecting it to SimpleBackups lets you store portable backup files in your own storage with flexible retention schedules, complementing RDS's native snapshot functionality. This guide covers both manual connection and automatic API-based setup.
Connecting your database
Step 1: Open your RDS database
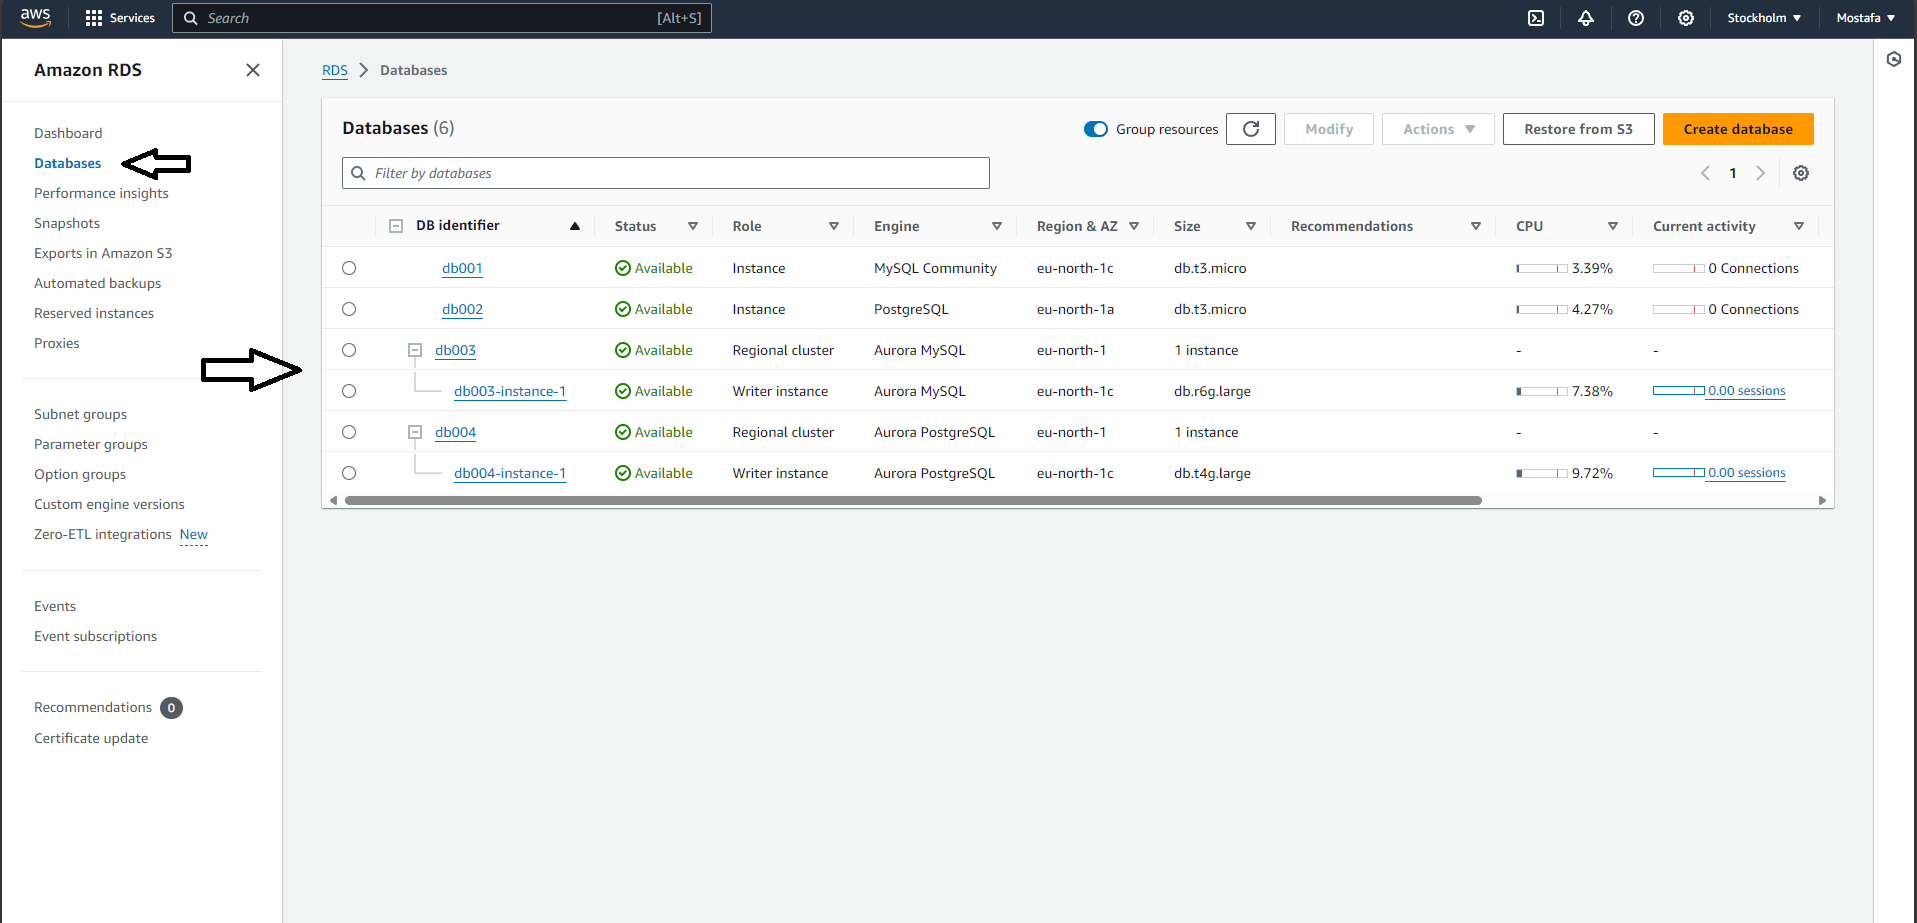
From the AWS console, navigate to Databases under RDS.
Step 2: Configure IP filtering
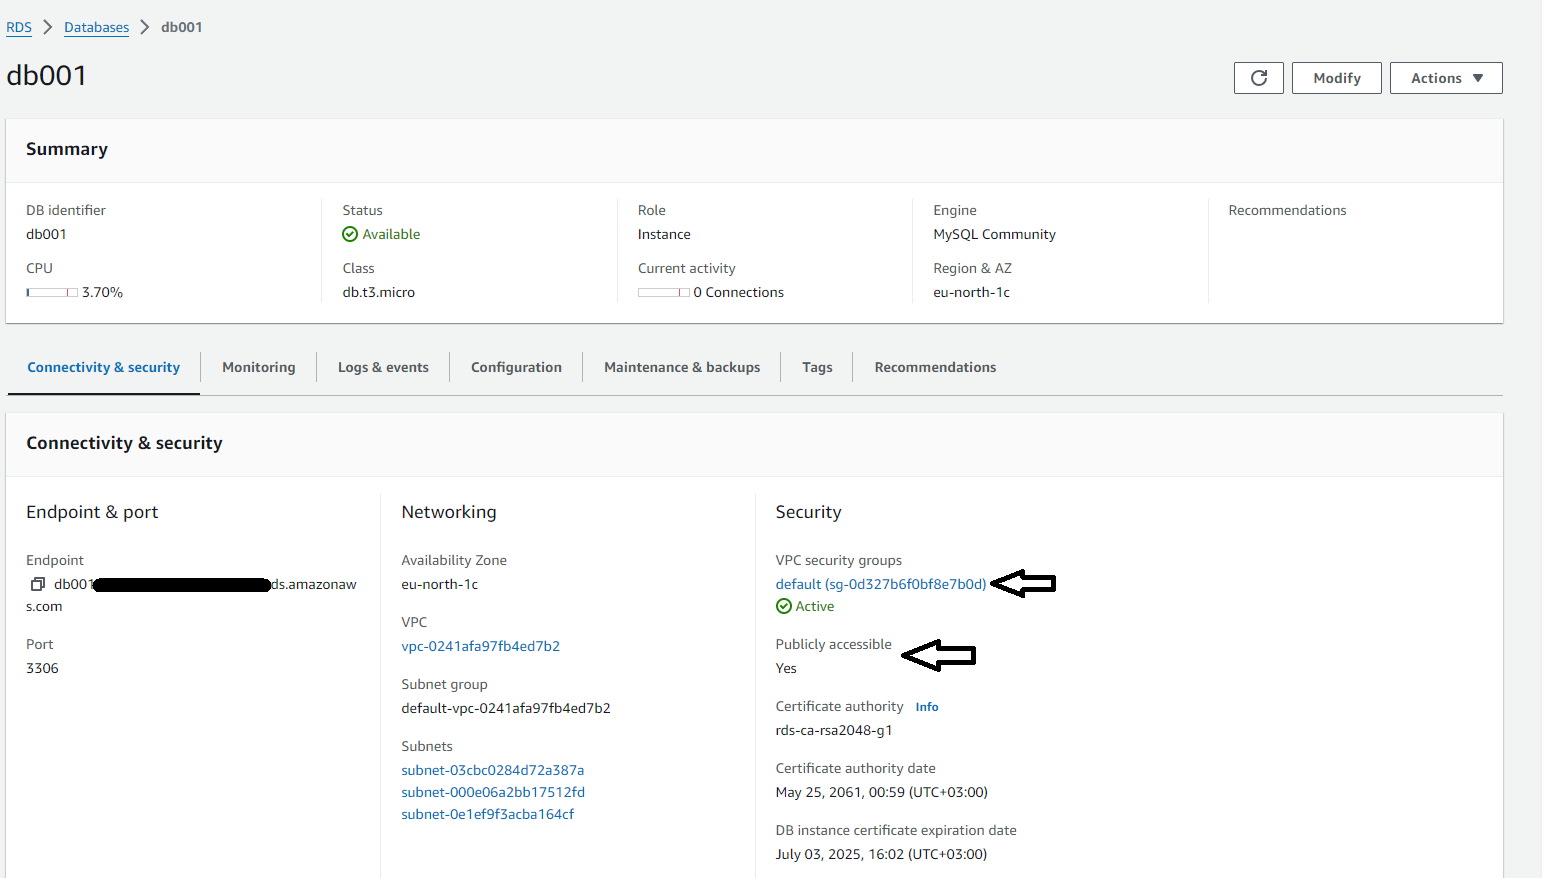
- Select the database you want to back up.
- Ensure that Publicly accessible is set to Yes. If not, use Modify to change it.
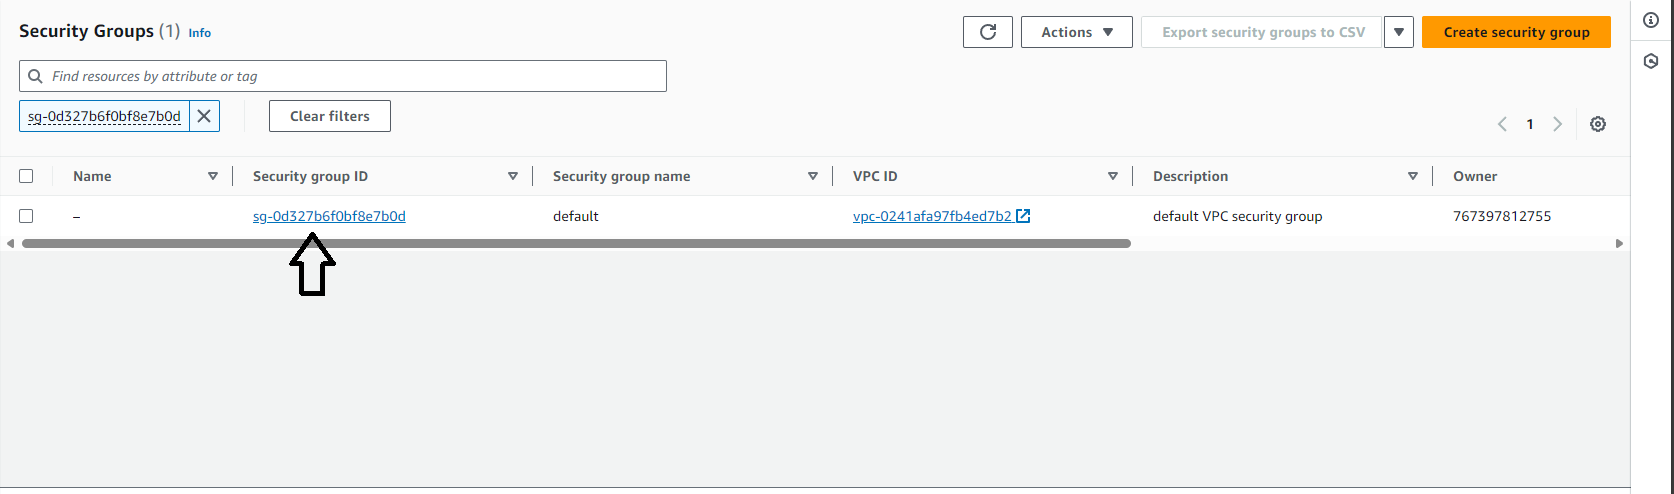
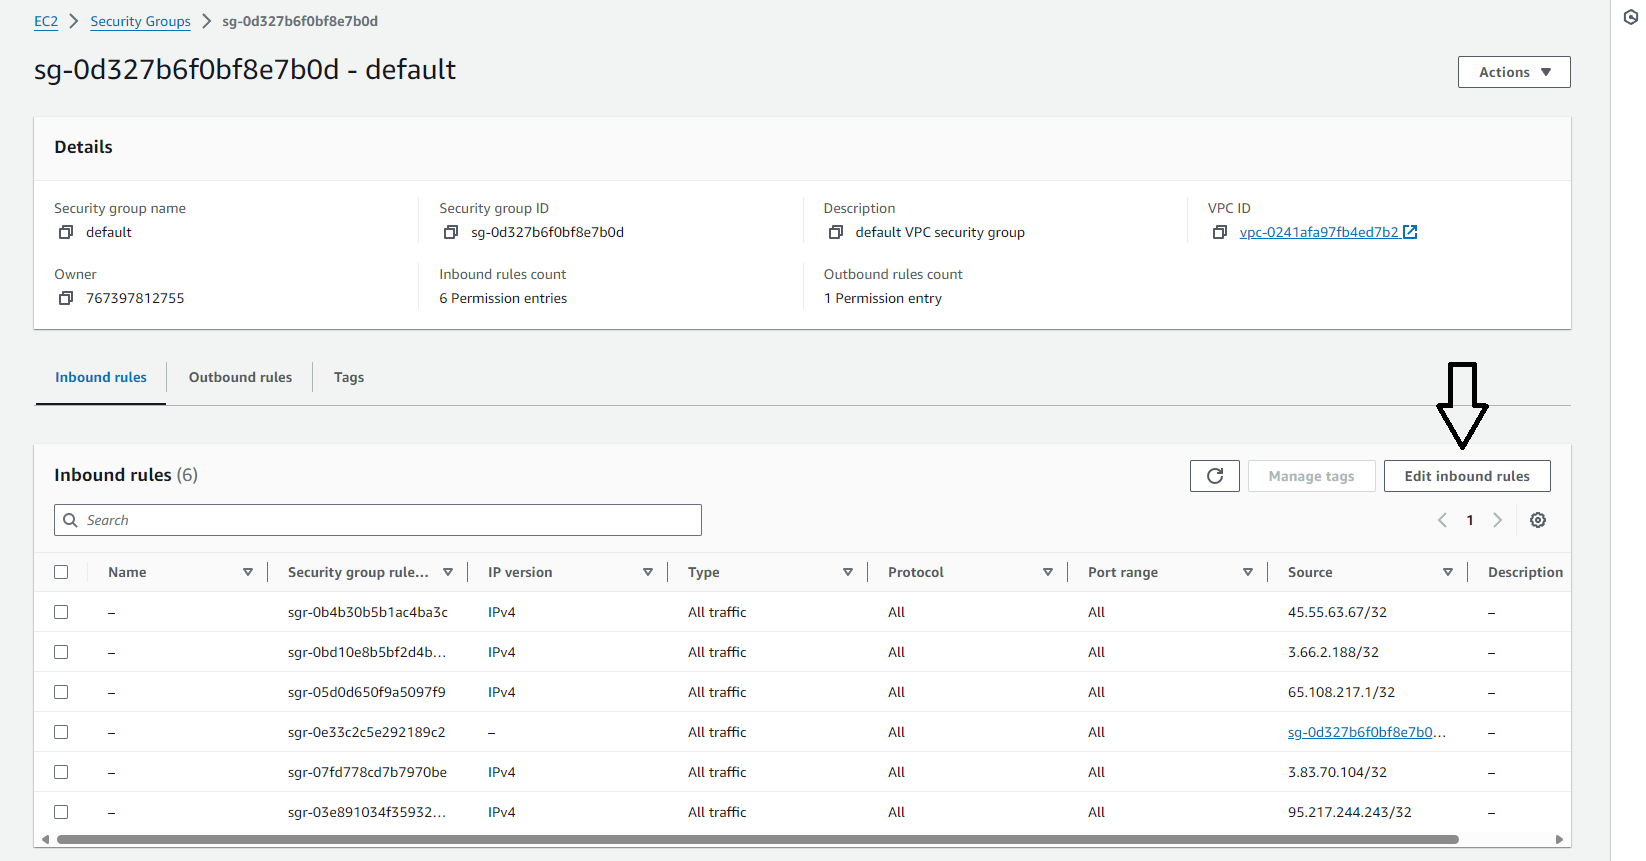
- Open the default VPC security groups and add the SimpleBackups IP addresses to the Inbound Rules.

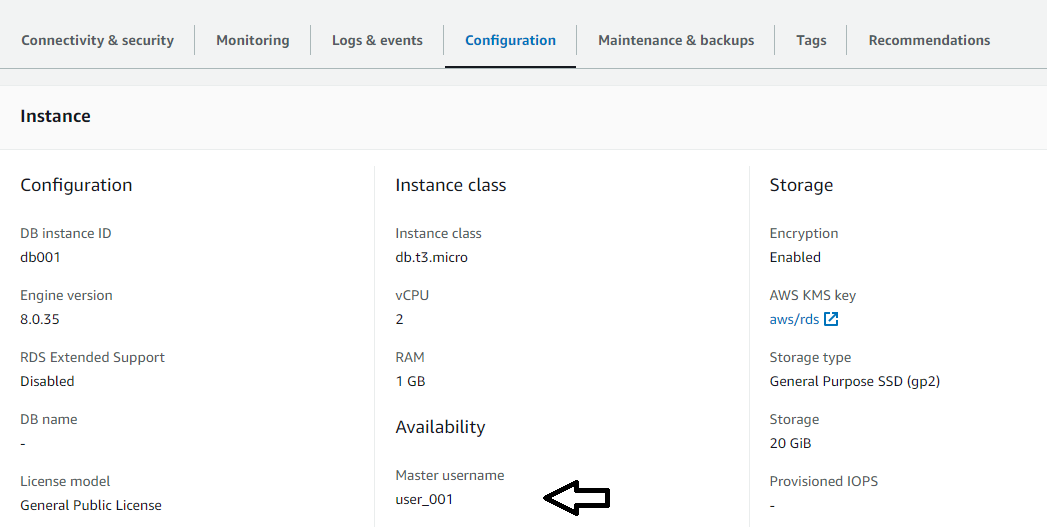
Step 3: Copy your connection credentials
- Navigate to the Connectivity & security section and copy the Endpoint and Port.

- Navigate to the Configuration section and copy the Master username.
Step 4: Set up a database backup in SimpleBackups
Navigate to creating a new database backup and choose Serverless. You can connect using either manual form fill or automatic import:
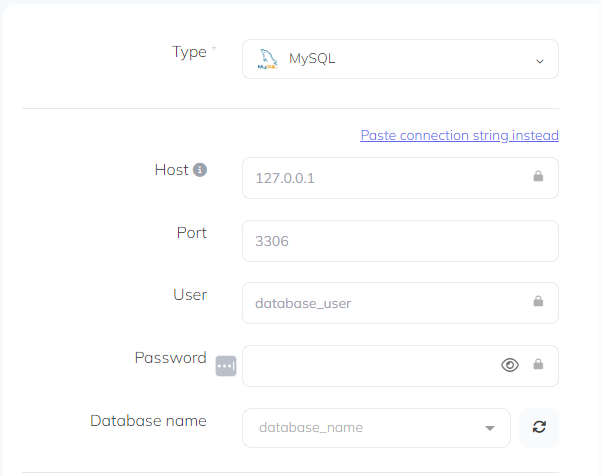
Manual connection
Select the database Type and fill in the connection details, or click Paste connection string and enter the full connection URI.
Automatic import via DBaaS provider
- Click Connect your DBaaS Provider.
- Choose an Amazon RDS provider.
- Select the managed database you want to back up.
- Click Load.

Step 5: Validate and activate
Click Validate connection to confirm that SimpleBackups can reach your database. Once validated, configure your schedule and activate the backup.
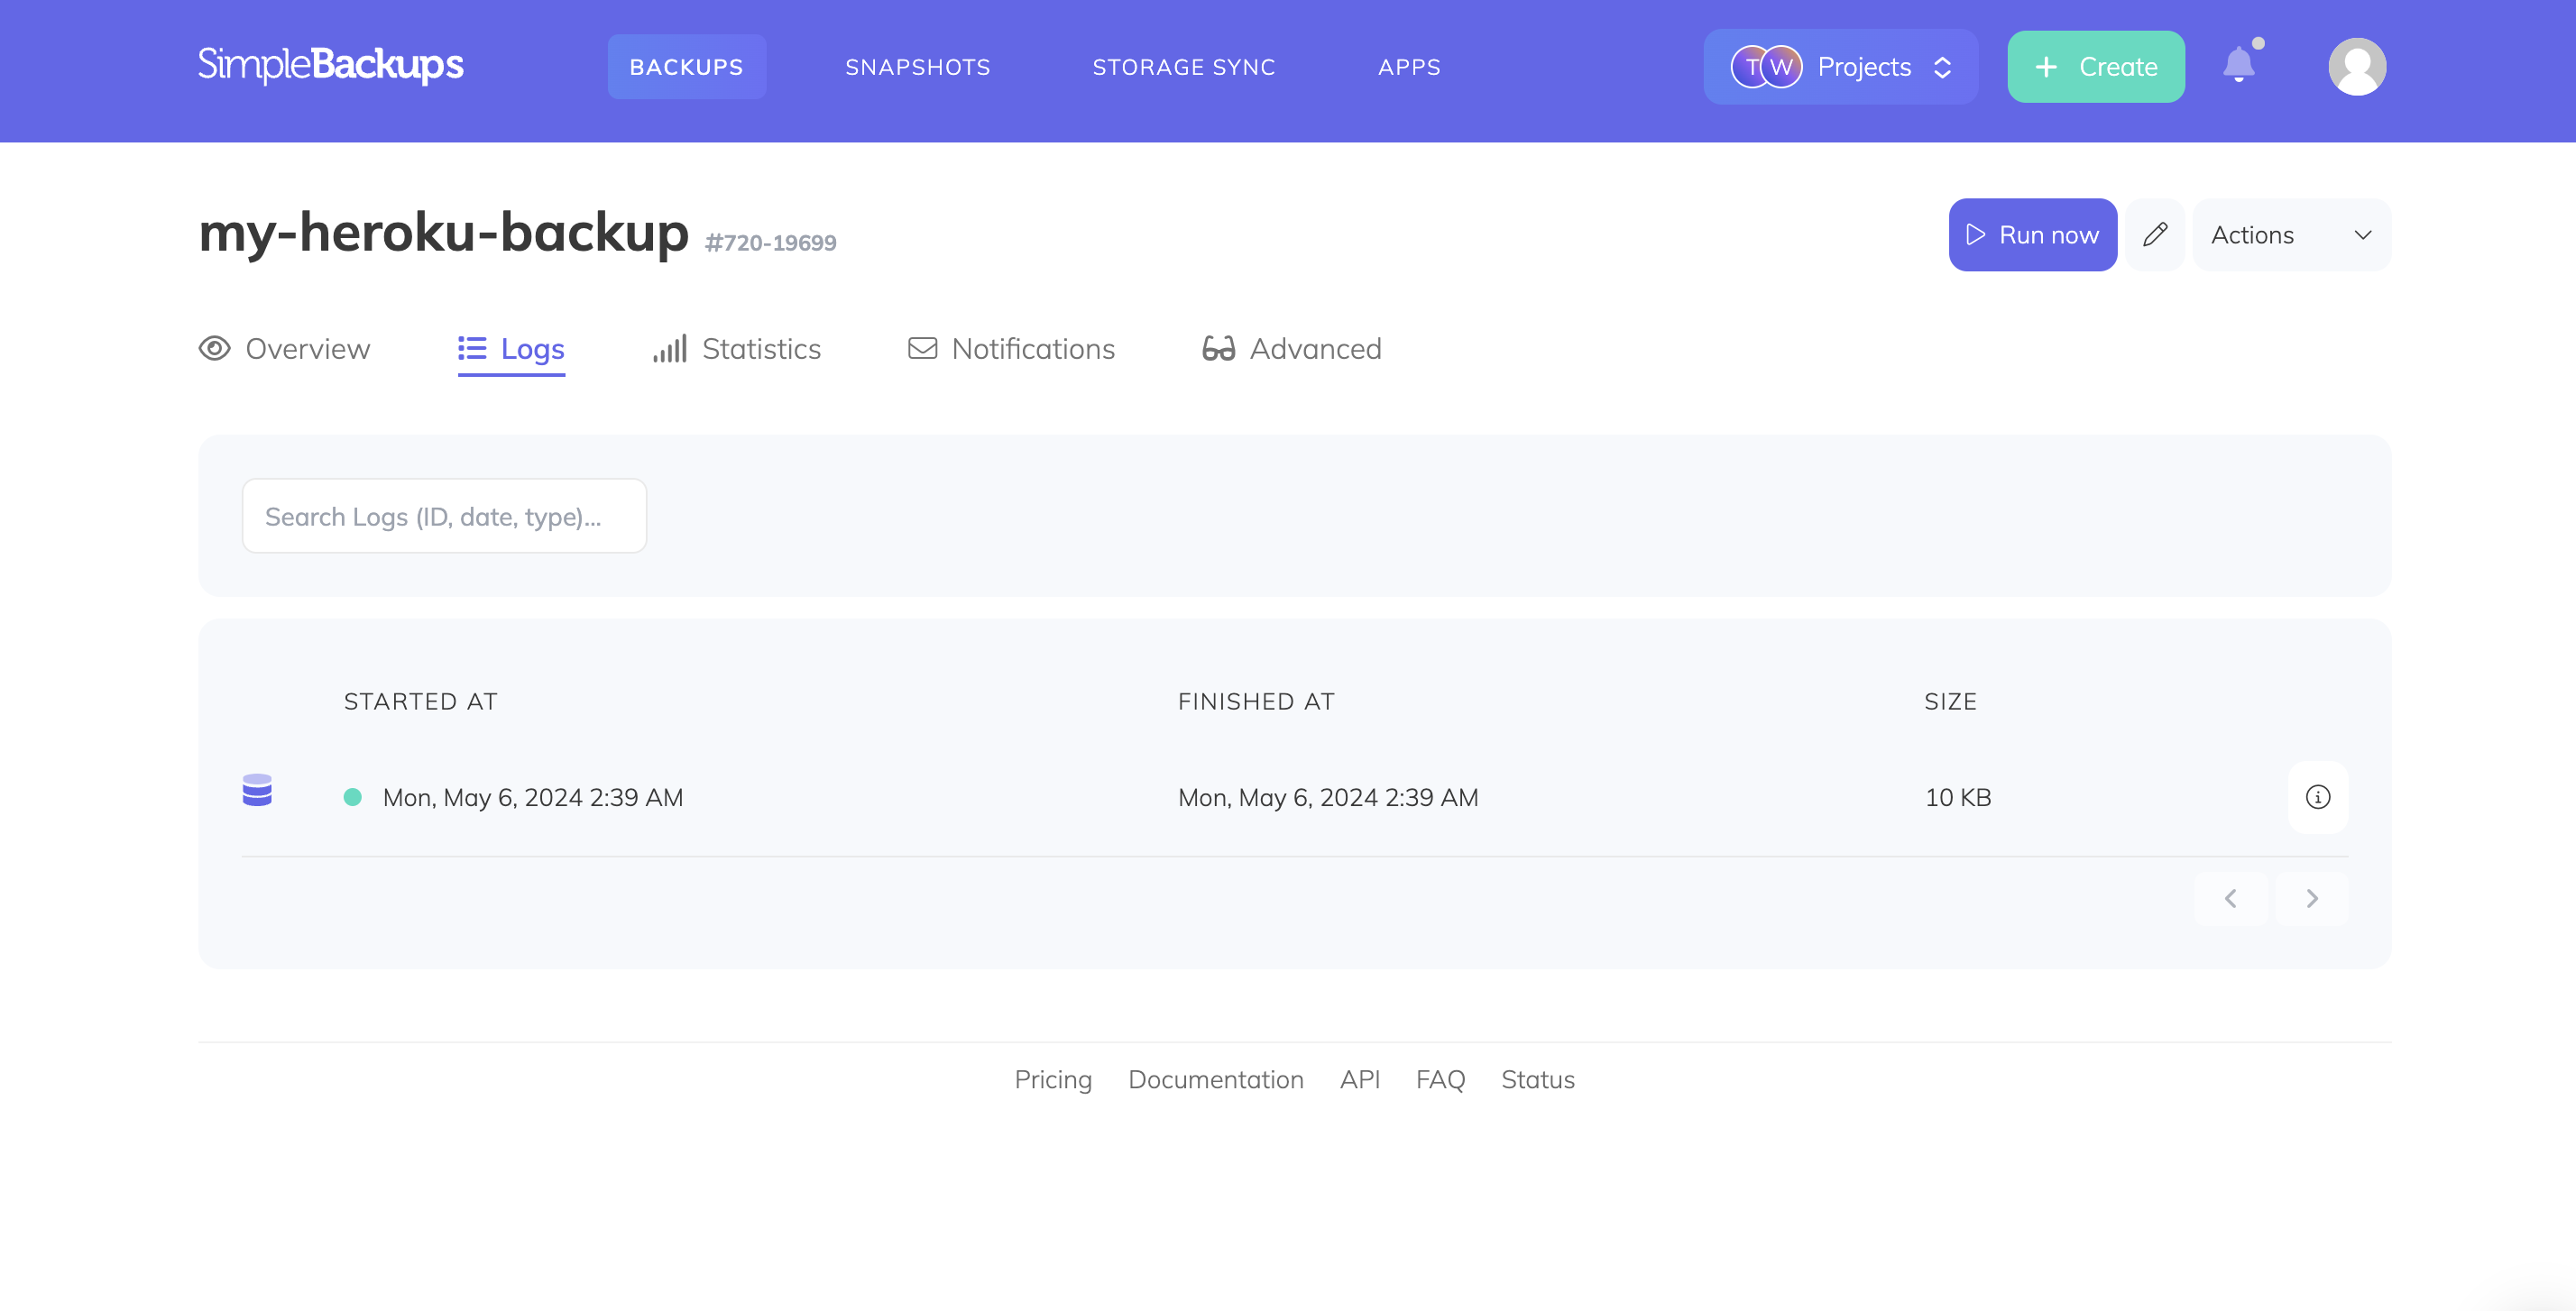
Restoring a backup
To restore a backup, navigate to your backup page and open the Logs tab. Click the detail icon on the backup you want to restore from, then open the Restore tab. Generate a download link and copy it.
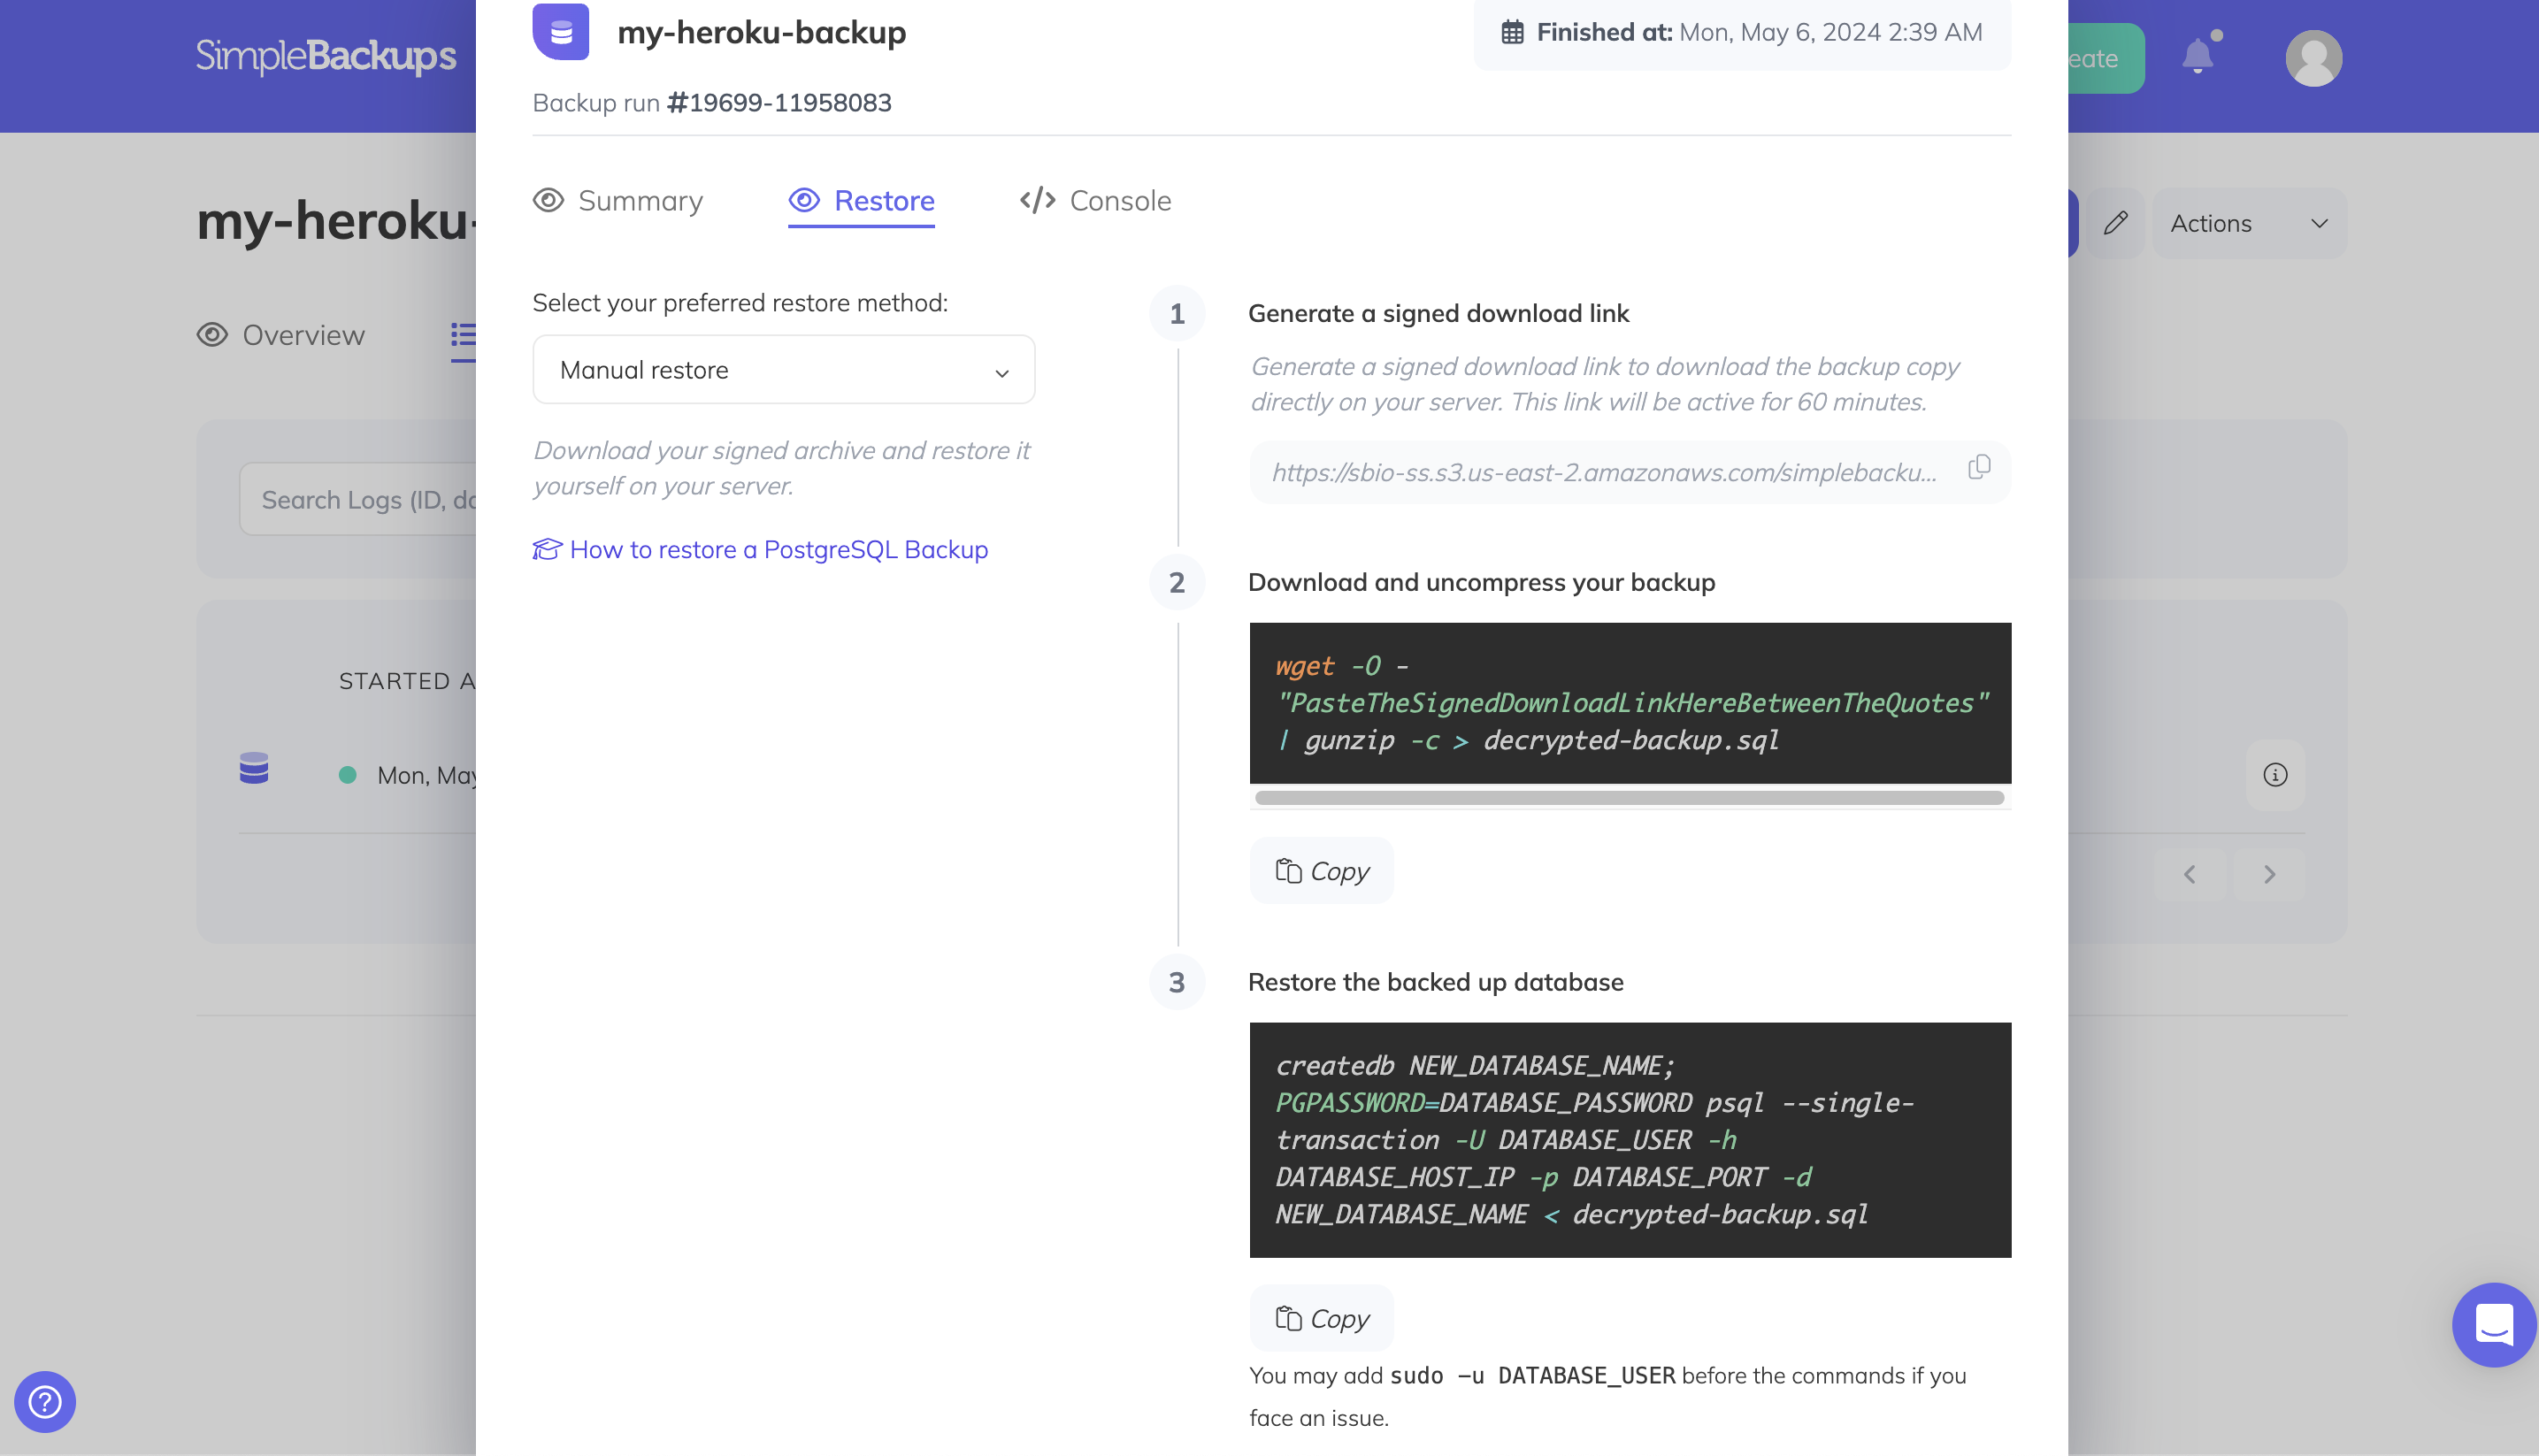
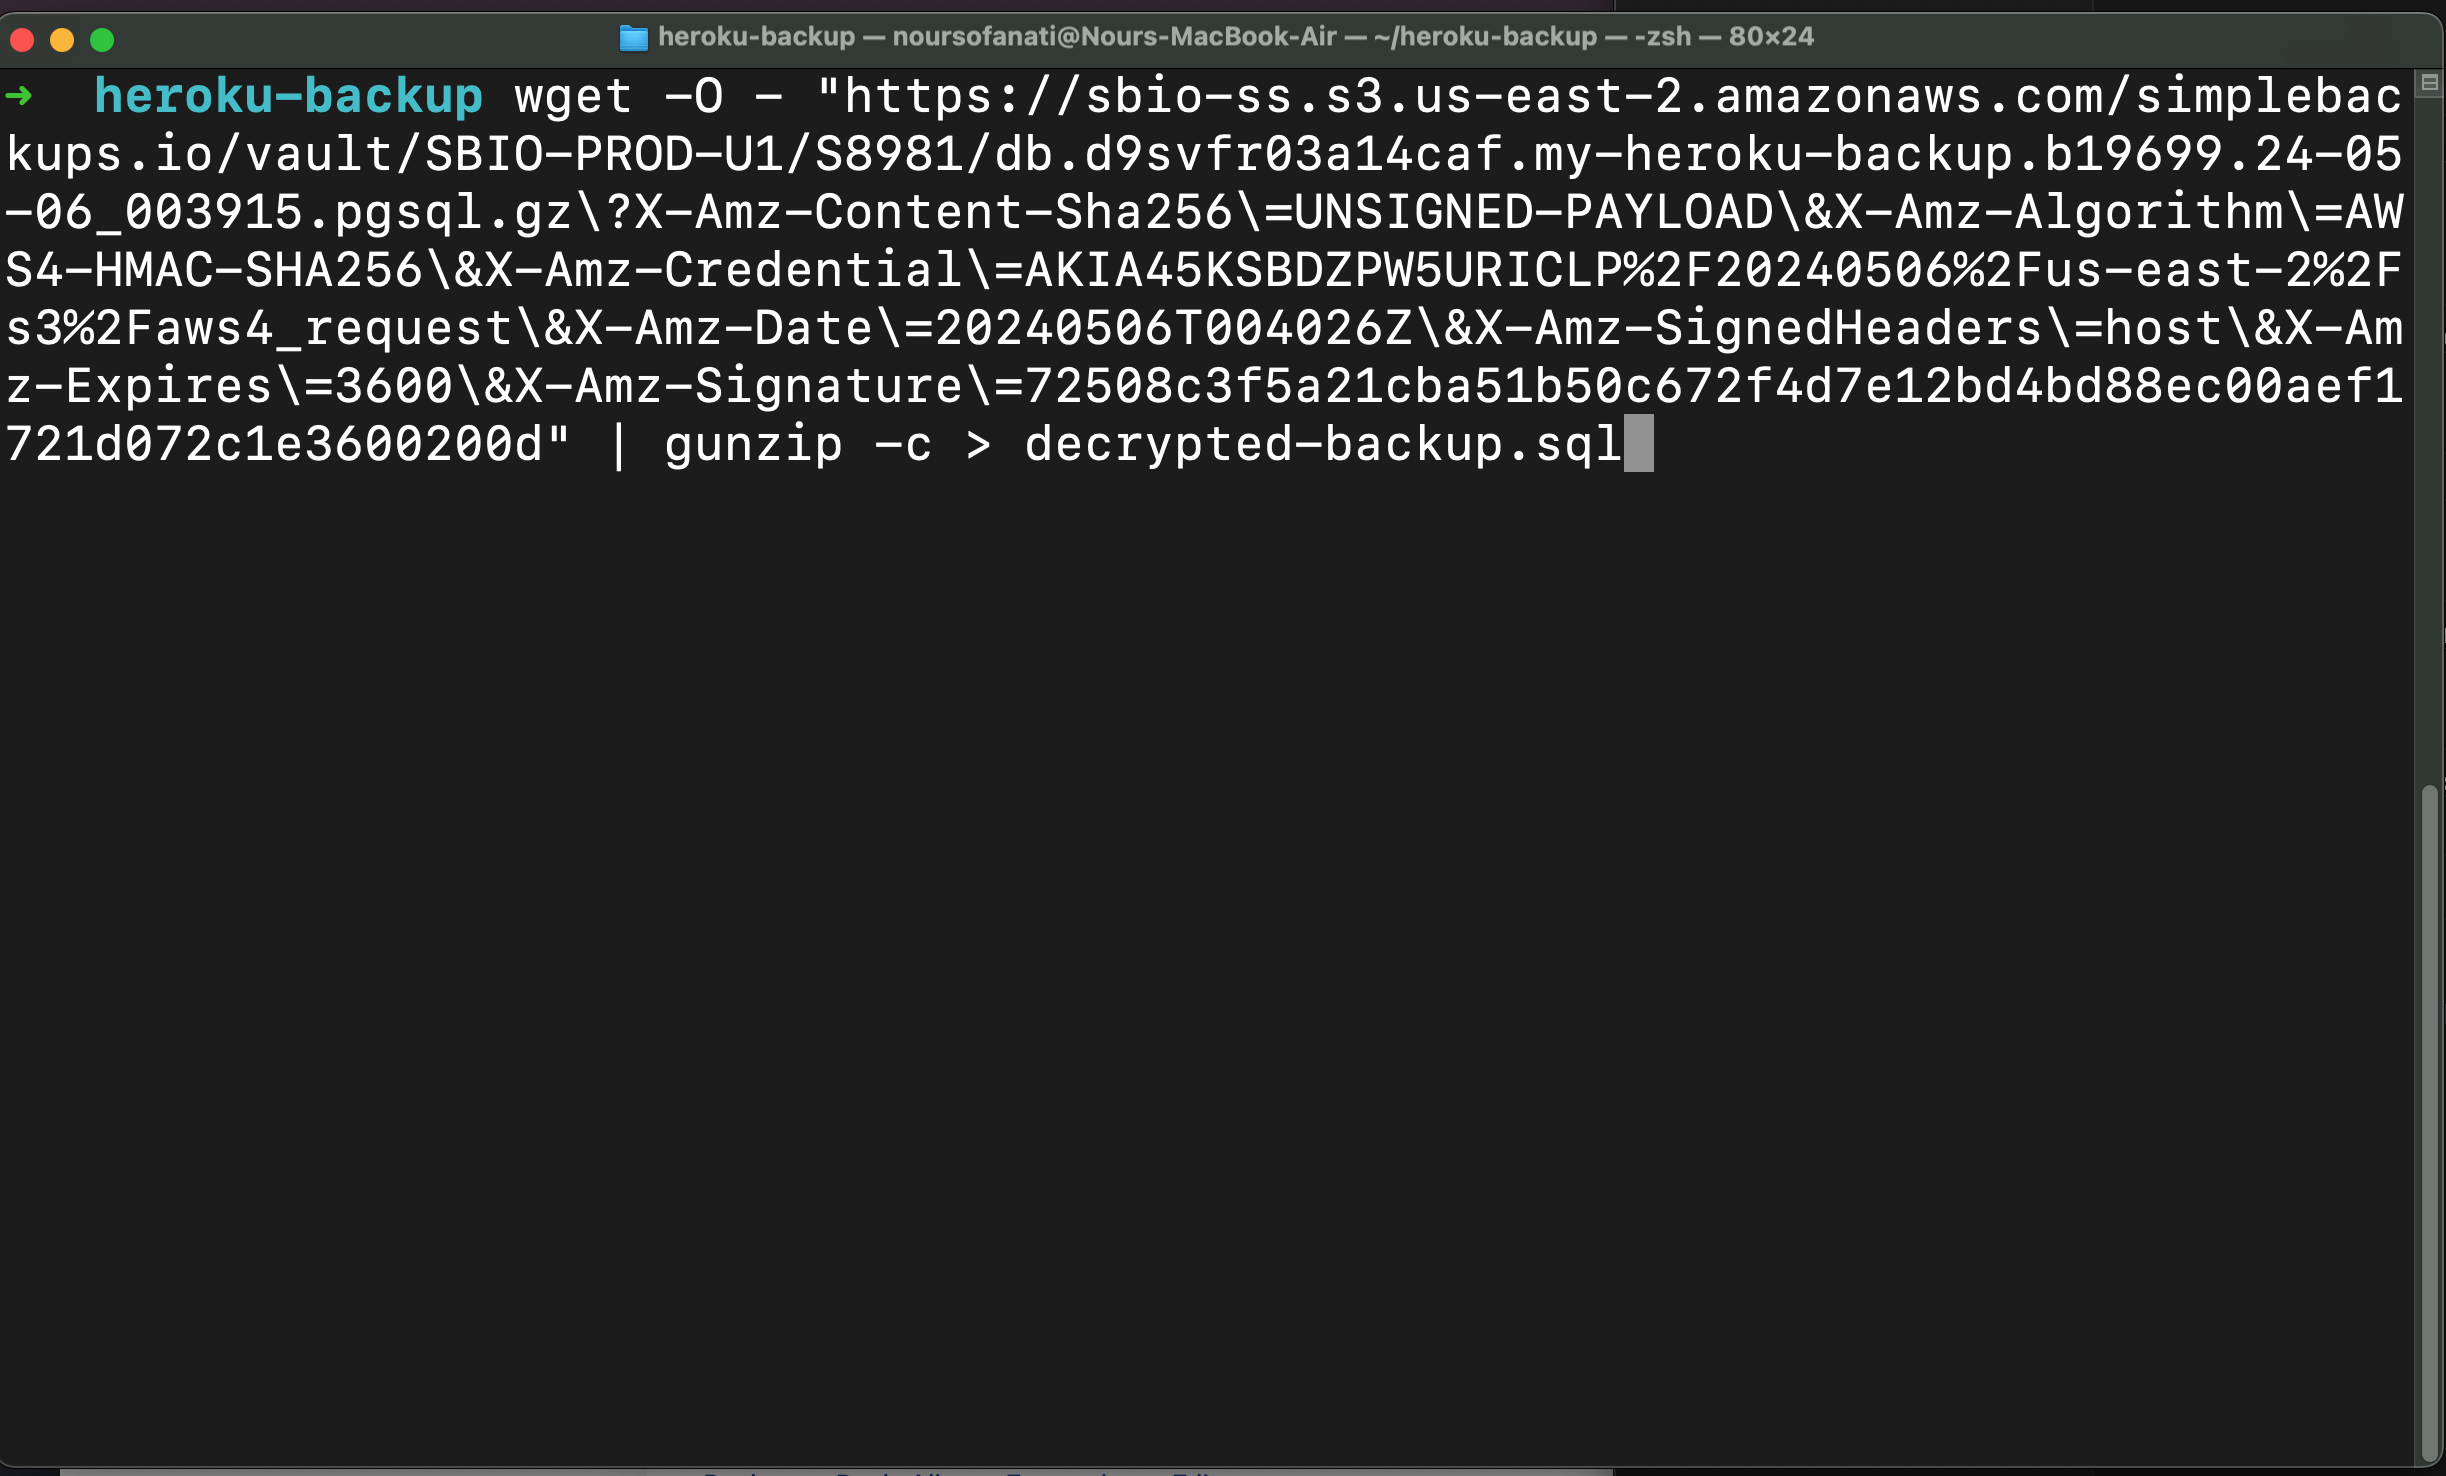
Run the following command to download and decompress your backup (replace the URL with your signed download link):
bash
wget -O - "<signed-download-url>" | gunzip -c > backup.pgsqlThen restore using pg_restore, replacing <your-database-uri> with your full database connection string:
bash
pg_restore -d "<your-database-uri>" ./backup.pgsql