Appearance
Scalingo
How to back up and restore Scalingo managed databases via SimpleBackups.
Scalingo is a European PaaS platform that provides managed add-on databases for MySQL and PostgreSQL. Connecting a Scalingo database to SimpleBackups requires generating an API token and enabling internet access on the database. This guide covers both the automatic API-based setup and the manual connection string approach.
Automatic setup
In this section, you will generate a Scalingo API token and connect your Scalingo application to SimpleBackups so that databases are discovered automatically.
Step 1: Obtain Scalingo API credentials
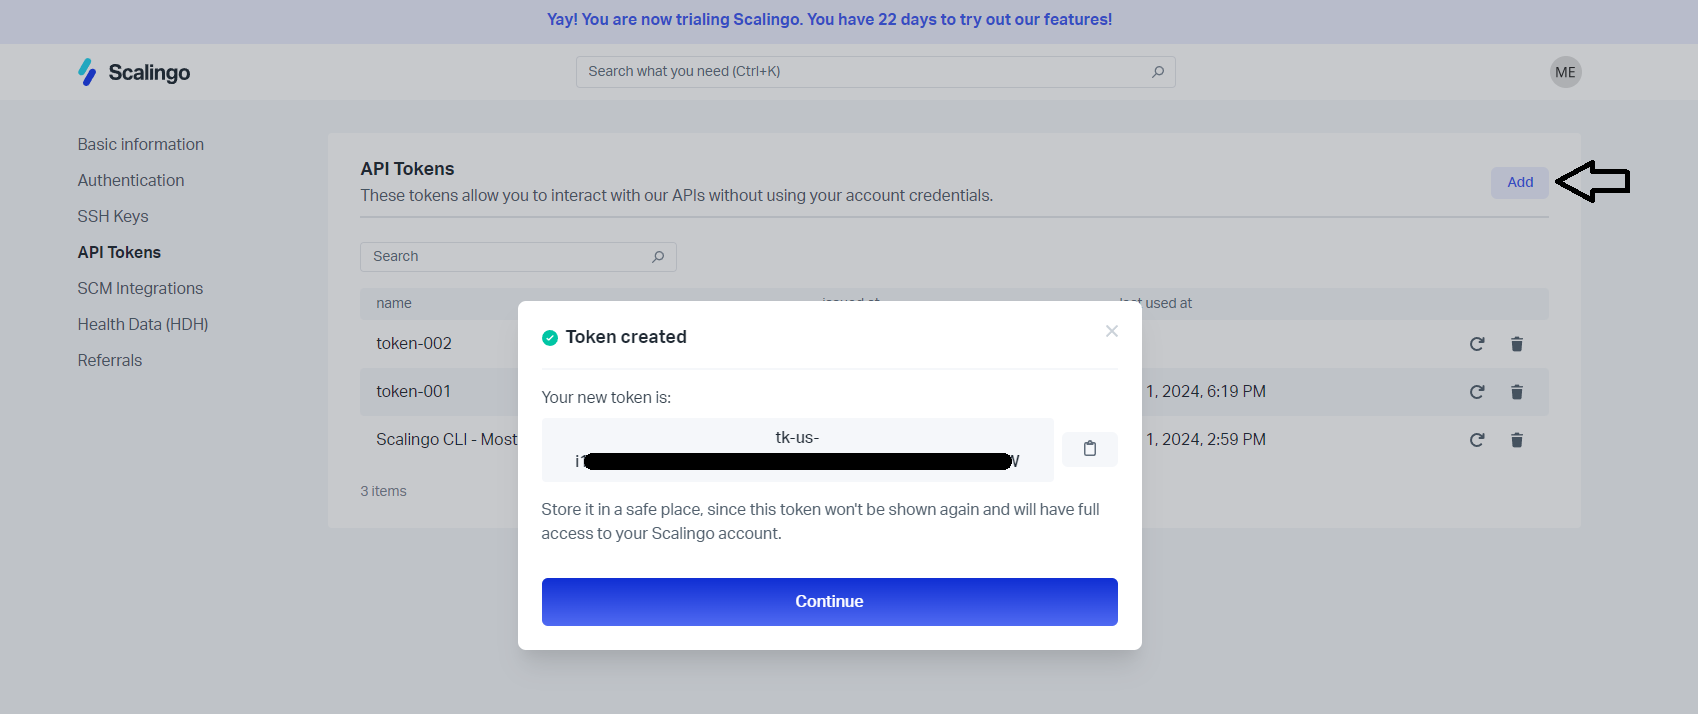
- Go to https://dashboard.scalingo.com/account/tokens.
- Click Add.
- Copy the generated key to a safe location.
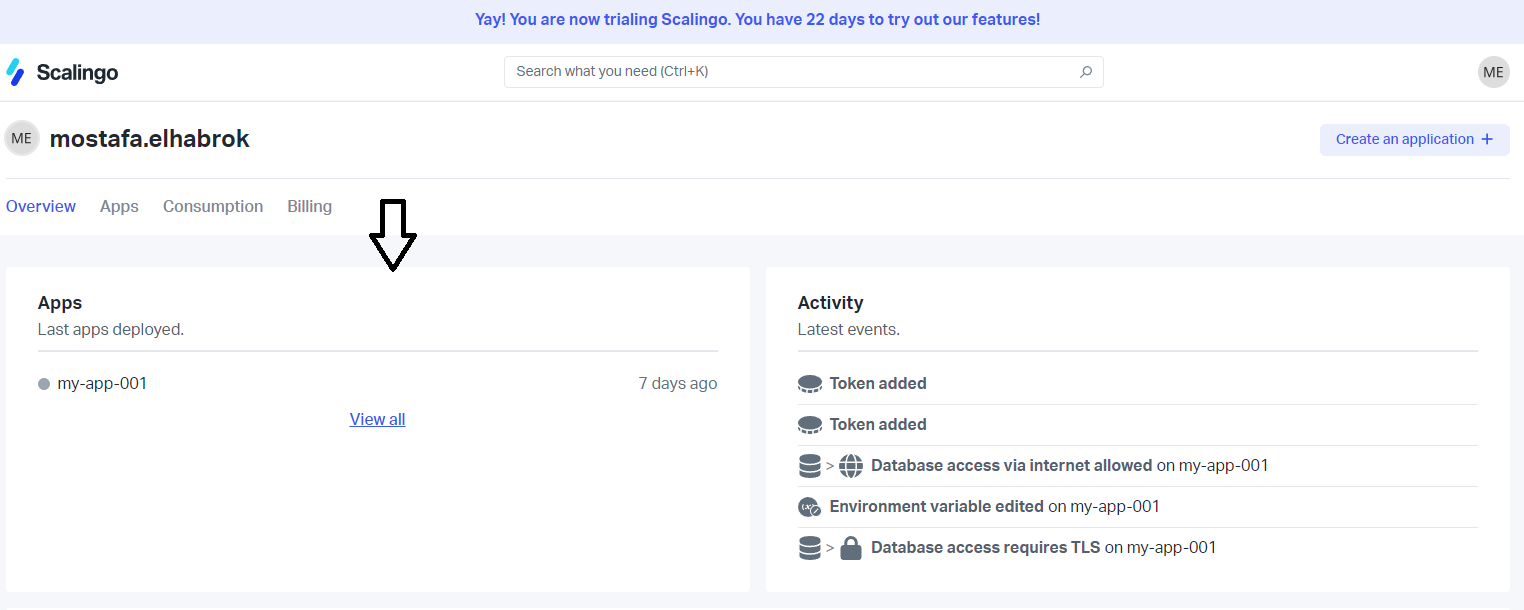
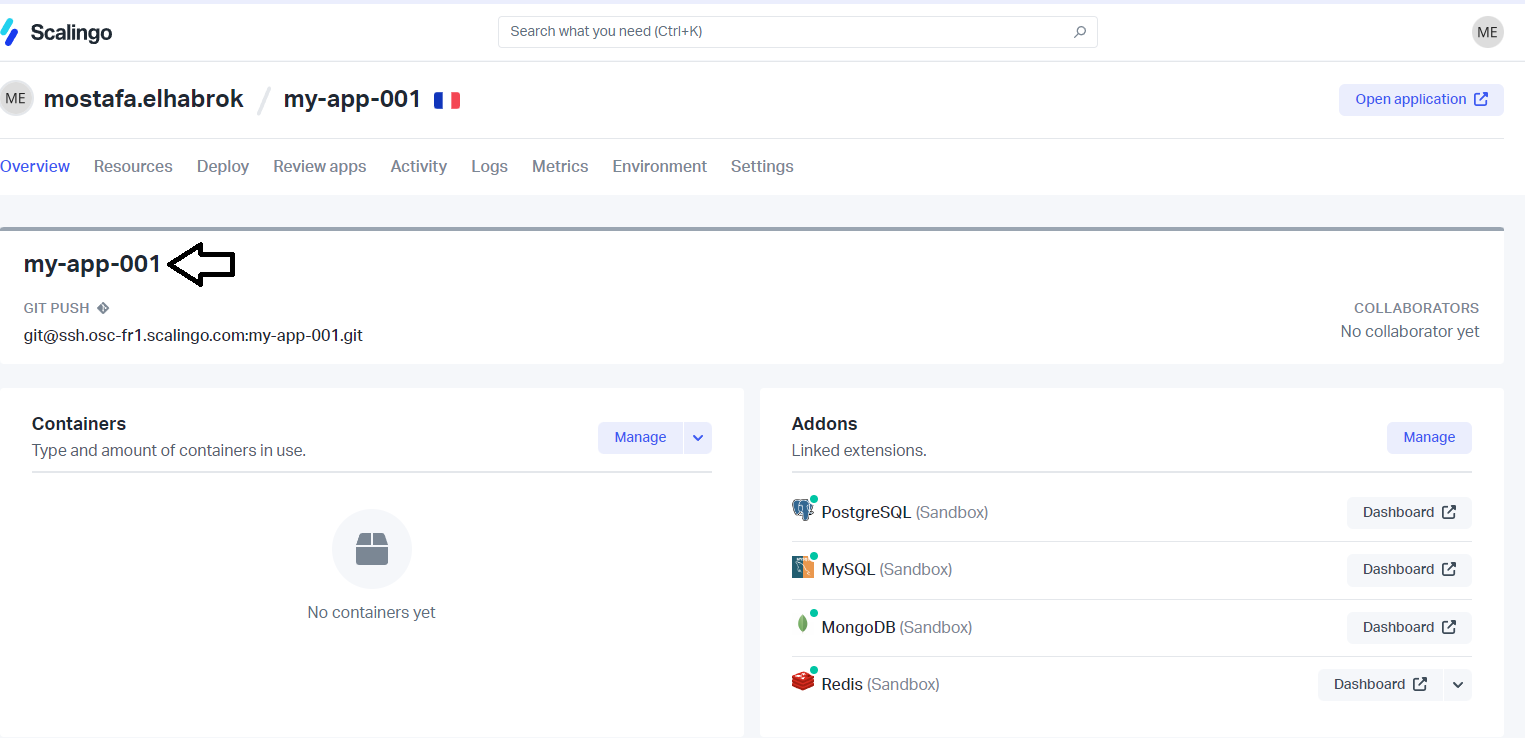
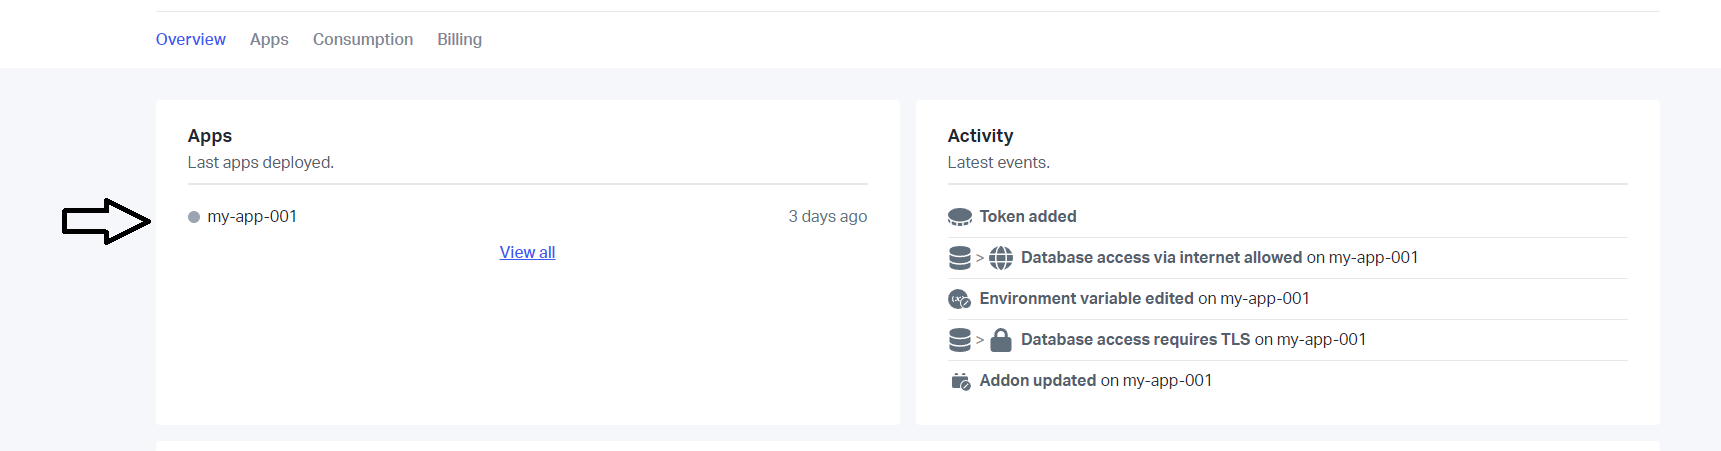
Step 2: Get the application name
- From the dashboard, navigate to Apps.
- Choose the app that contains the database you want to back up.
- Copy the Application Name.
Step 3: Create a Scalingo provider in SimpleBackups
- Go to the database backup page and click Add in the Connect your DBaaS Provider section.
- Select Scalingo from the Provider dropdown, enter a name for your Scalingo account, paste the token and application name, then click Save provider.

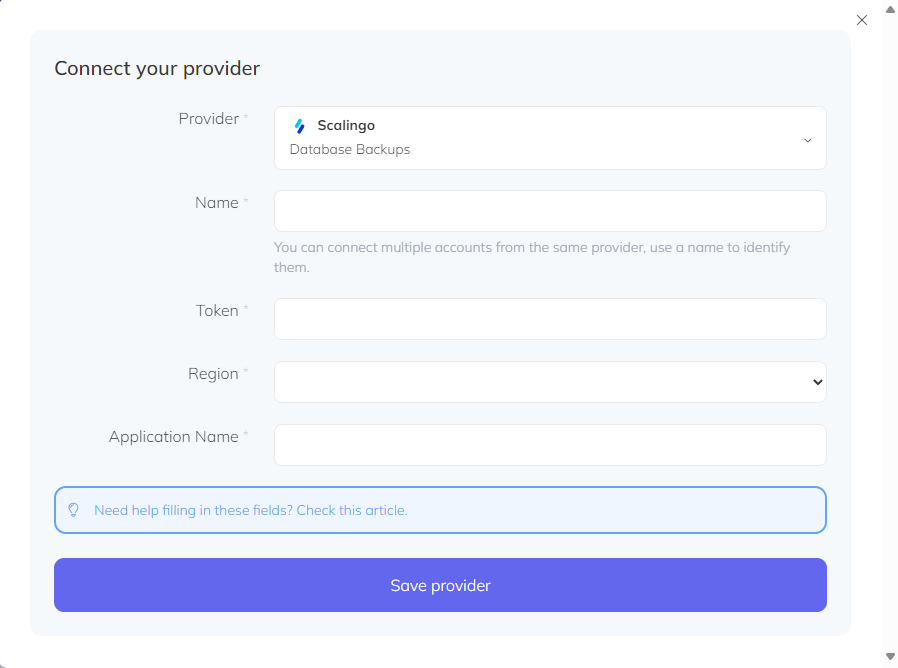
- Select your provider and the database you want to back up, then click Load.
Step 4: Validate and activate
Click Validate connection to confirm that SimpleBackups can reach your database. Once validated, configure your schedule and activate the backup.
Manual setup
Use this approach if you prefer to supply connection credentials directly rather than through the Scalingo API.
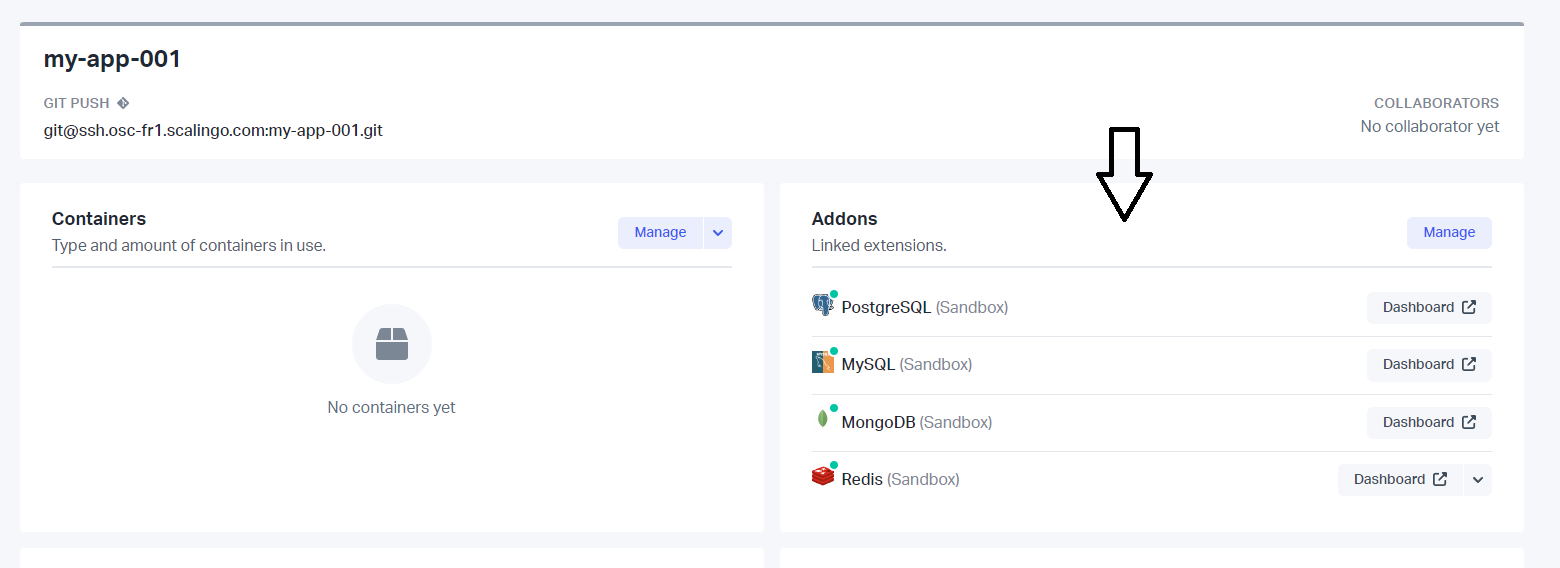
Step 1: Open your Scalingo database
- Open the application that contains the database you want to back up.
- Navigate to the Addons section.
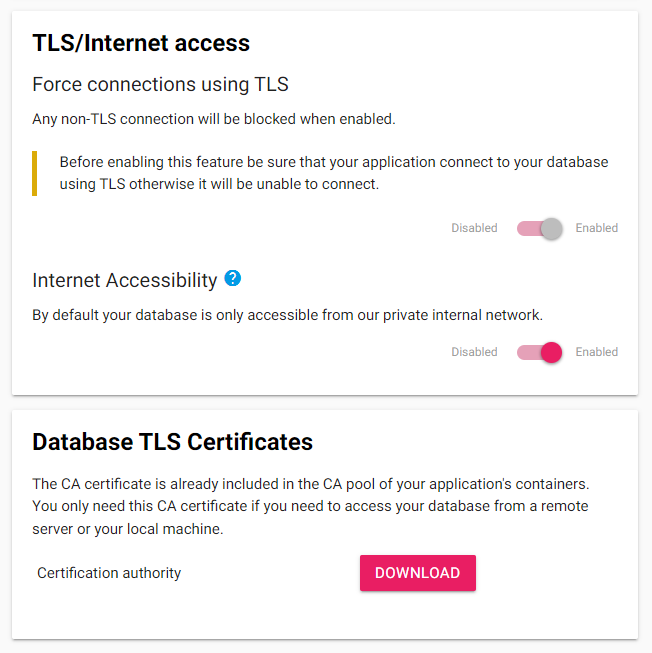
Step 2: Enable internet access and download certificates
- Select the database you want to back up and click Dashboard.
- Navigate to the TLS/Internet access section and enable both Force connections using TLS and Internet Accessibility.
- Navigate to the Database TLS Certificates section and download the certificates.
Step 3: Copy your connection string
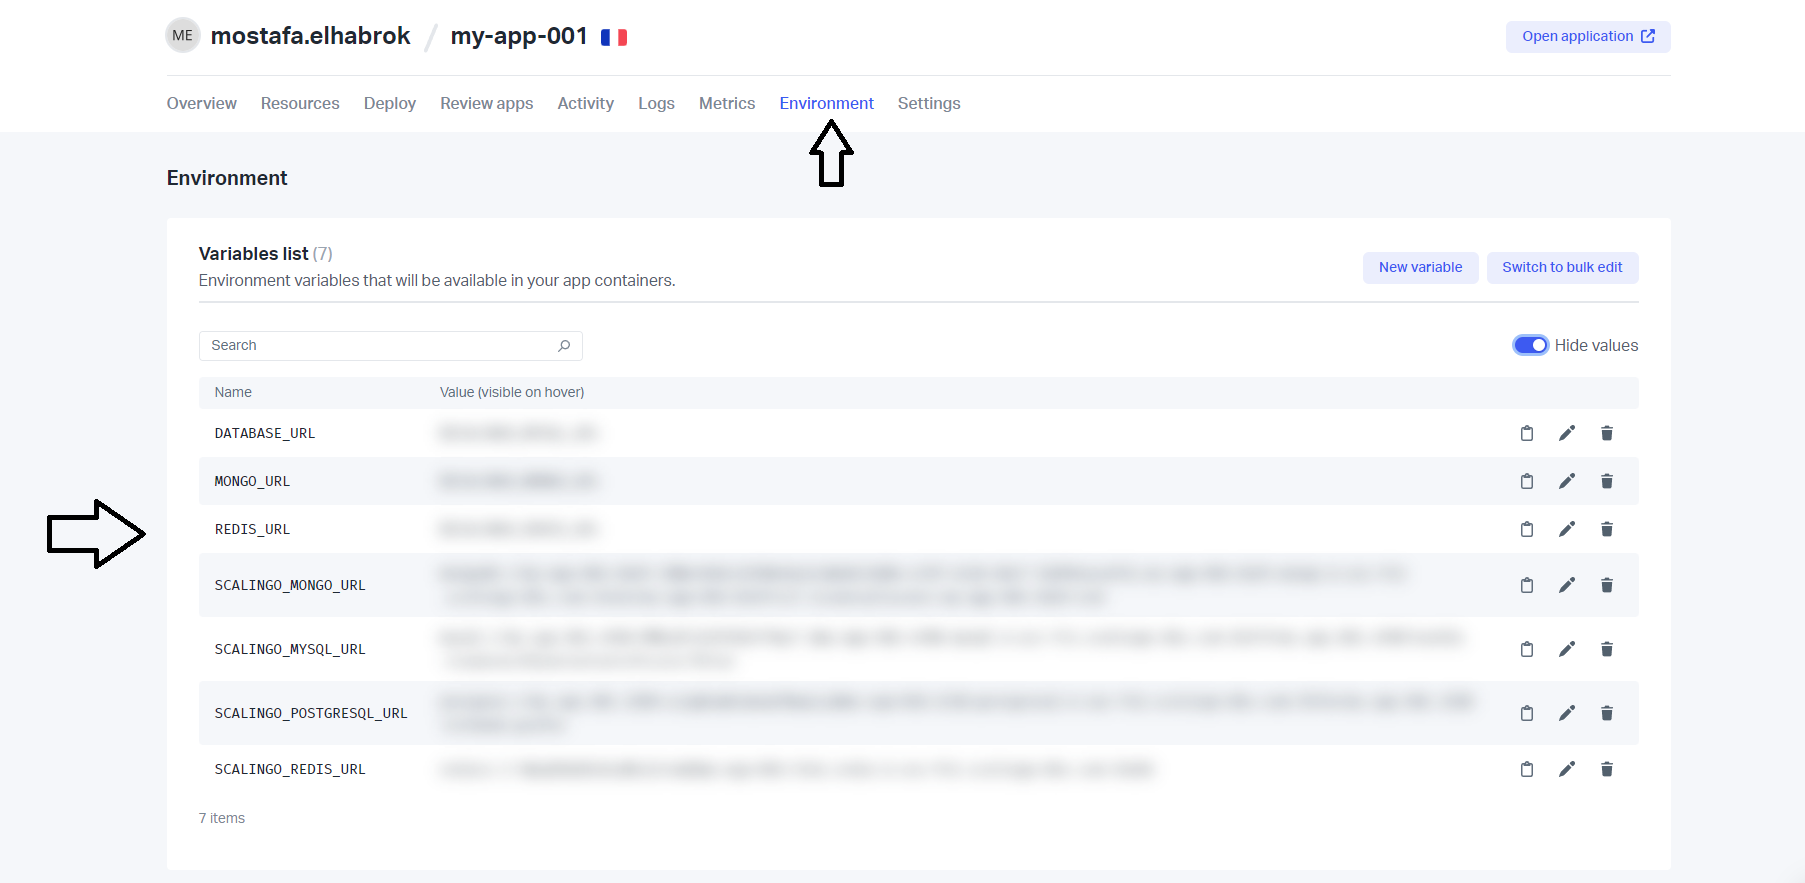
- Navigate to the Database Access section and copy the connection string.
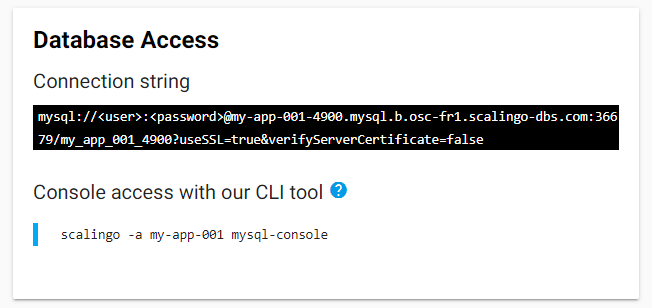
- You can also find the full connection string including the username and password from the main application page. Navigate to the Environment tab and copy the connection string for your database.
Step 4: Set up a backup in SimpleBackups
- Navigate to creating a new database backup and choose Serverless.
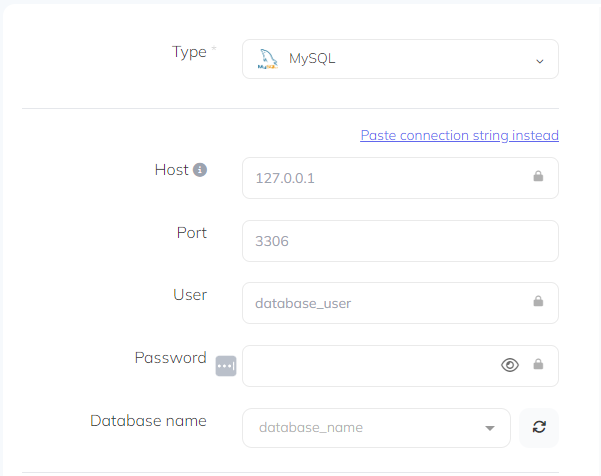
- Select the database Type and fill in the connection details, or click Paste connection string and enter the full service URI.
Step 5: Validate and activate
Click Validate connection to confirm that SimpleBackups can reach your database. Once validated, configure your schedule and activate the backup.
Restoring a backup
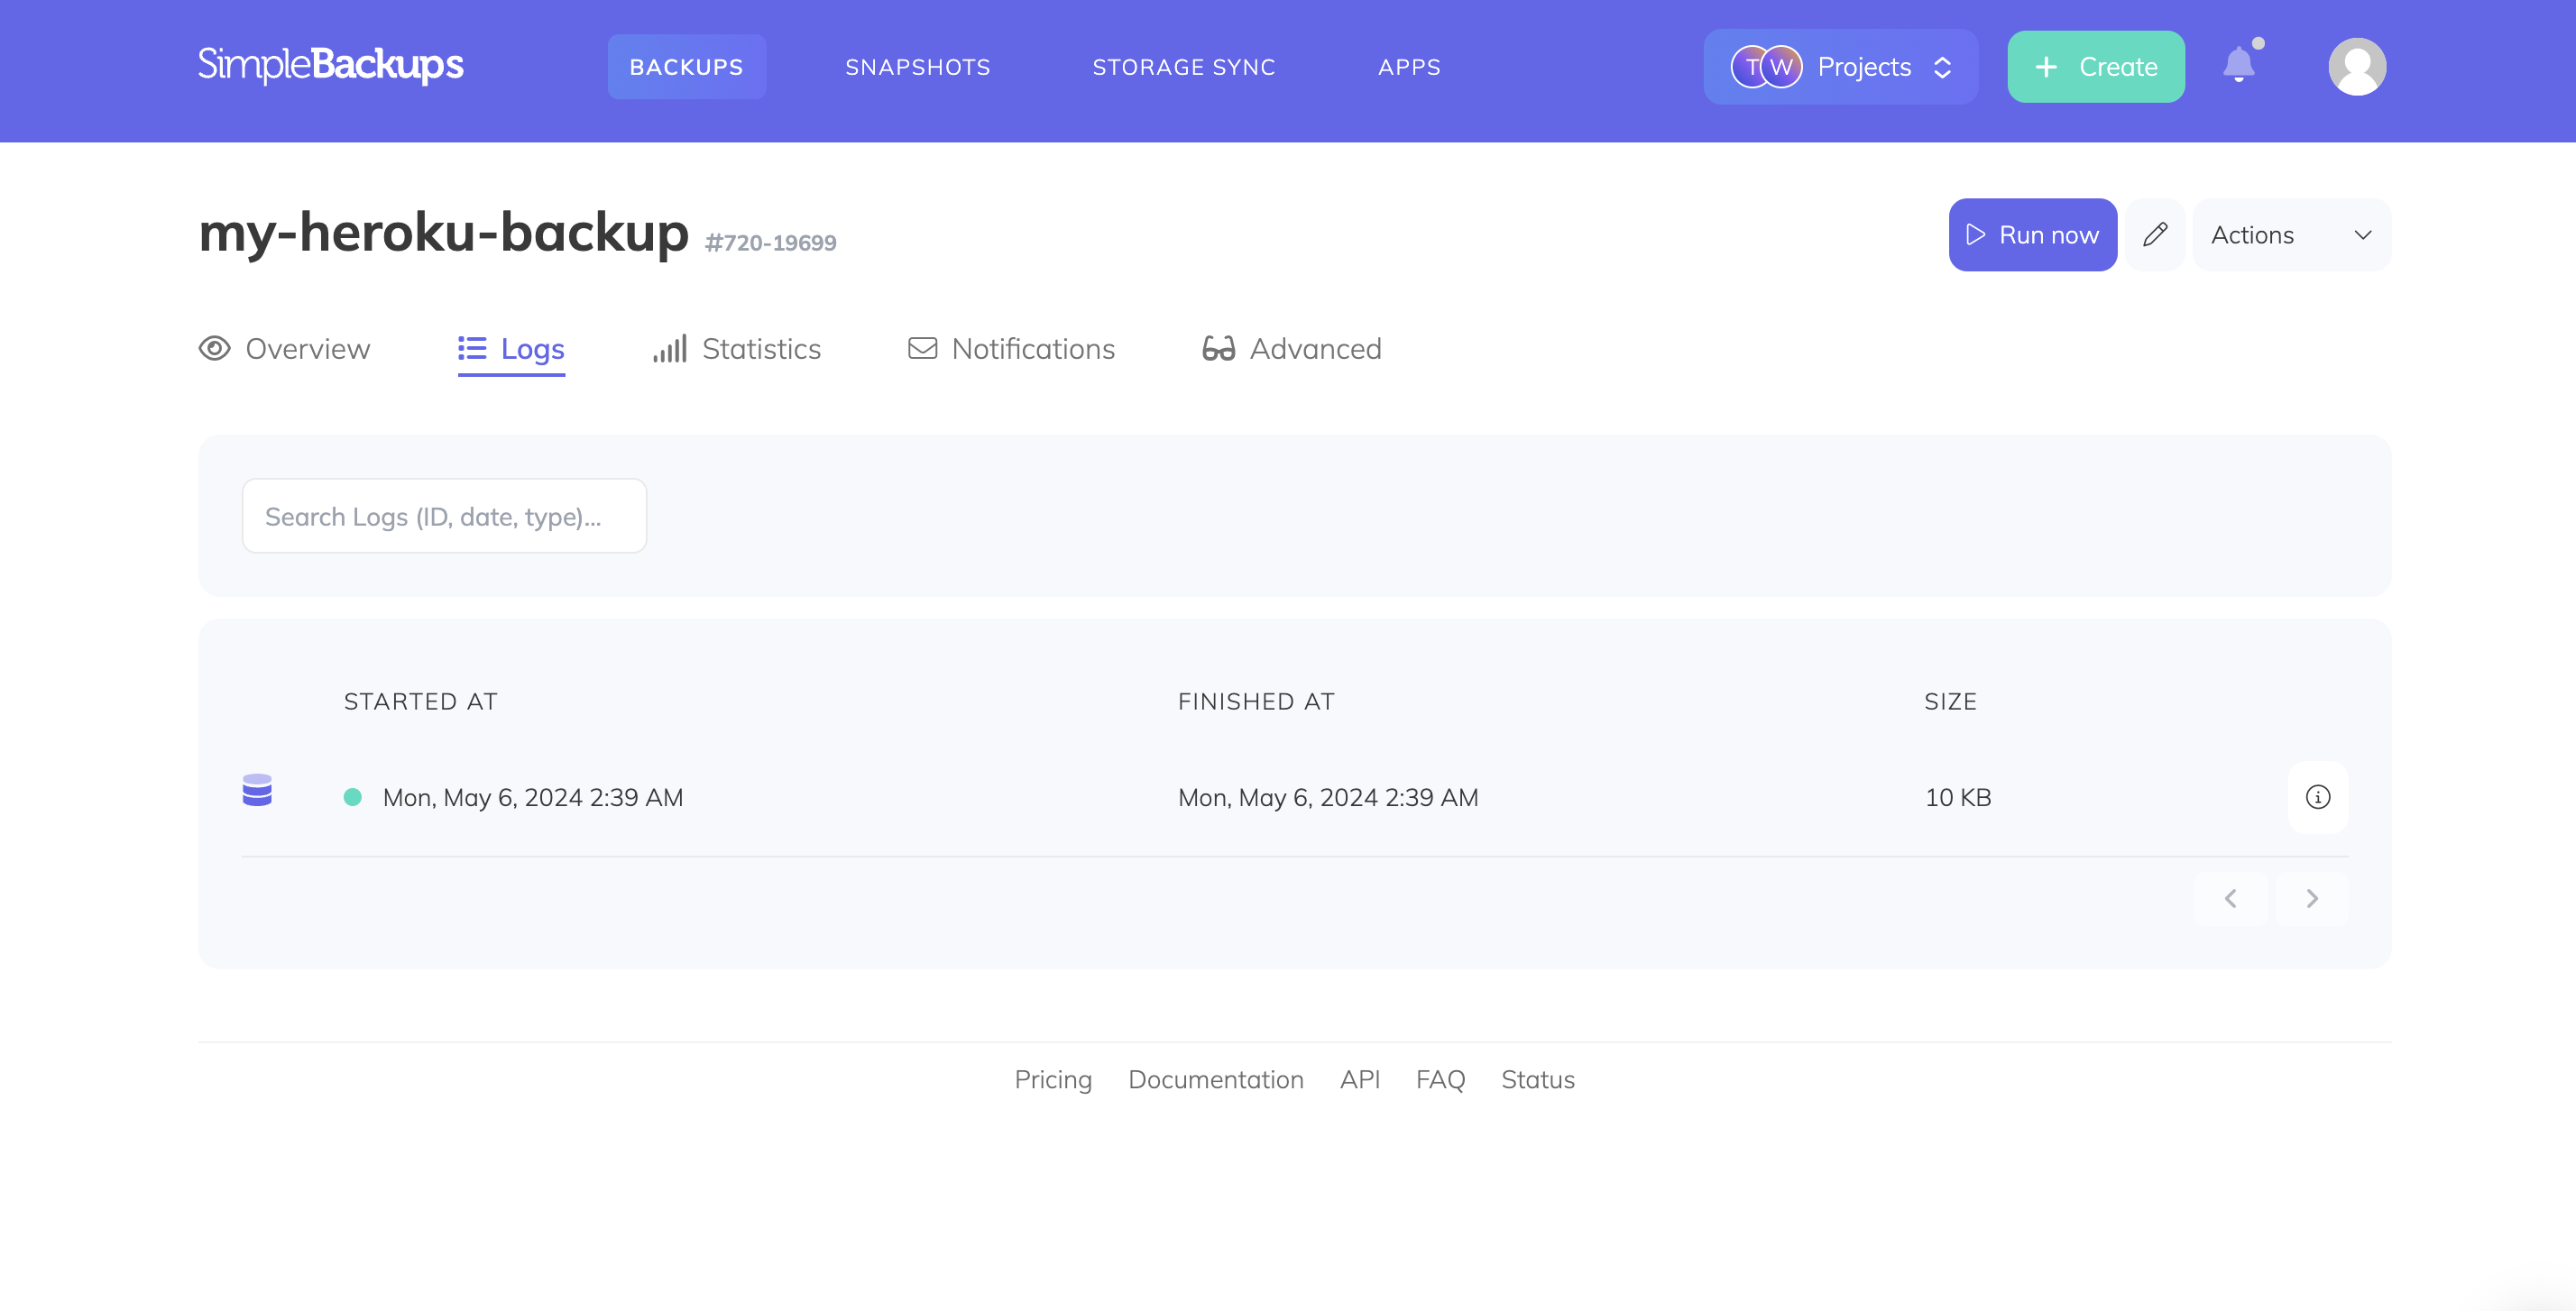
To restore a backup, navigate to your backup page and open the Logs tab. Click the detail icon on the backup you want to restore from, then open the Restore tab. Generate a download link and copy it.
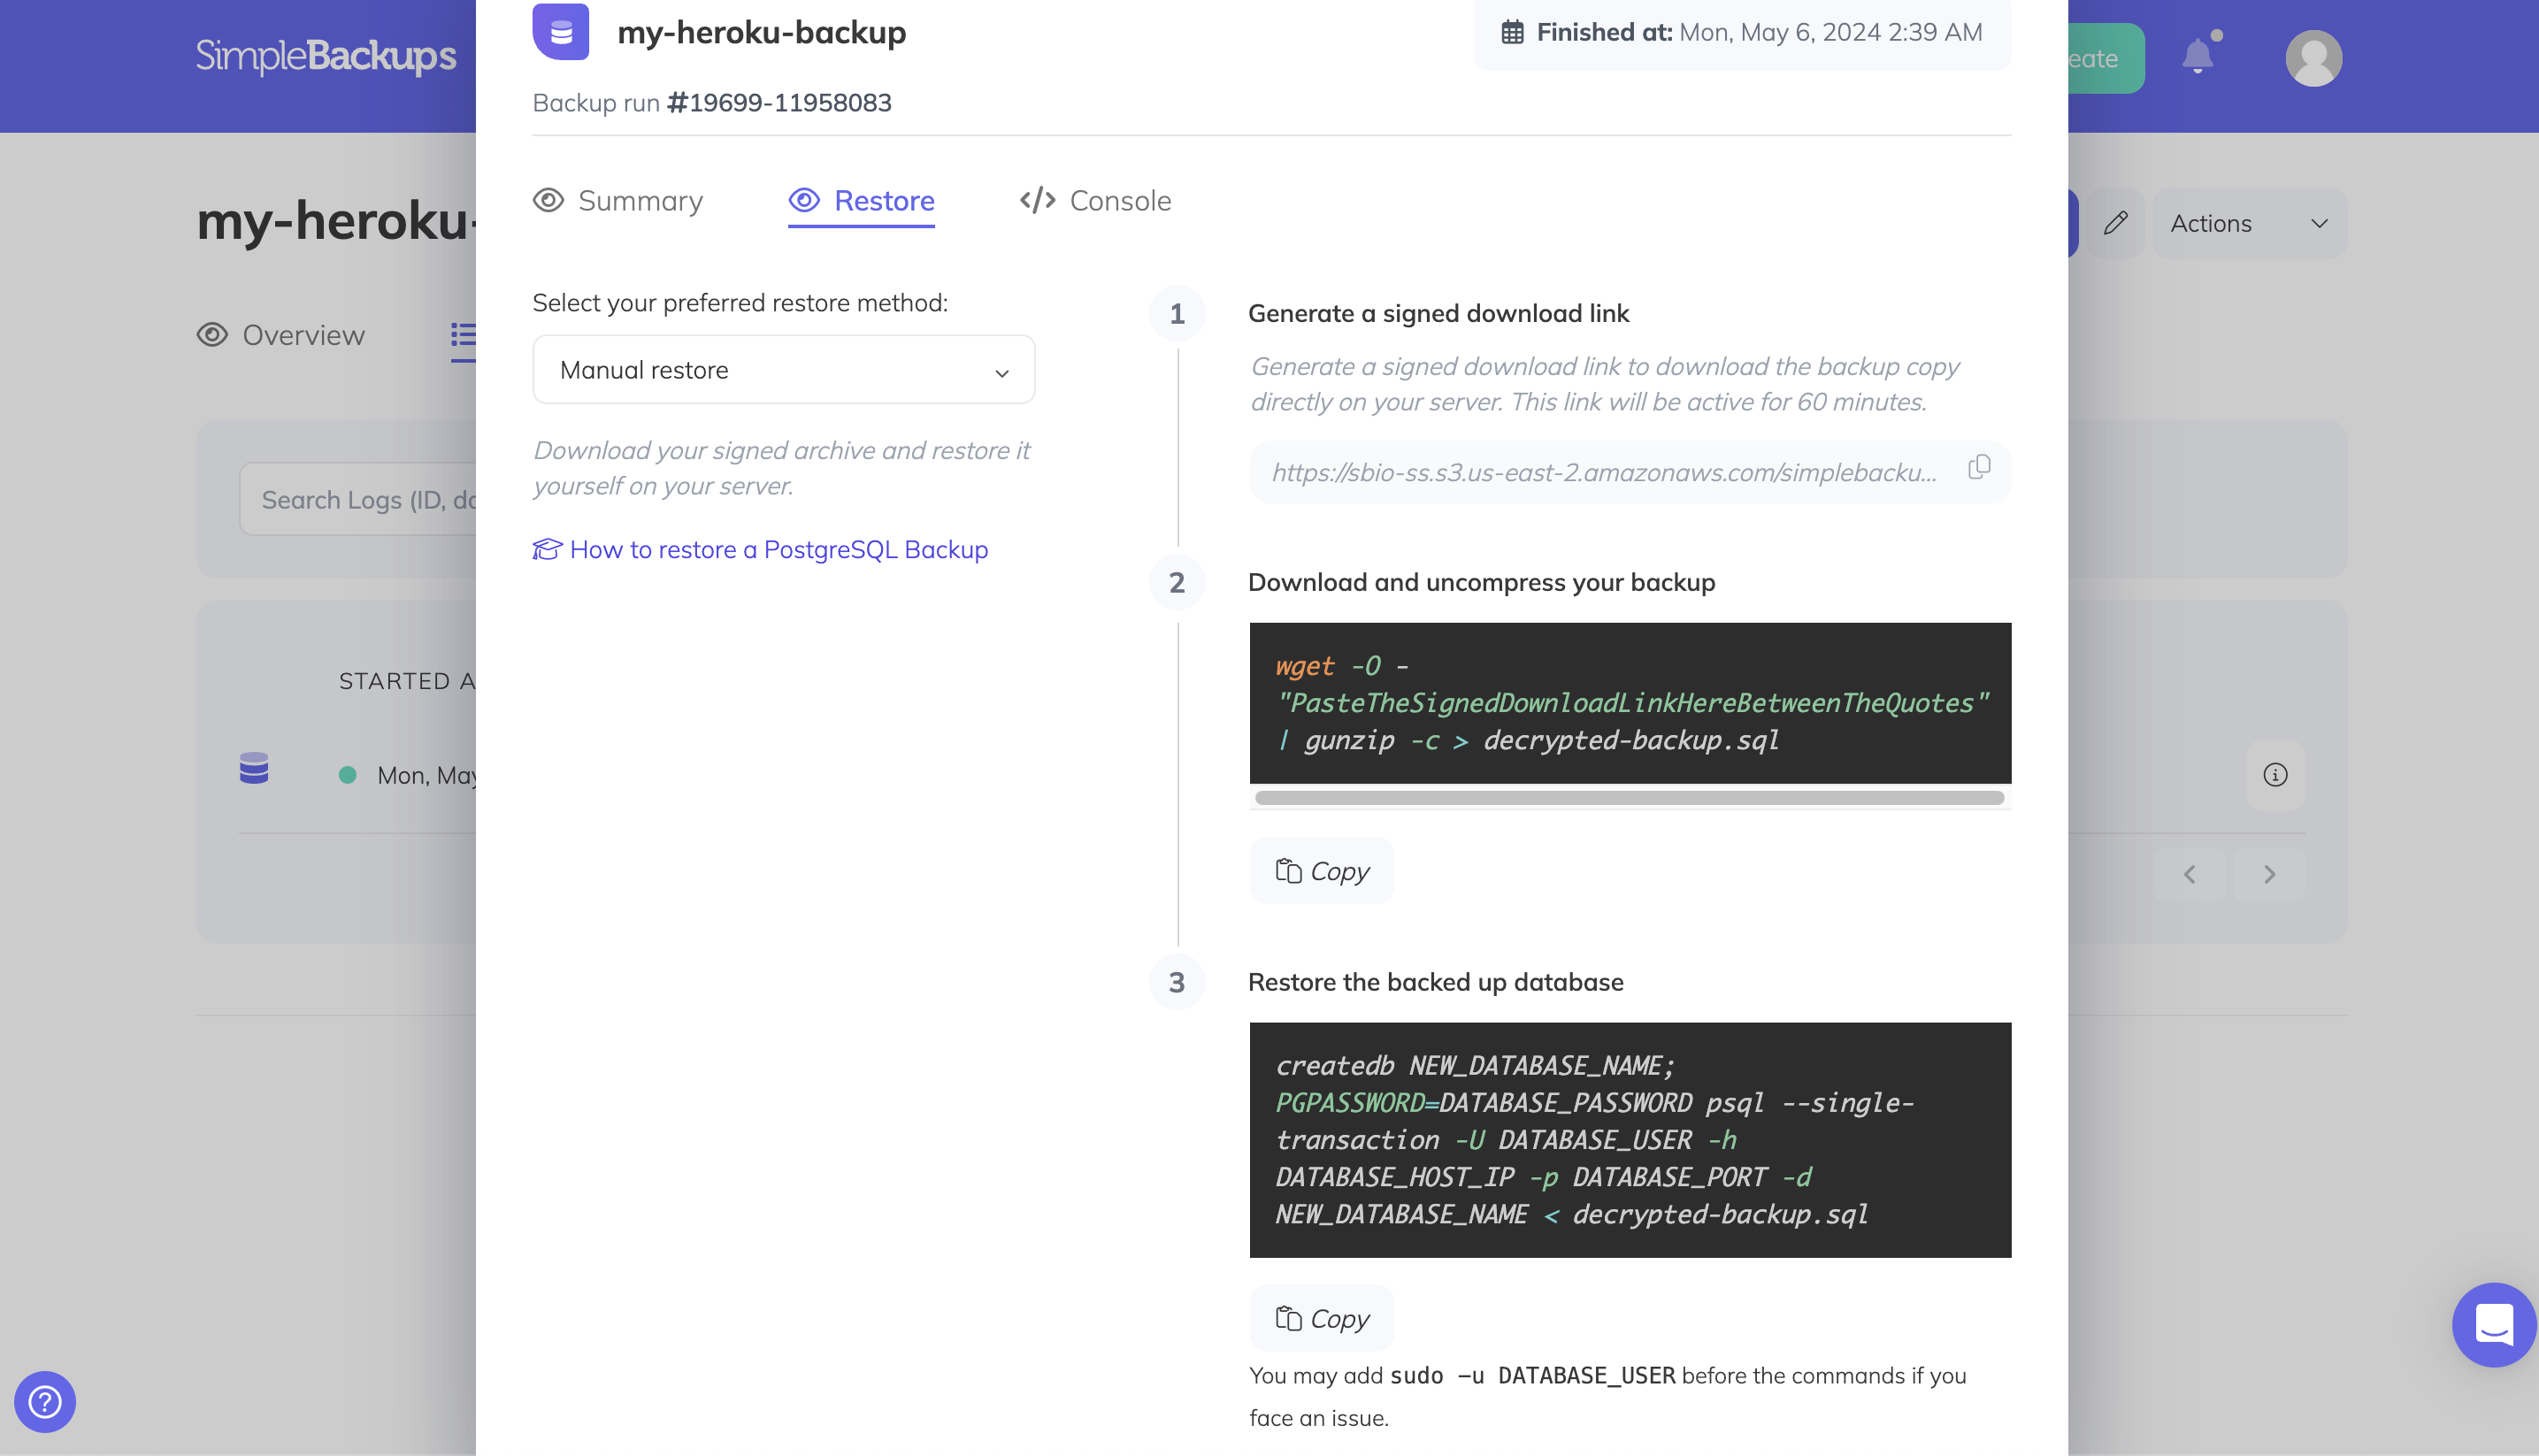
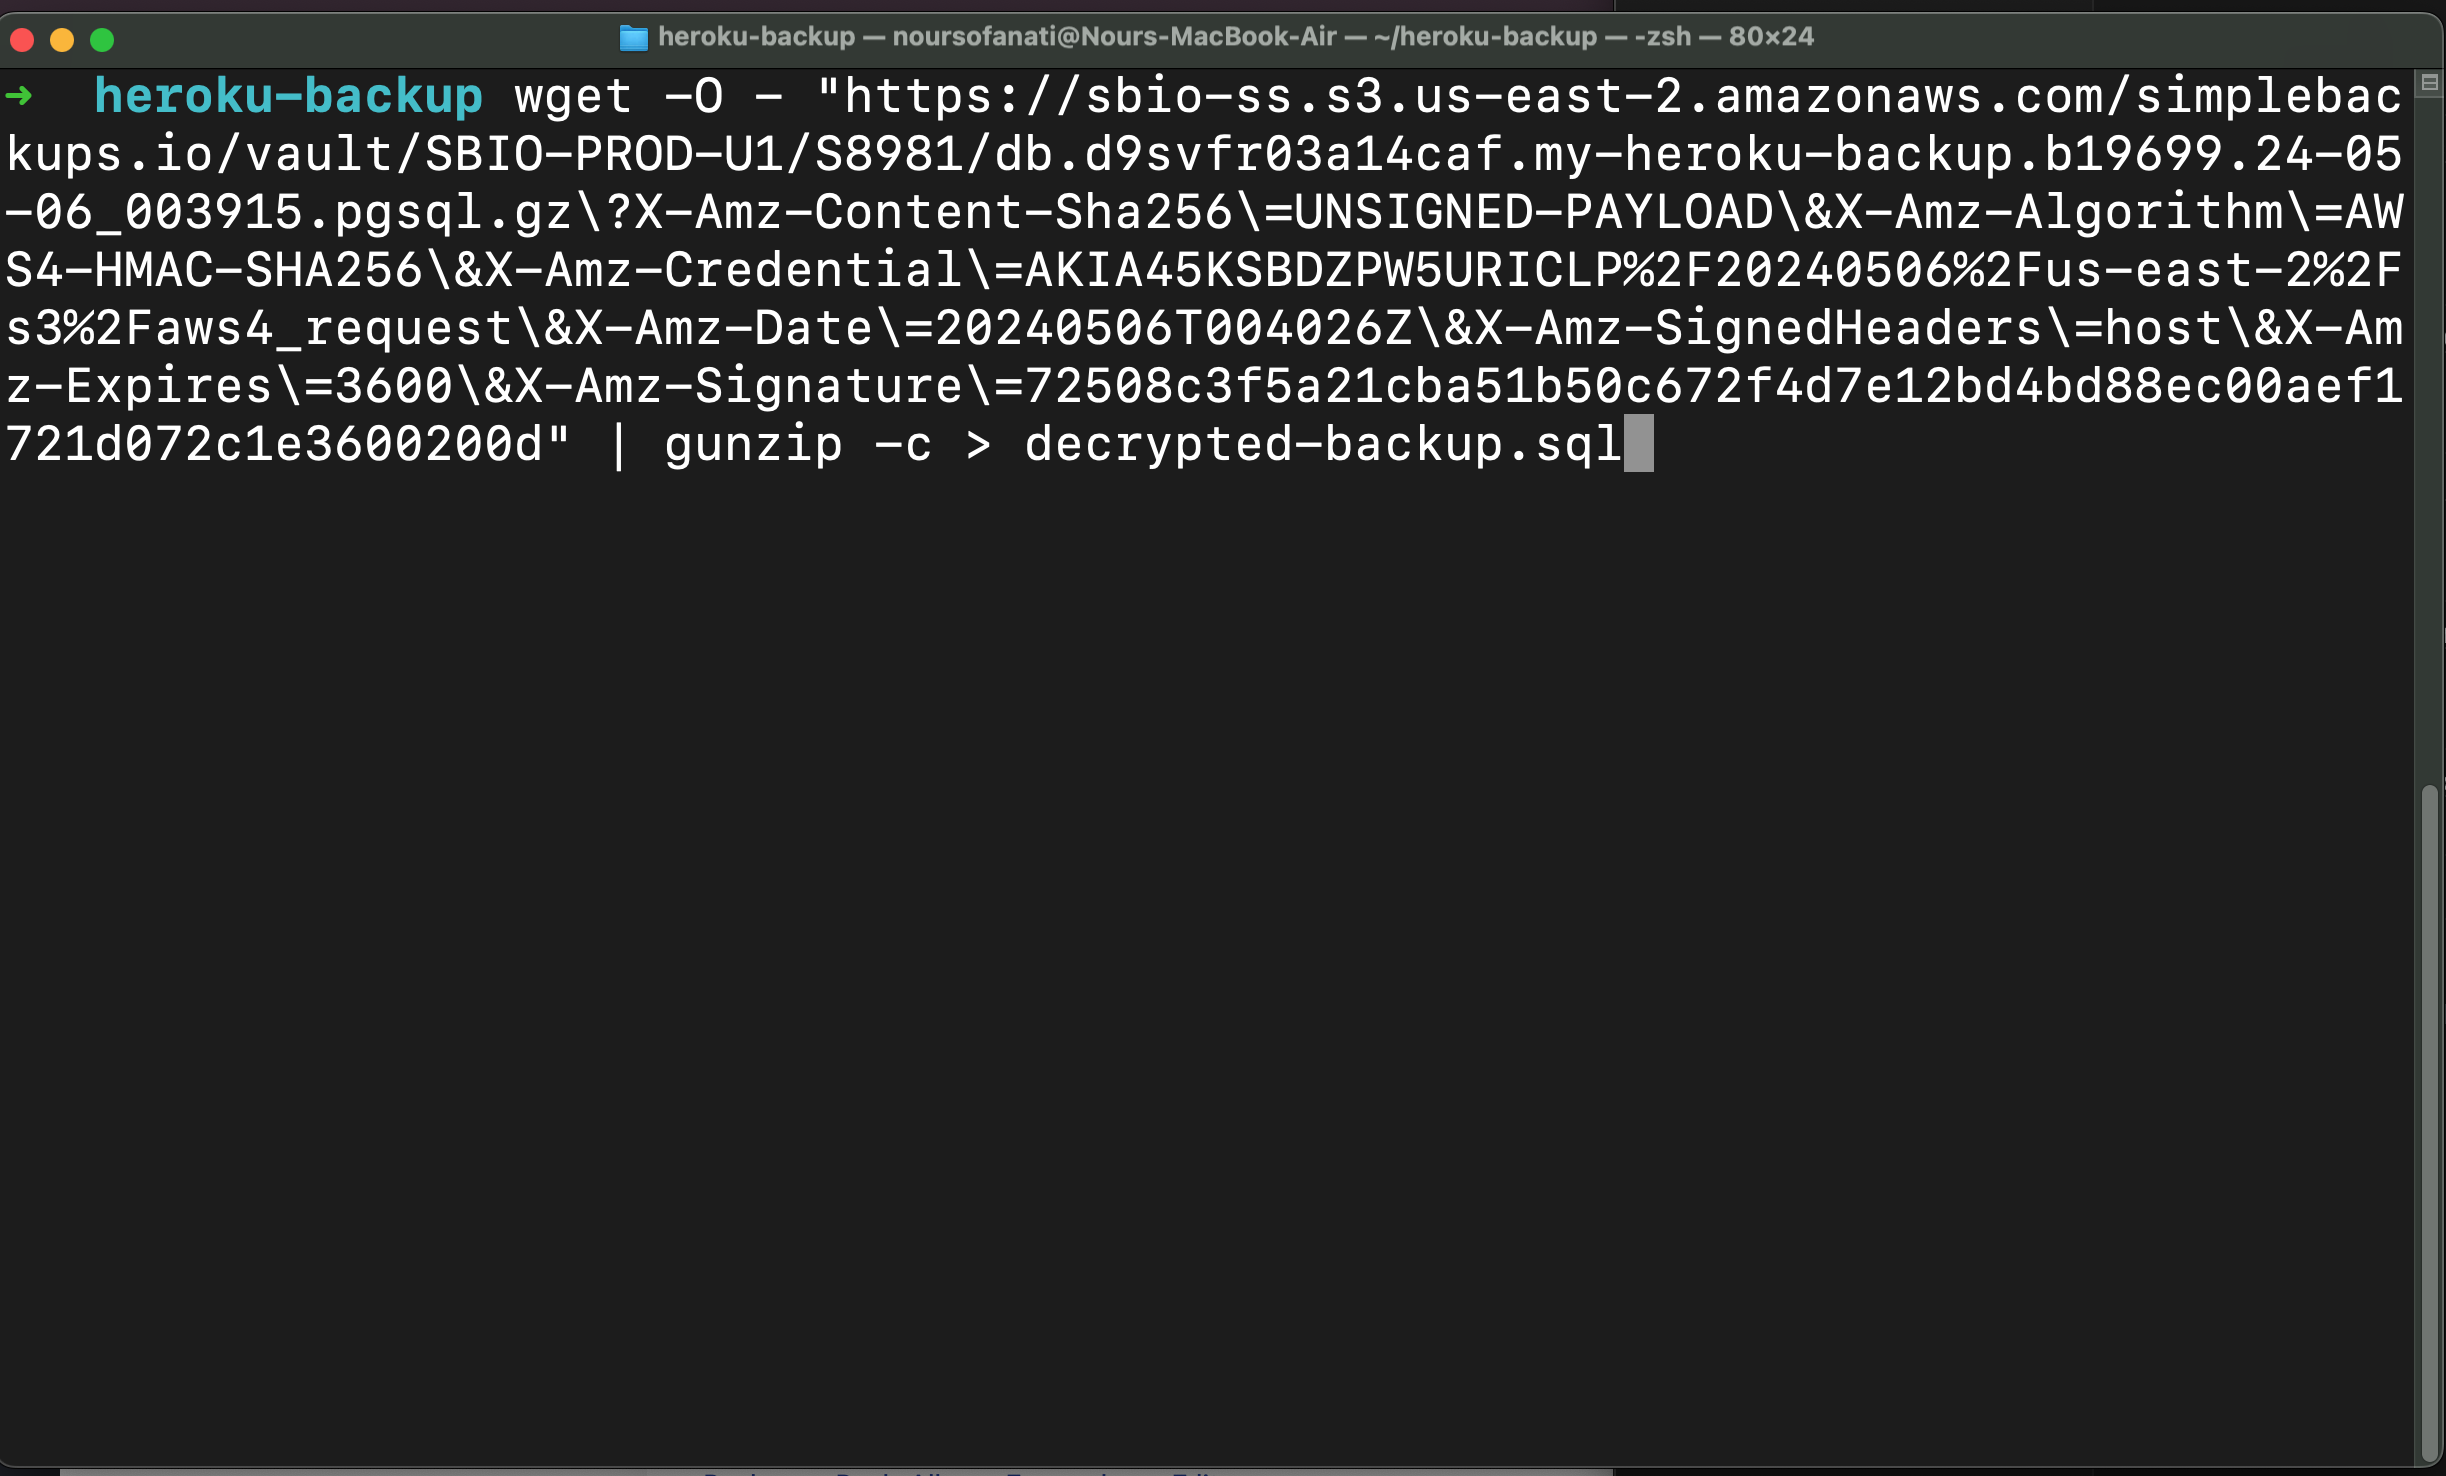
Run the following command to download and decompress your backup (replace the URL with your signed download link):
bash
wget -O - "<signed-download-url>" | gunzip -c > backup.pgsqlThen restore using pg_restore, replacing <your-database-uri> with your full database connection string:
bash
pg_restore -d "<your-database-uri>" ./backup.pgsql