Appearance
Synology C2
Steps to connect your Synology C2 storage to SimpleBackups
How to Connect your Synology bucket to SimpleBackups
1. Create your Synology C2 Bucket
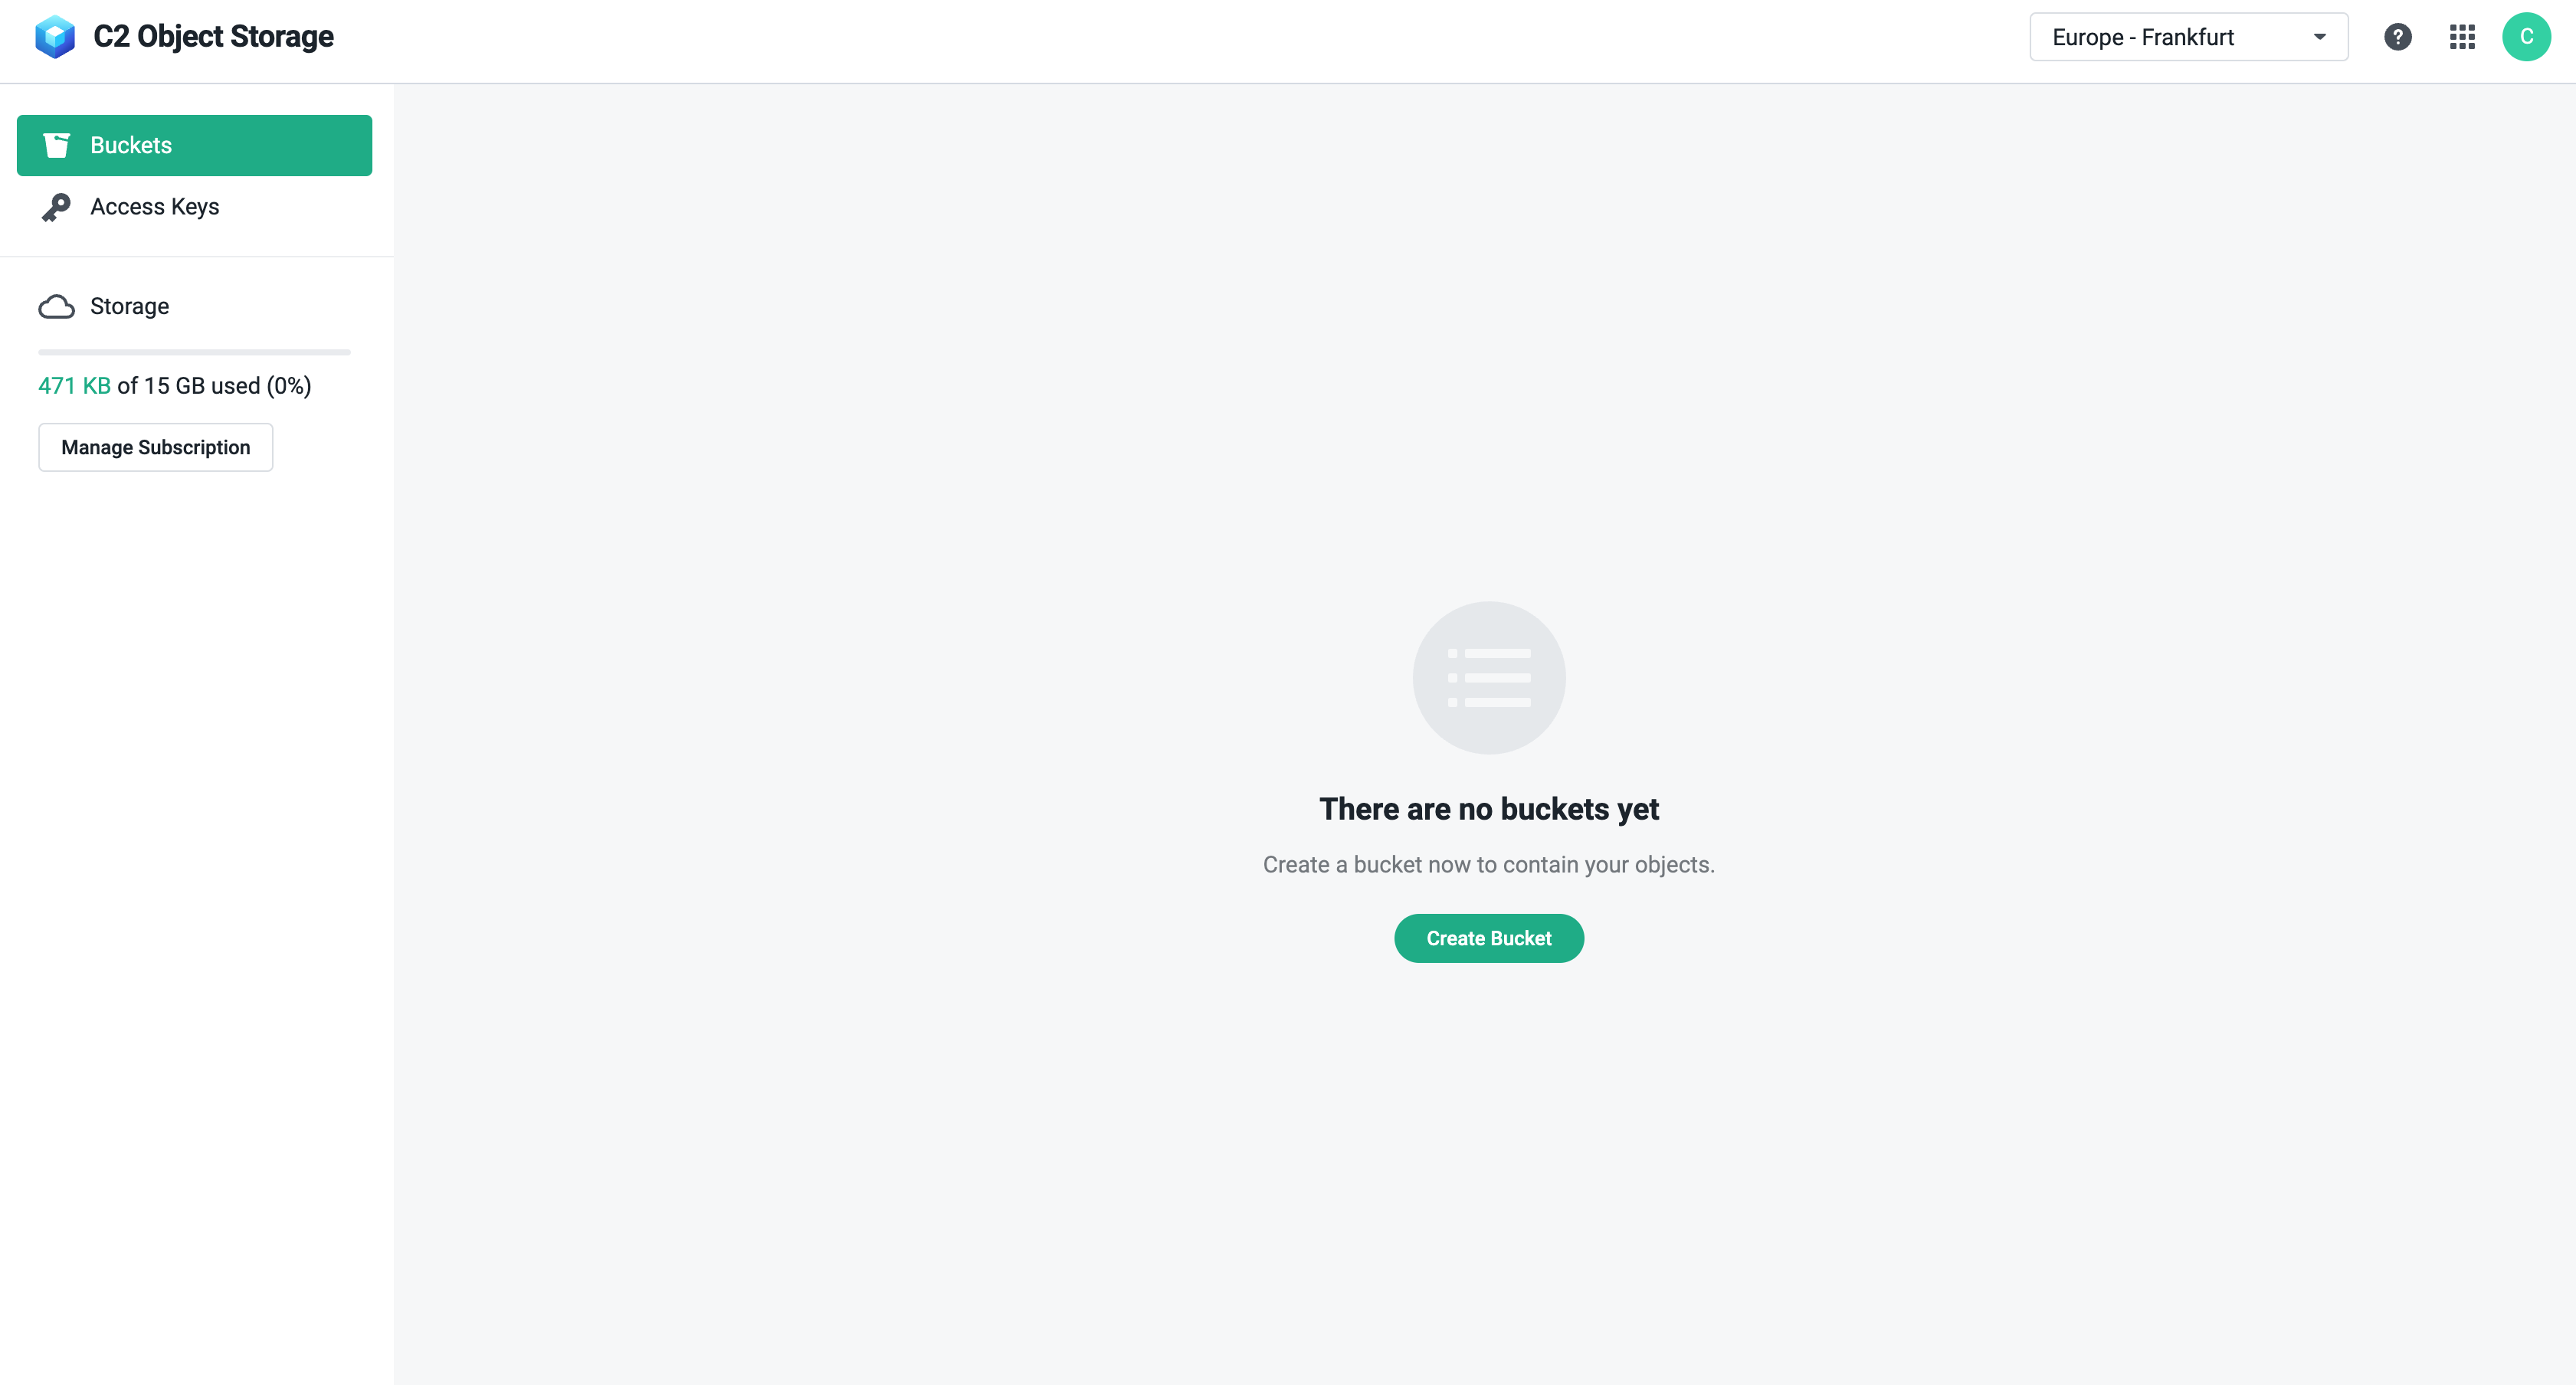
- Log into your Synology account
- Go to the Bucket page, create a new Bucket if you don’t have one.
- Fill in your Bucket name and create the Bucket, and check the Create an access key for this bucket checkbox. Give your access key a description, (e.g. SimpleBackups Access)
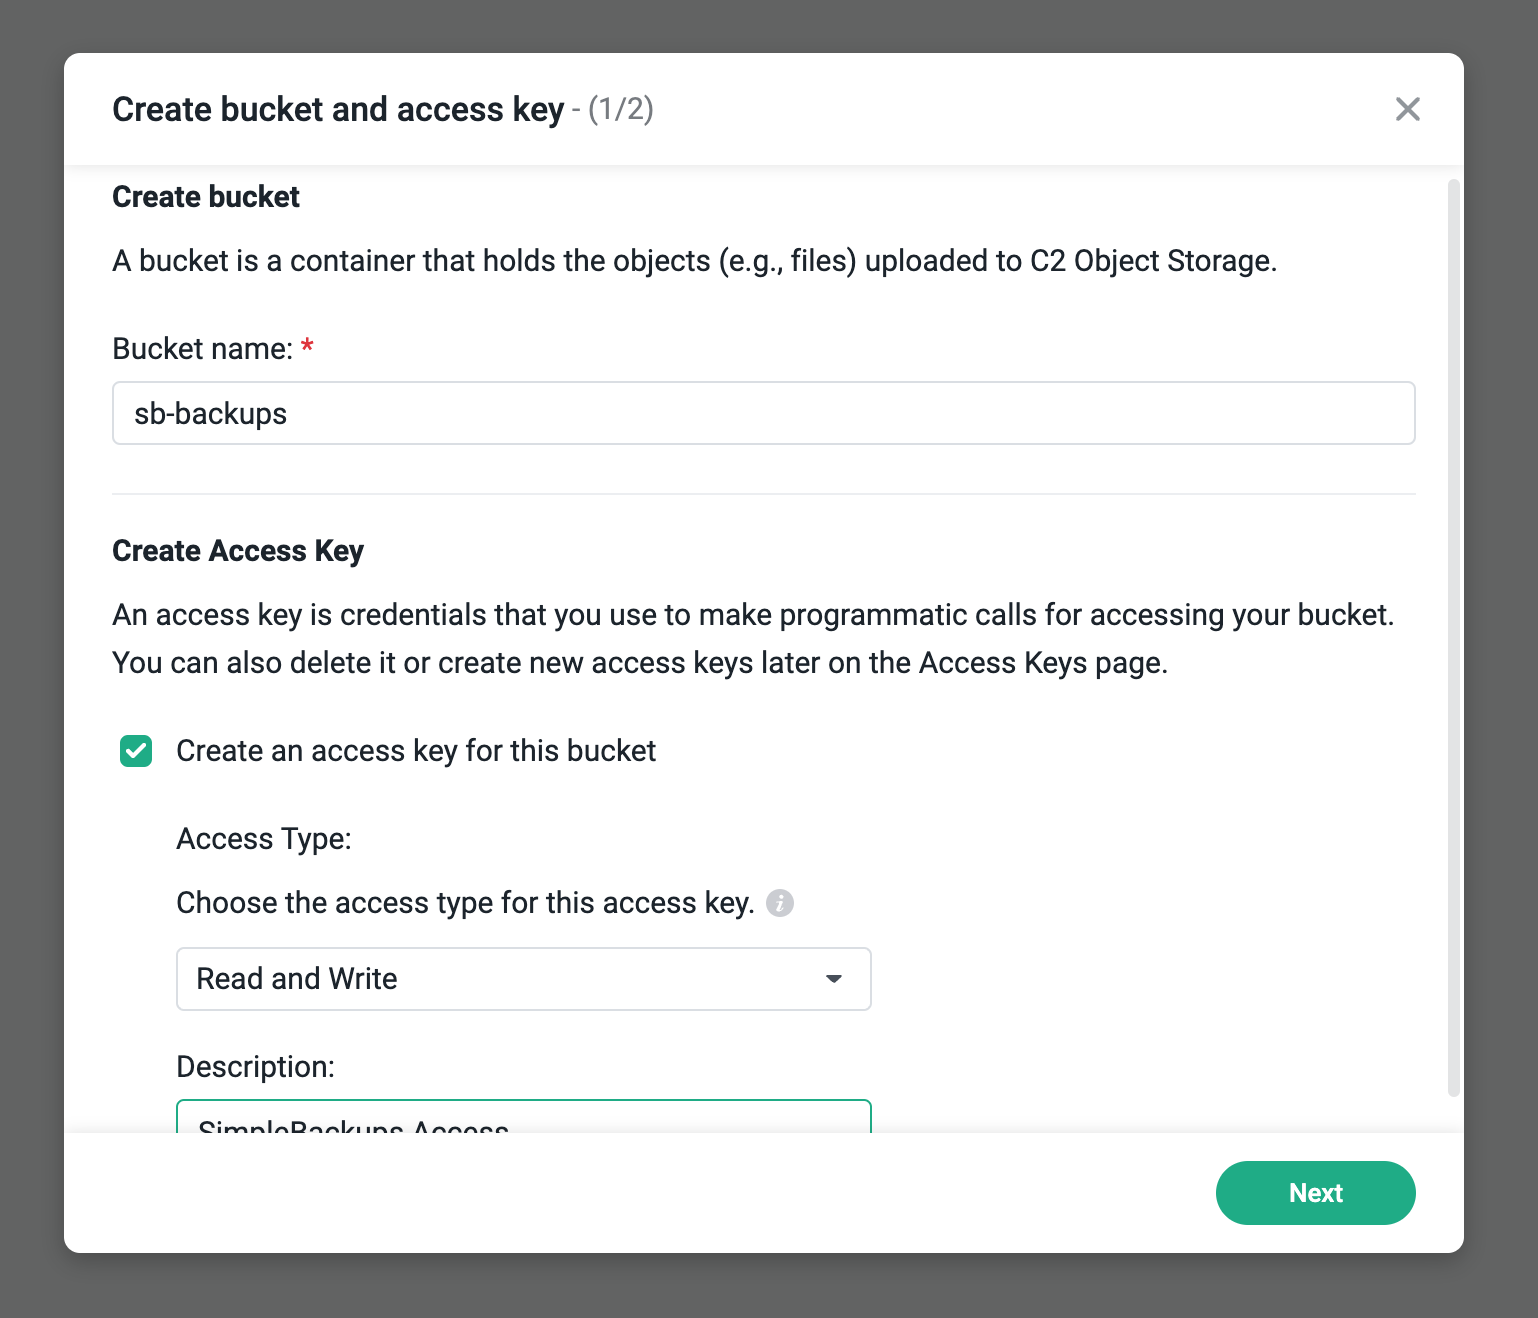
Good job! Your bucket is created.
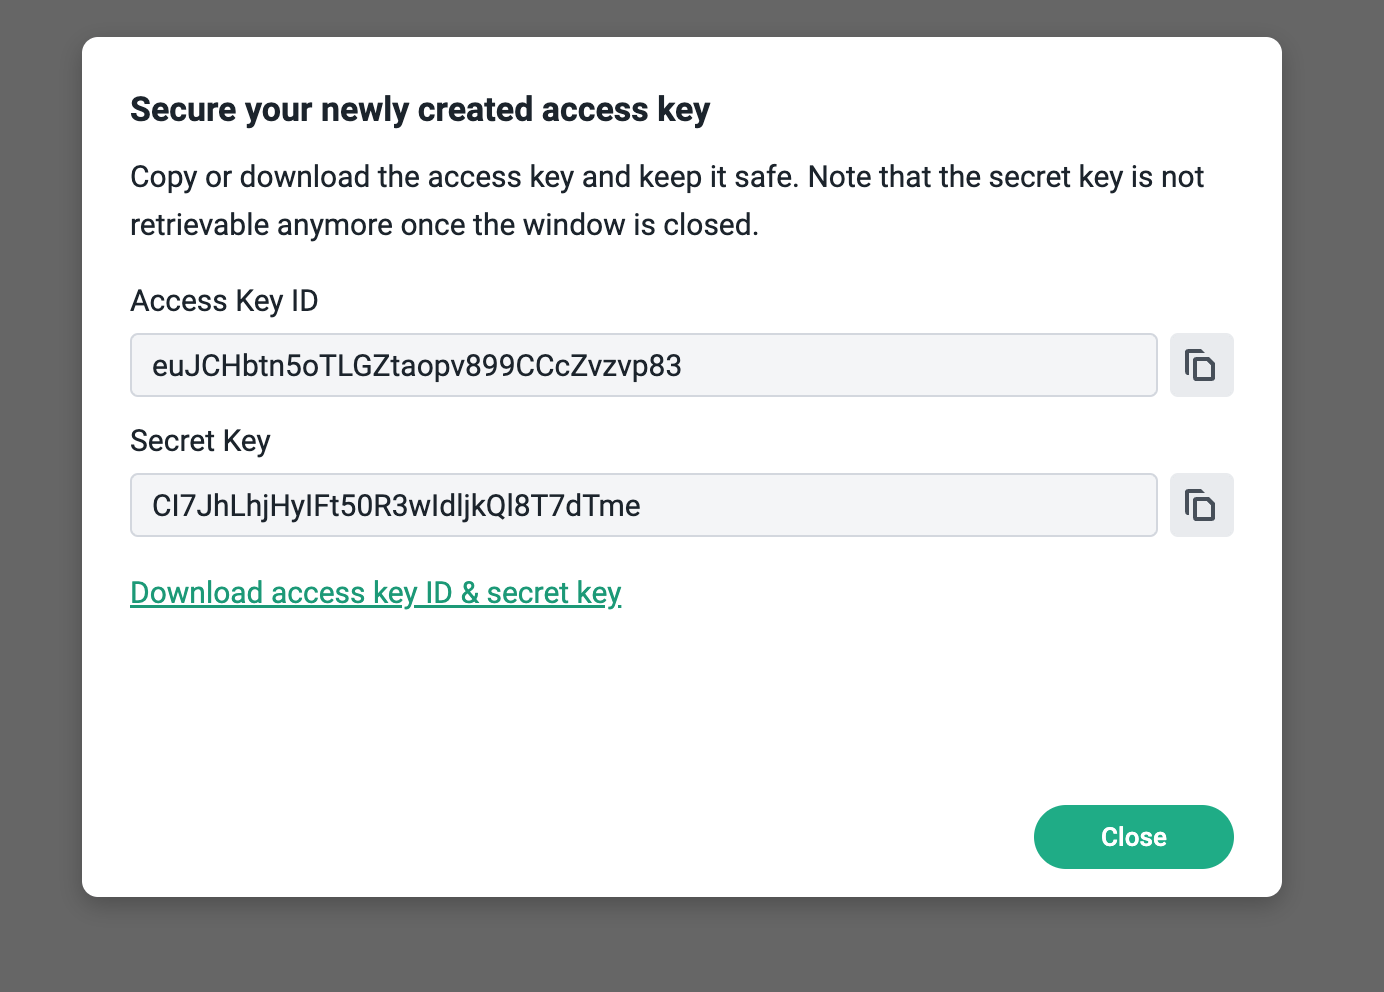
Don't leave the Synology C2 interface yet, we'll now have to copy the Credentials, make sure to store them somewhere safe.
After the bucket has been created, not the endpoint lowest subdomain, in this case it was the eu-003 region.

2. Connect your Bucket to SimpleBackups
So far we have created a Bucket and have created the required credentials to get access to this it. The only remaining step is connecting this new storage to SimpleBackups.
- Log into SimpleBackups and head to the connect your storage page
- Select "Synology" as storage provider and fill in the "Connect your storage" form with the information from step 1 and 2.
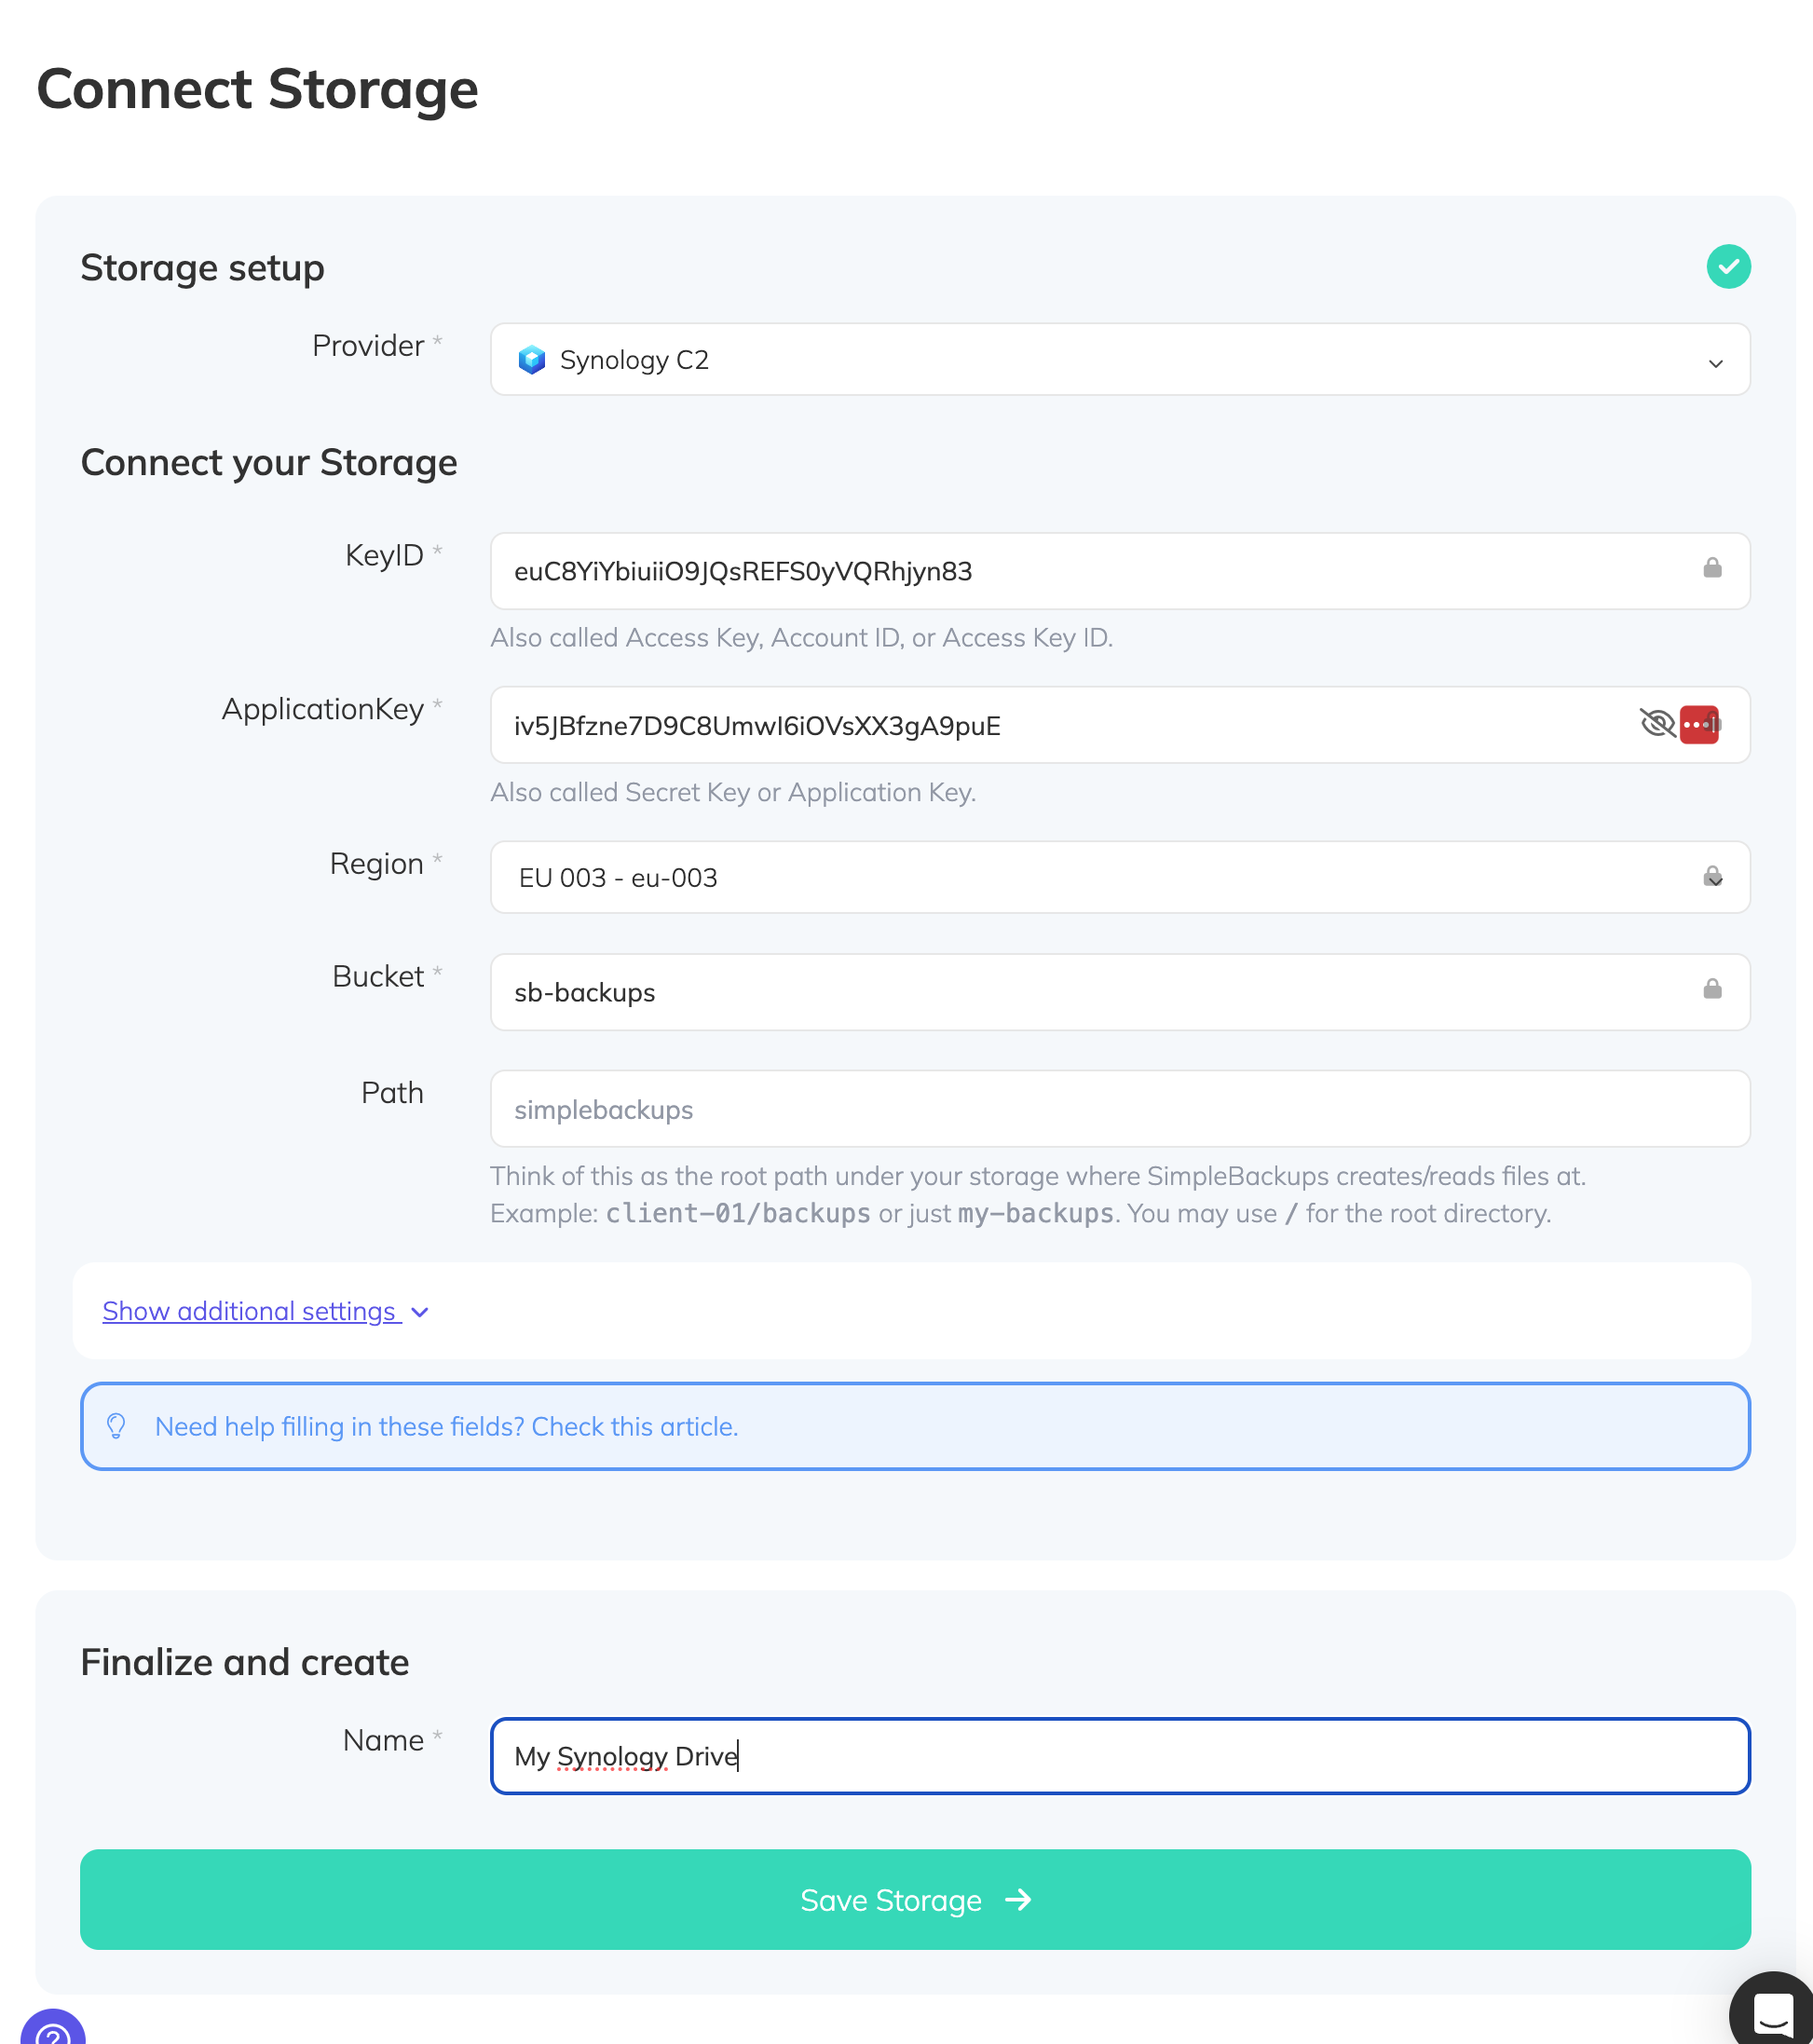
You'll have to input :
- Key: KeyID described in (step 1)
- Secret: applicationKey described in (step 1)
- Region: Bucket region described in (step 1)
- Bucket: Bucket name described in (step 1)
- Give your storage a name (usually we like to use the Bucket name) and click on "Save new storage".