Appearance
Cloudflare R2
This guide walks you through creating a Cloudflare R2 API token and connecting your bucket to SimpleBackups — whether you're using R2 as a backup destination (storing backups in R2) or as a backup source (syncing data from R2).
Which permission do I need?
Cloudflare offers four R2 token permission levels. Pick the one that matches how you'll use the bucket in SimpleBackups — least privilege is best.
| How you'll use R2 in SimpleBackups | Cloudflare permission to choose | Why |
|---|---|---|
| Backup destination (store backups in R2) | Object Read & Write | SimpleBackups needs to upload, overwrite, and delete objects to apply your retention policy. |
| Backup / Sync source (copy data from R2) | Object Read only | We only need to list and read objects. |
| Let SimpleBackups create the bucket for you | Admin Read & Write | Required to create new buckets and edit bucket configuration. |
Object Read & Write and Object Read only can both be scoped to specific buckets, which we recommend. Admin permissions are account-wide and cannot be bucket-scoped.
Use an Account API token, not a User API token. Account tokens are tied to your Cloudflare account and survive teammate changes. User tokens become inactive if the user who created them leaves the account — which will silently break your backups. See Cloudflare's notes on token types.
Step 1: Open R2 API Tokens
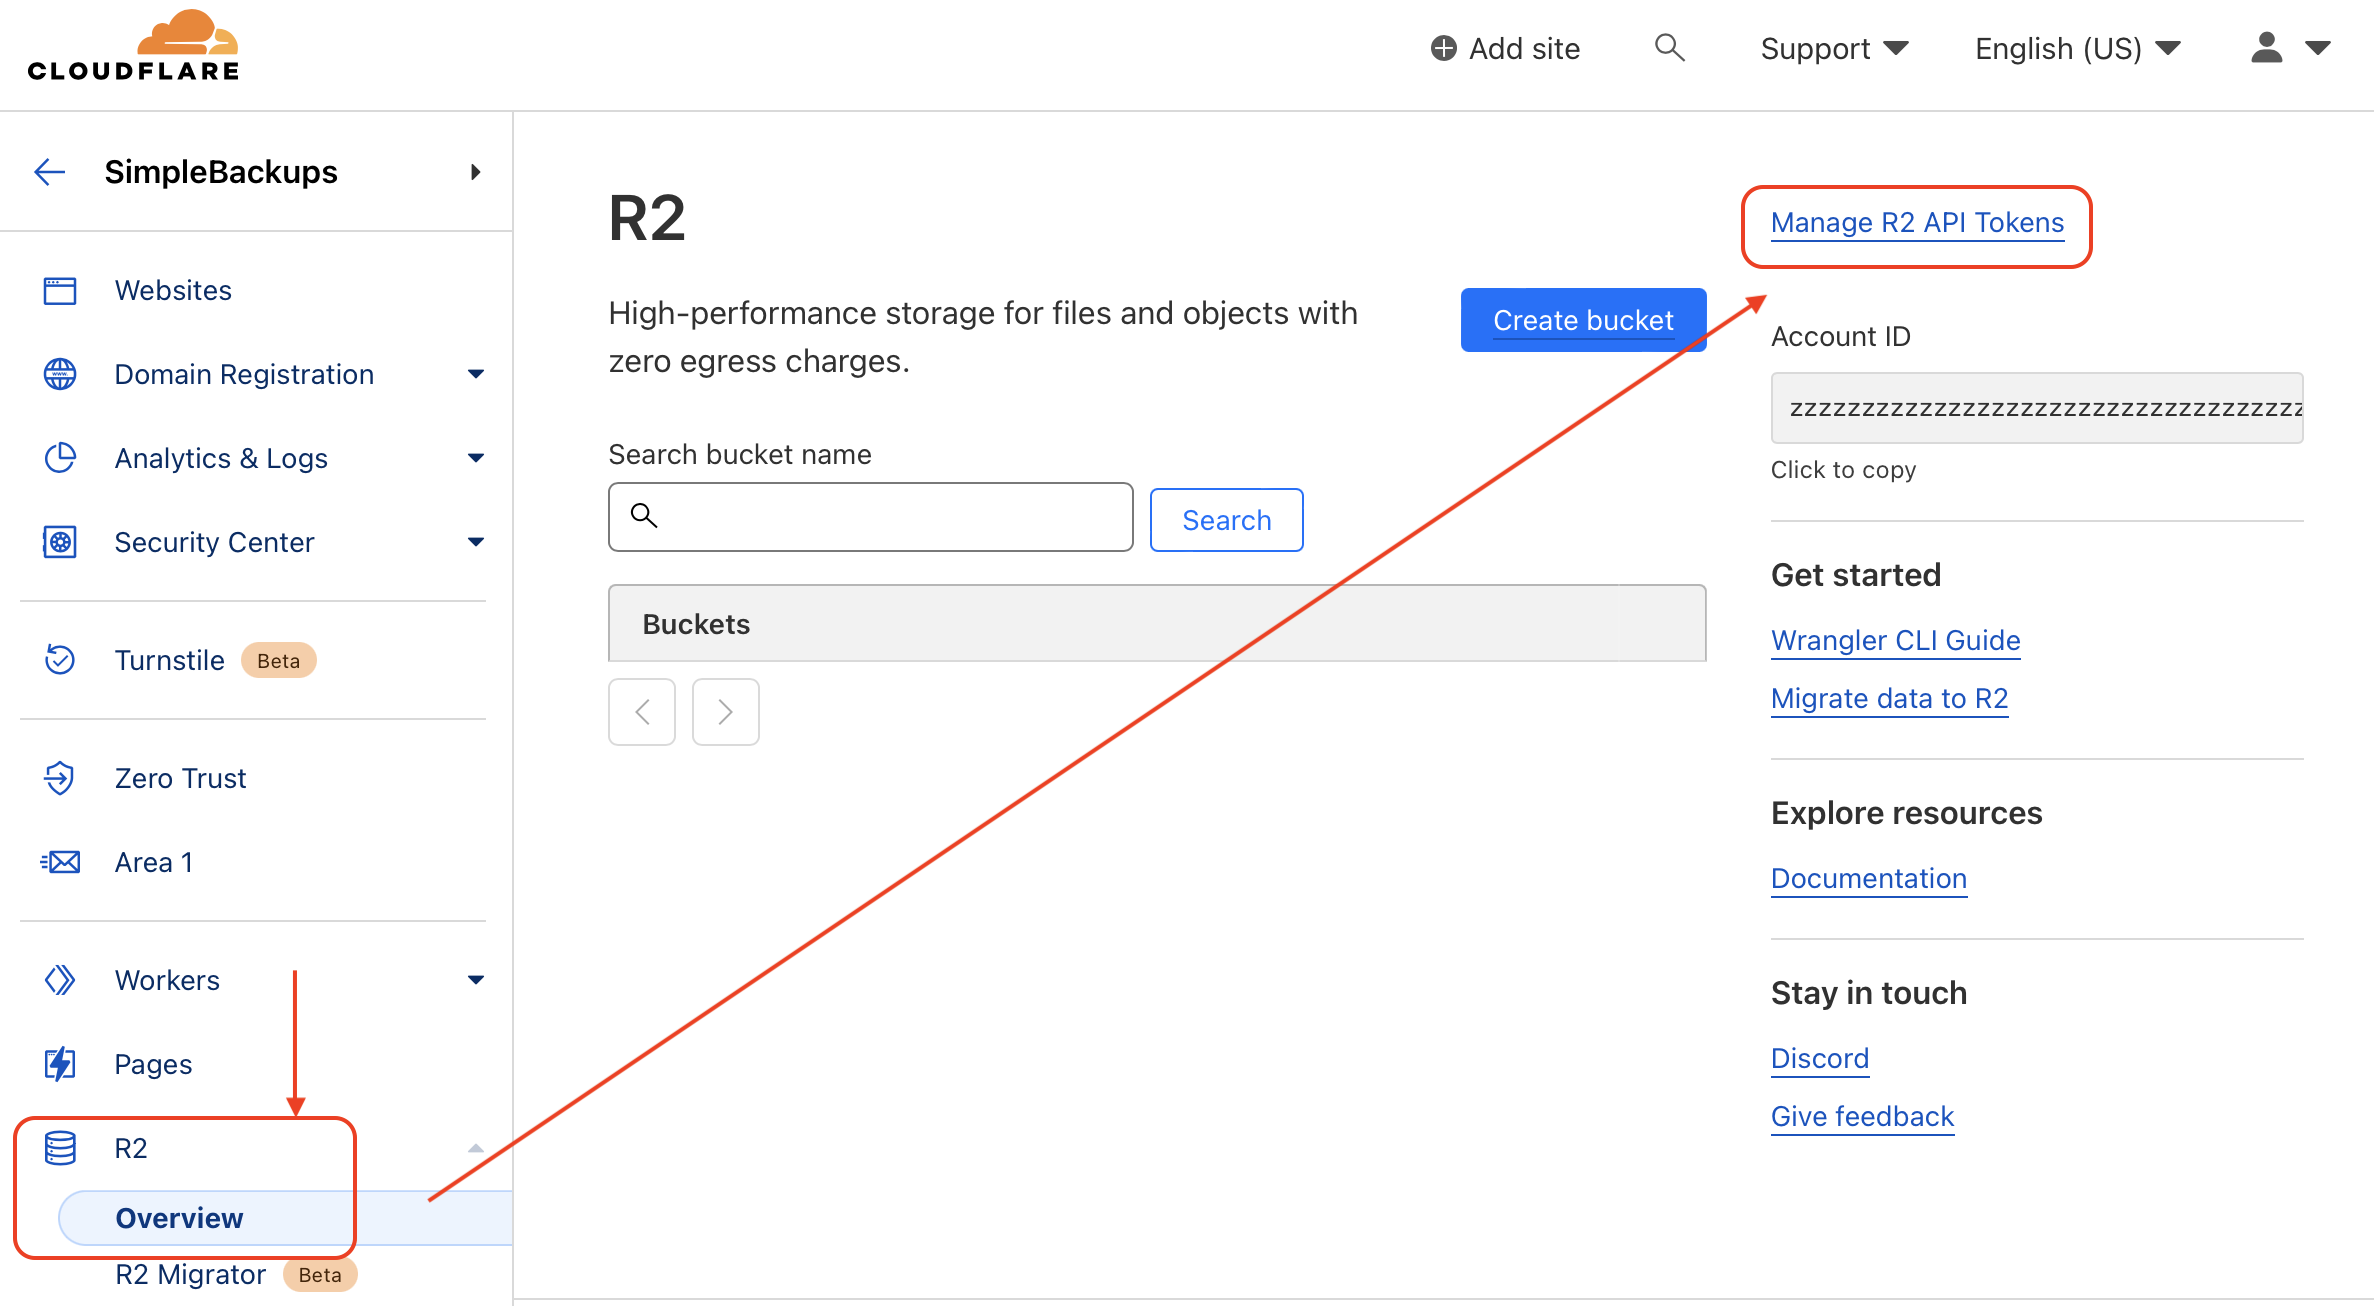
- Log in to the Cloudflare dashboard.
- Click R2 in the left sidebar, then Overview.
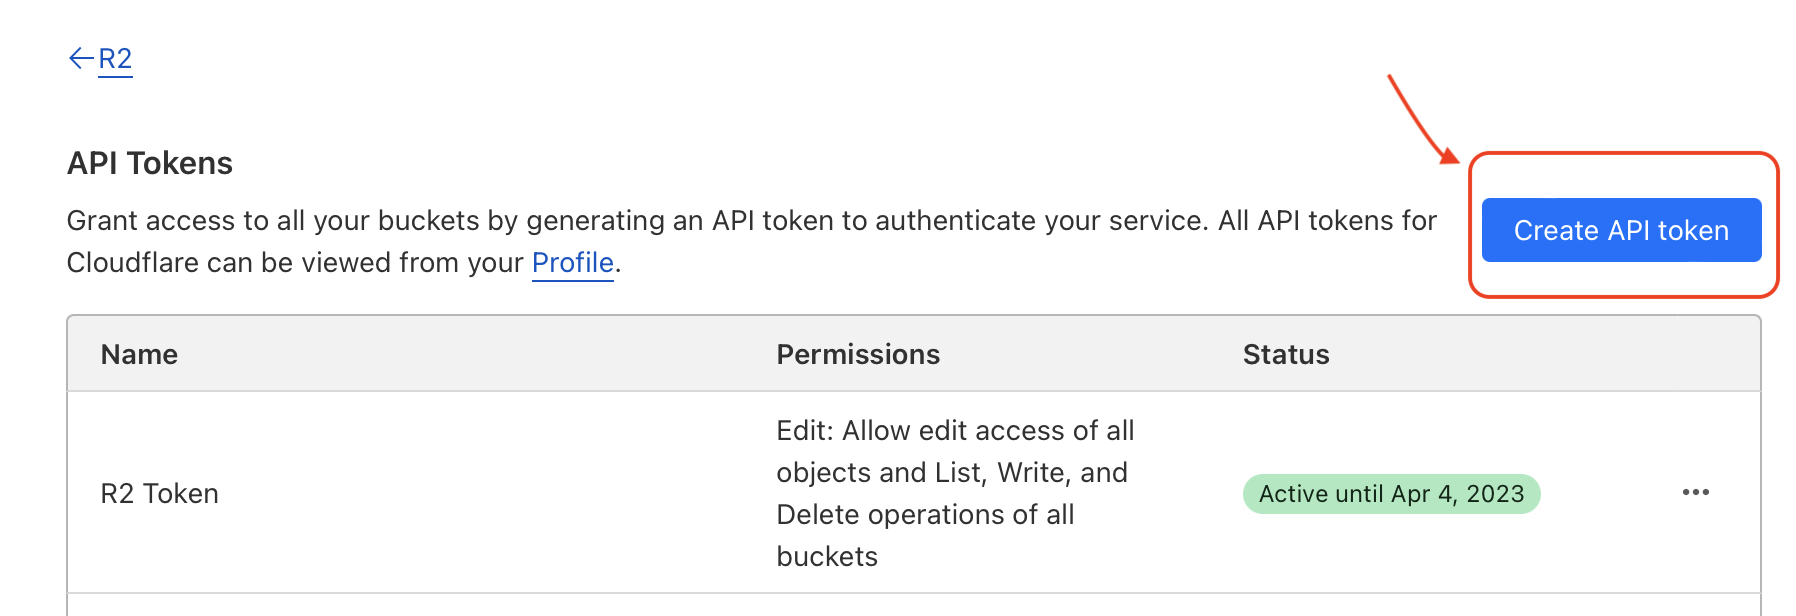
- Click Manage R2 API Tokens (top right), then Create API Token.
Step 2: Configure the token
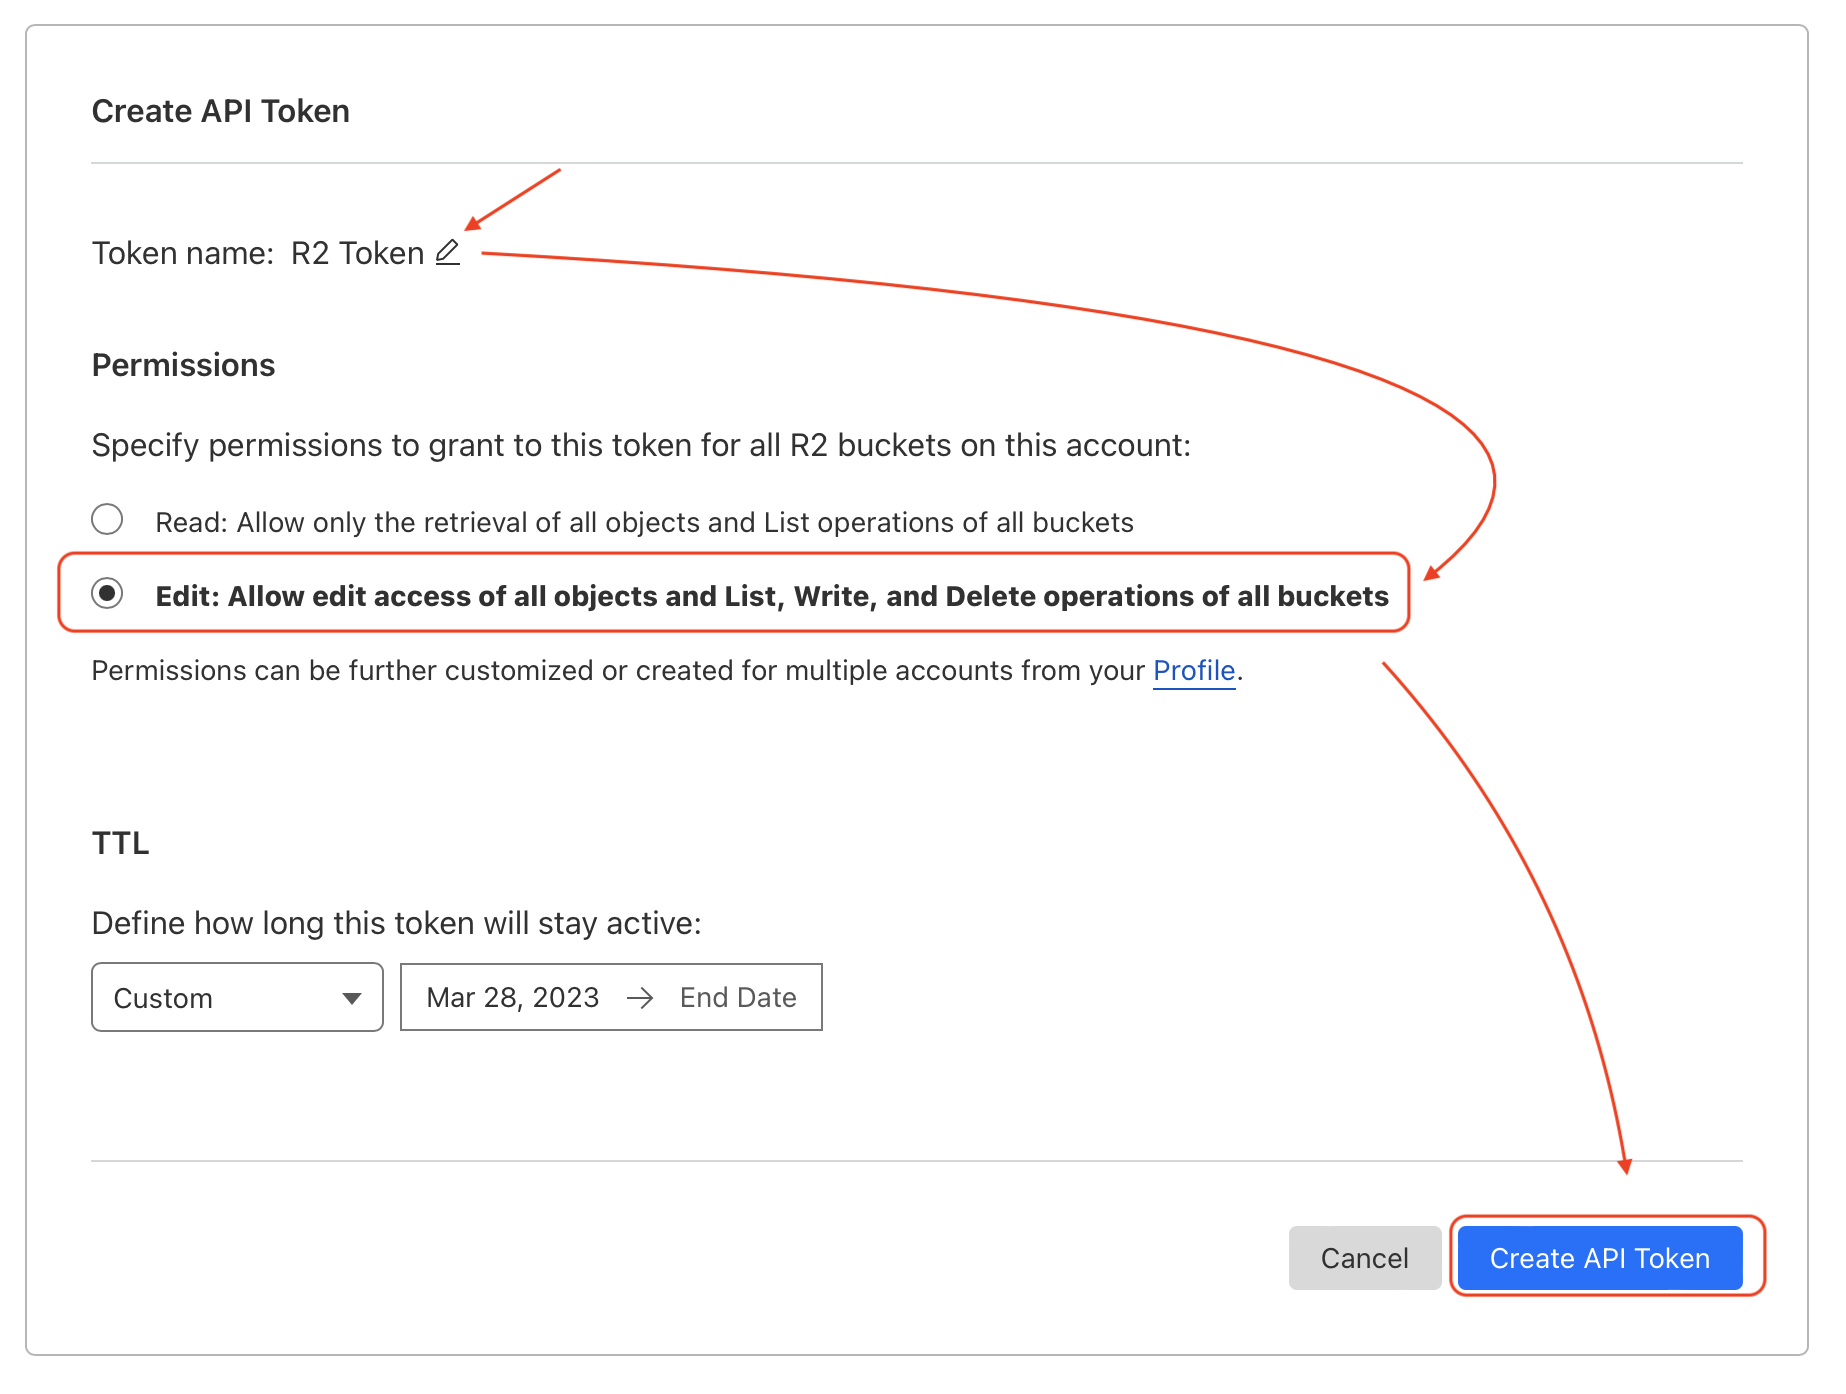
- Token name — something descriptive, e.g.
simplebackups-prod-r2. - Permissions — pick the level from the table above based on your use case.
- Specify bucket(s) — for
Objectpermissions, restrict the token to the bucket(s) you'll back up to/from. - TTL — leave as "Forever" unless you have a rotation policy in place.
- (Optional) Client IP Address Filtering — leave empty; SimpleBackups uses a dynamic range of IPs.
- Click Create API Token.
For the canonical screenshot-by-screenshot walkthrough of the Cloudflare UI, see Cloudflare's "Authentication" docs.
Step 3: Copy your credentials
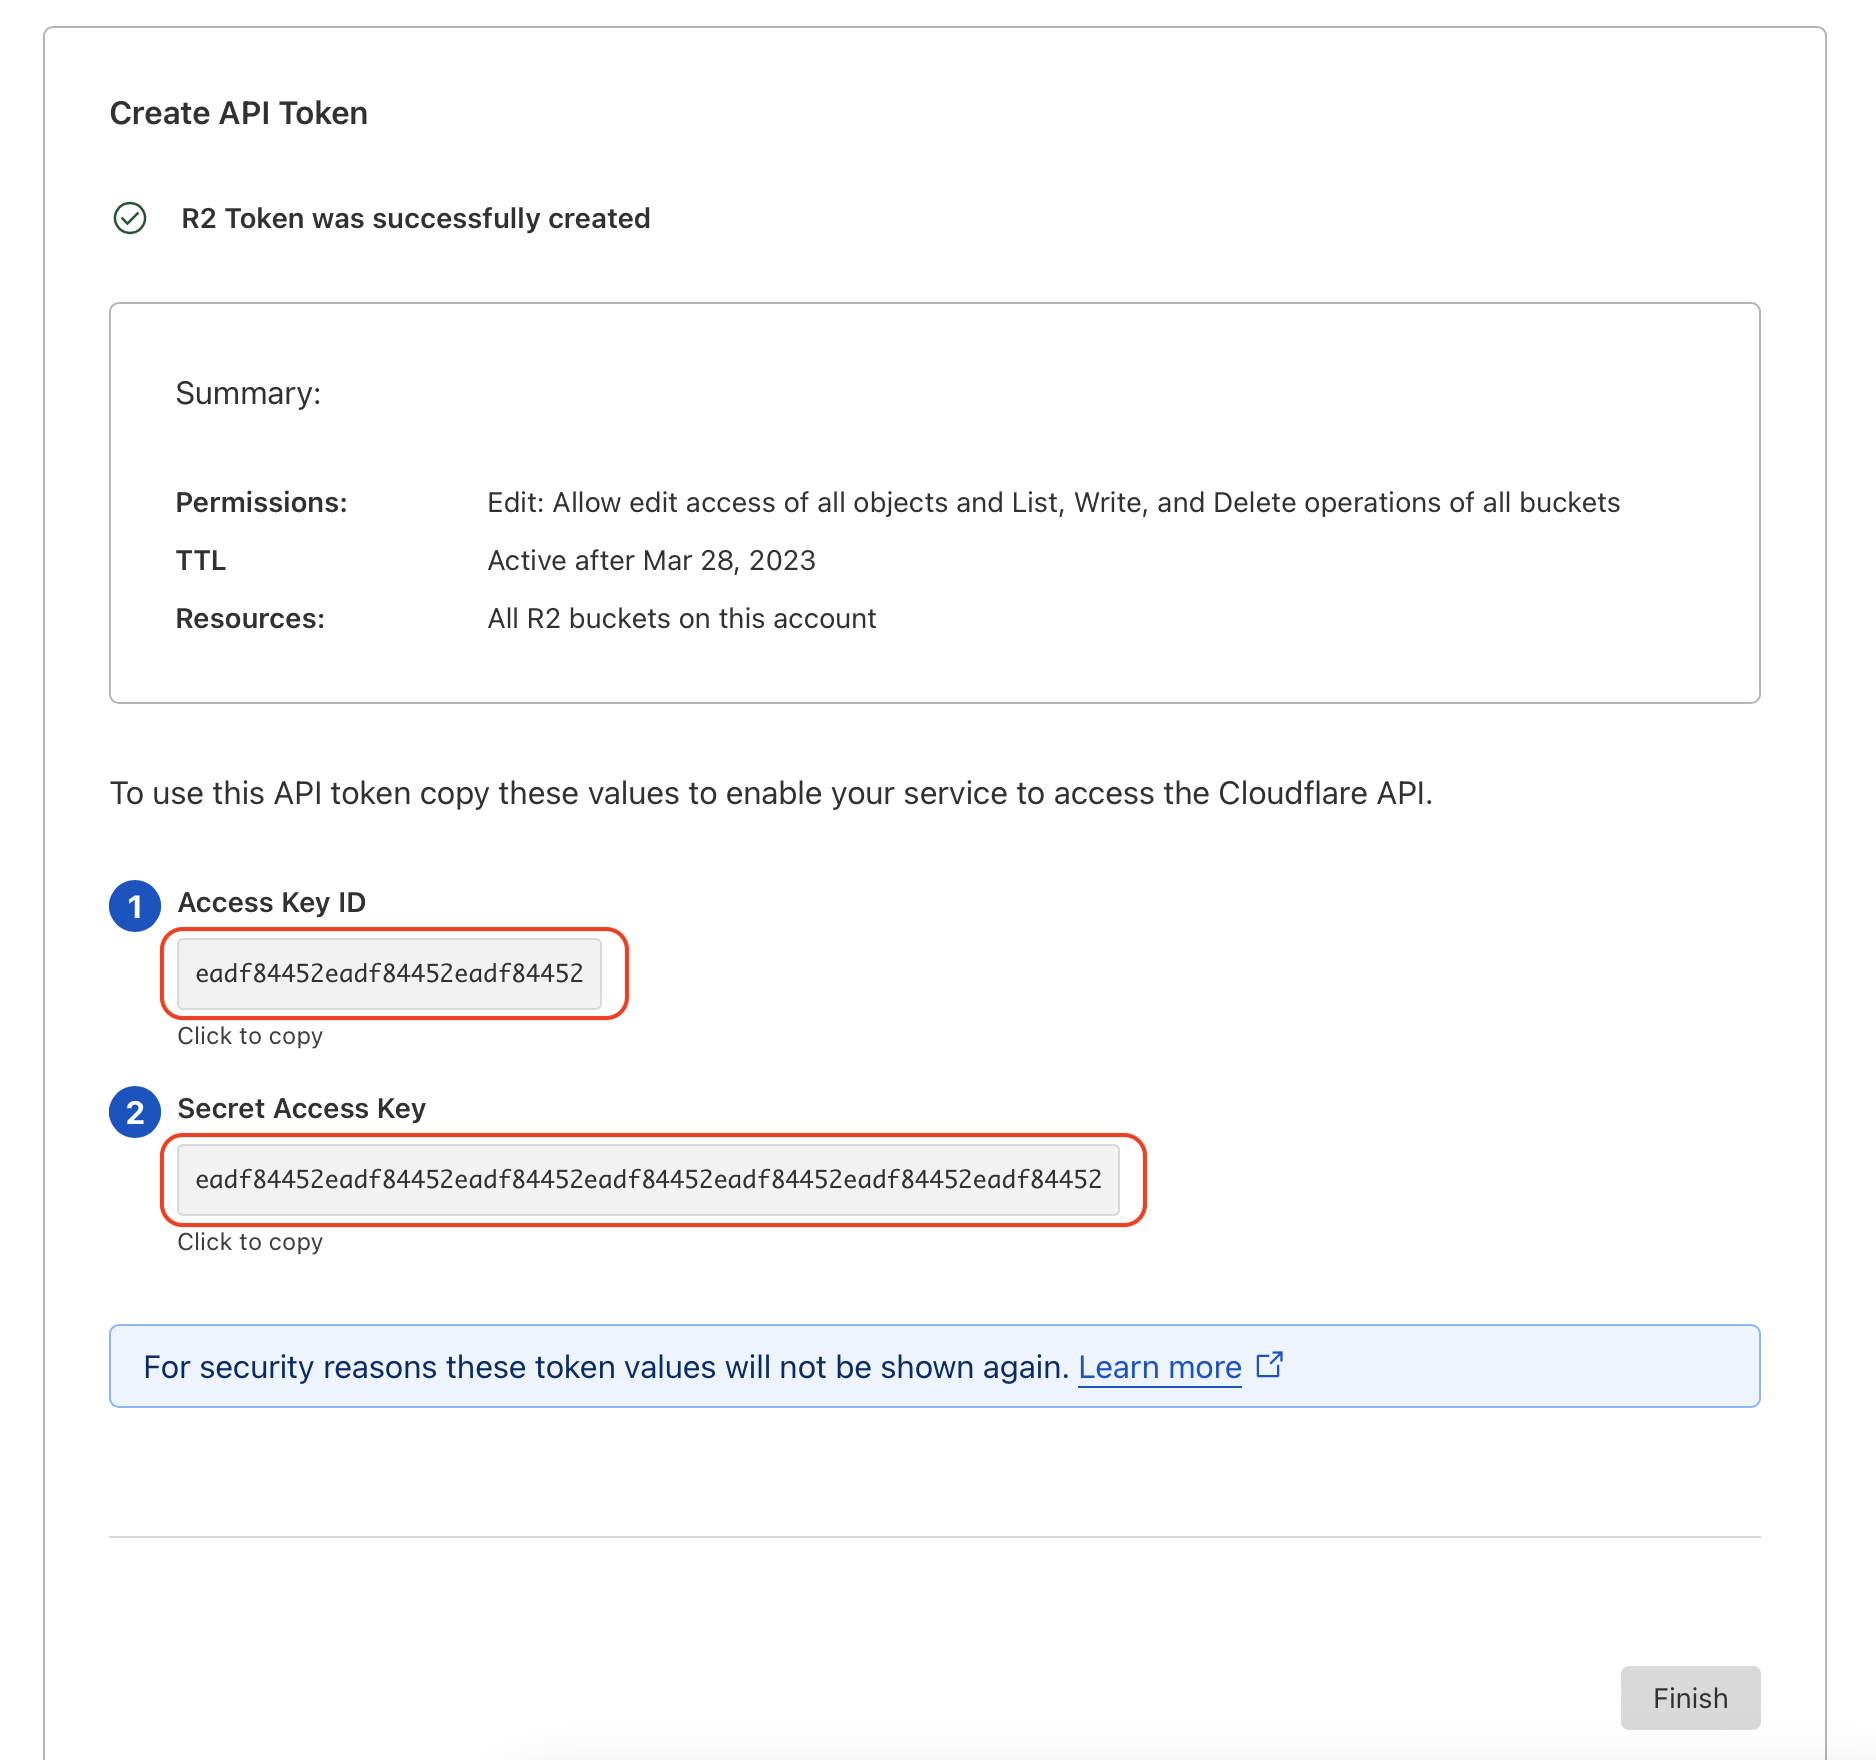
After creating the token, Cloudflare shows the credentials only once. Copy and paste them into SimpleBackups:
- Access Key ID — paste into Key in SimpleBackups.
- Secret Access Key — paste into Secret in SimpleBackups.
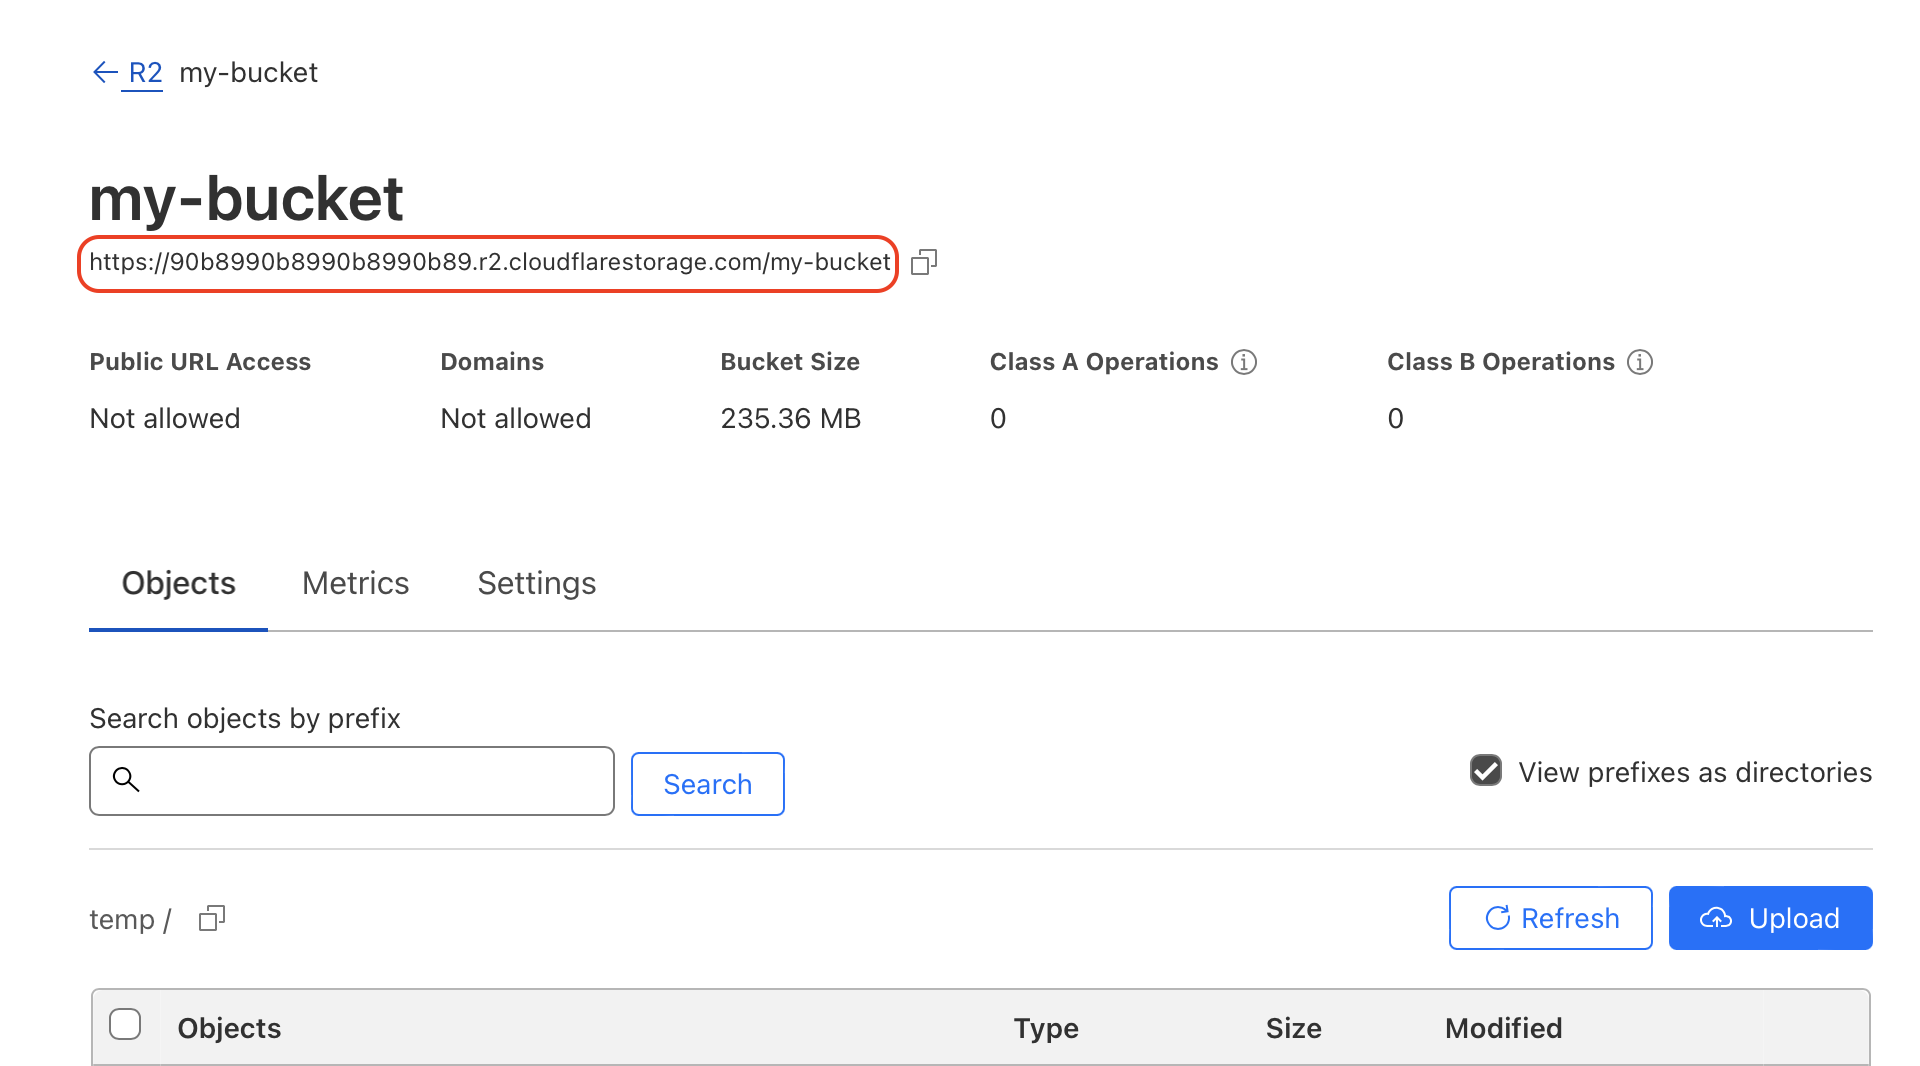
- S3 API endpoint — paste into S3 API Endpoint in SimpleBackups, with your bucket name appended:
https://<accountid>.r2.cloudflarestorage.com/<bucket-name>
EU jurisdiction buckets: if your bucket is in the EU jurisdiction, use
https://<accountid>.eu.r2.cloudflarestorage.com/<bucket-name>. The default endpoint will not reach EU-jurisdiction buckets.
Step 4: Connect R2 in SimpleBackups
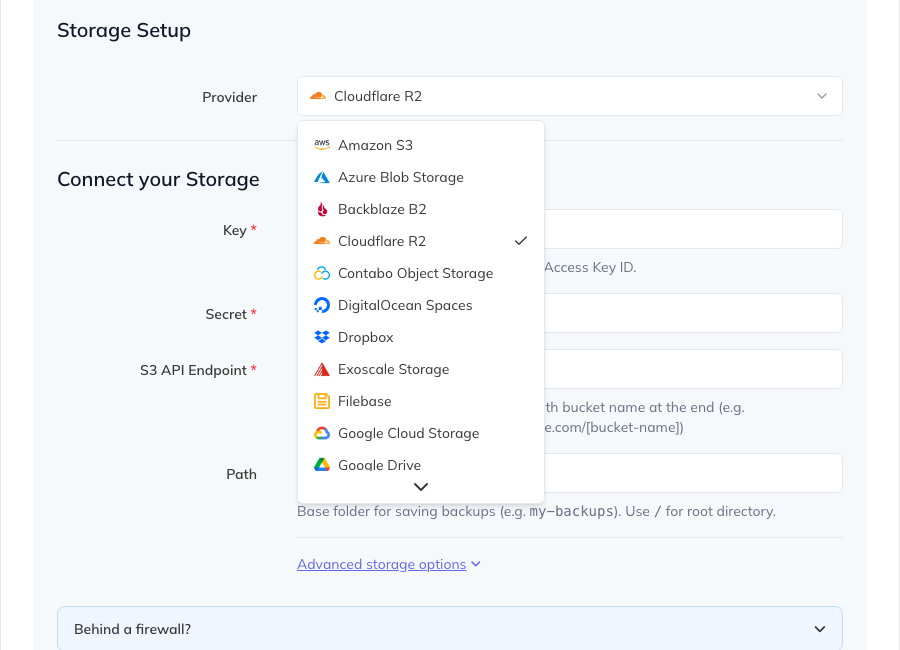
In SimpleBackups, open the storage selector, click Connect new Storage, and choose Cloudflare R2 as the provider.
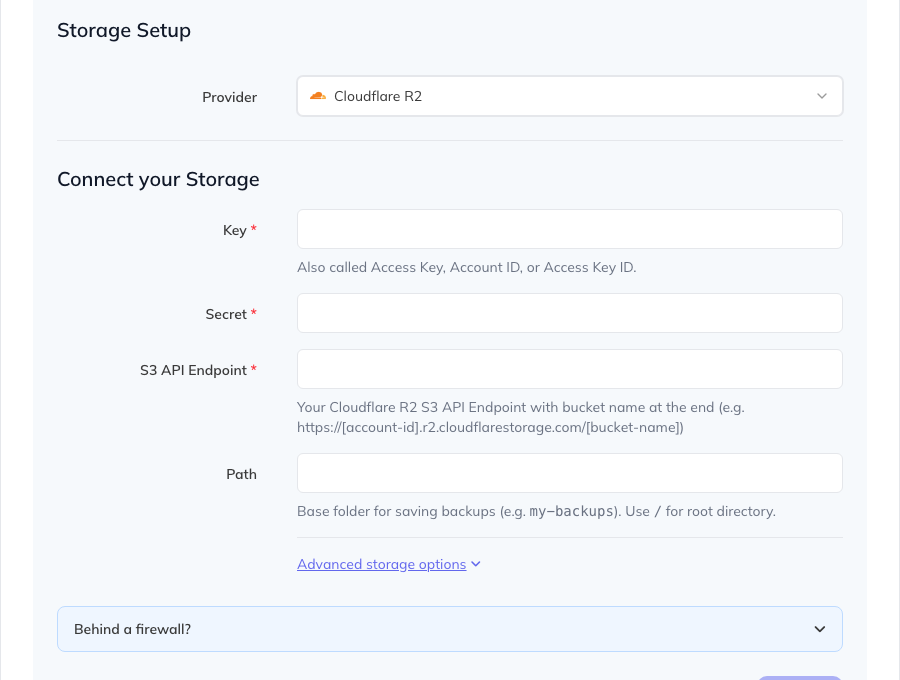
Fill in the Cloudflare R2 storage form:
| SimpleBackups field | What to enter |
|---|---|
| Key | Cloudflare Access Key ID |
| Secret | Cloudflare Secret Access Key |
| S3 API Endpoint | Your R2 endpoint with the bucket name at the end, e.g. https://<accountid>.r2.cloudflarestorage.com/<bucket-name> |
| Path | Optional folder/prefix inside the bucket. Use / for the bucket root. |
You're done
SimpleBackups will now be able to read from or write to your R2 bucket, depending on the permissions you granted. If a backup fails with an AccessDenied error, the most common cause is that the token was created with Object Read only but is being used as a destination — re-create it with Object Read & Write.