Appearance
Neon
How to back up Neon managed PostgreSQL databases via SimpleBackups.
Neon is a serverless PostgreSQL platform with branching and autoscaling. Backing it up through SimpleBackups lets you store portable copies in your own storage with custom retention schedules, independent of Neon's built-in history. This guide covers both the automatic API-based setup and the manual connection string approach.
Automatic setup
In this section, you will generate a Neon API key and connect your Neon project to SimpleBackups so that databases are discovered automatically.
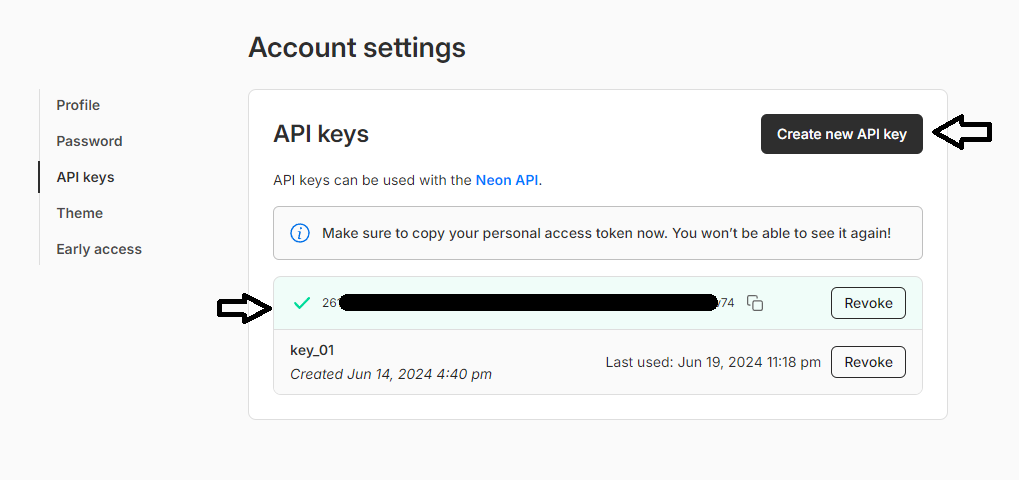
Step 1: Obtain Neon API credentials
- Go to https://console.neon.tech/app/settings/api-keys.
- Click Create new API key.
- Copy the generated key to a safe location.
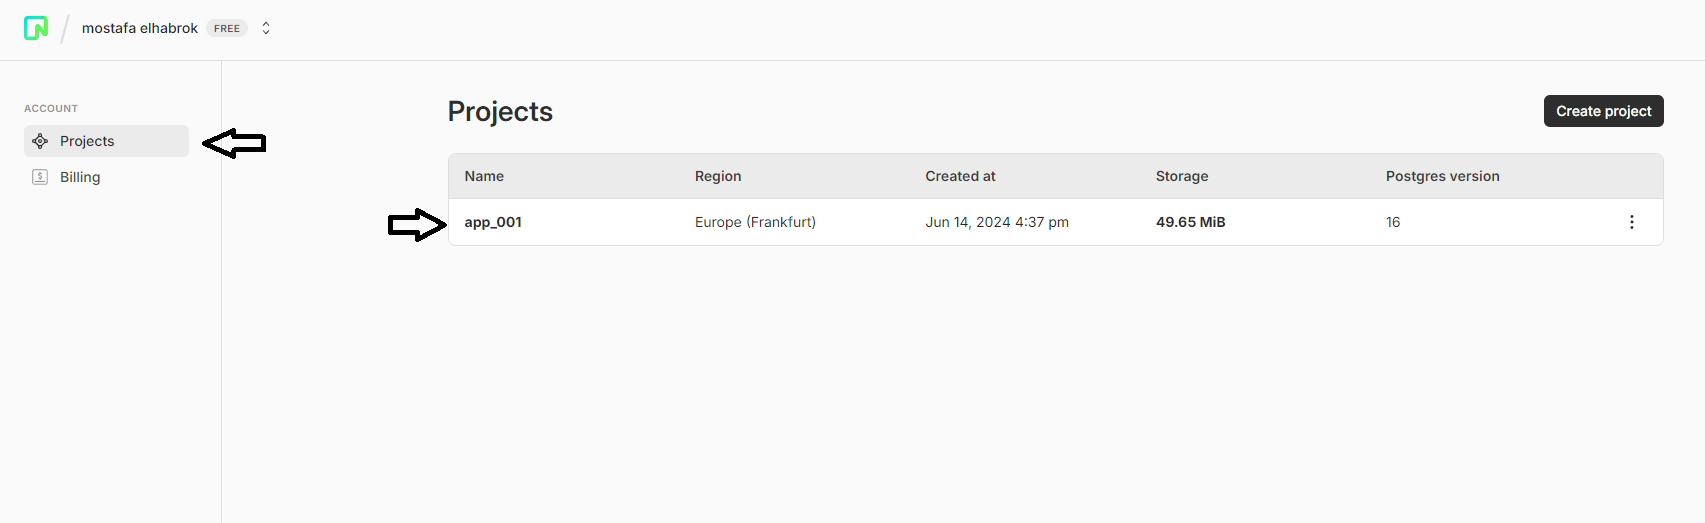
Step 2: Get the project ID and whitelist SimpleBackups IPs
- From the menu, click Projects and choose the project that contains the database you want to back up.
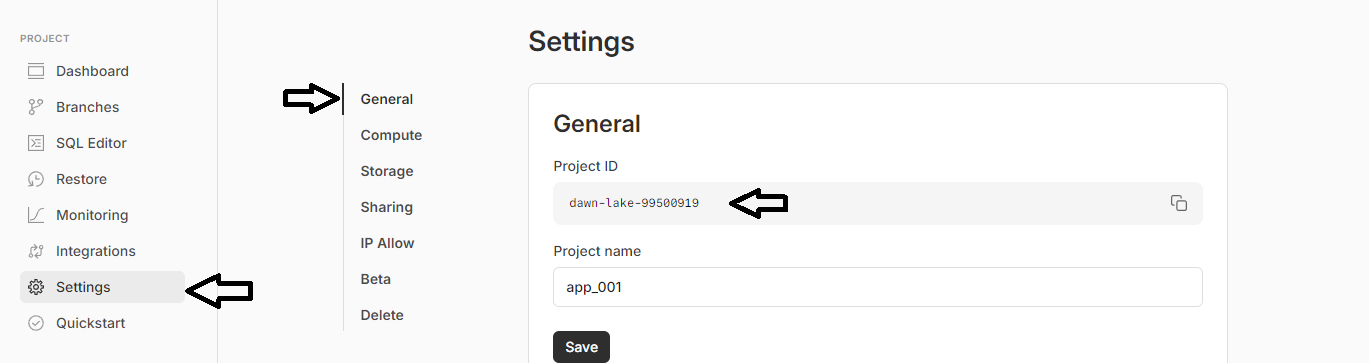
- From the menu, click Settings, then General.
- Copy the Project ID.
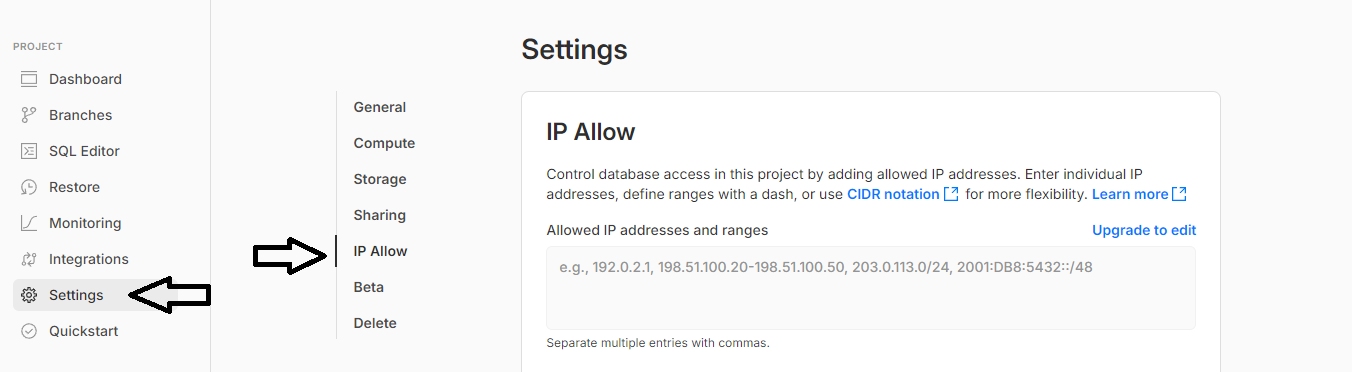
- Navigate to IP Allow and add the SimpleBackups IP addresses.
Step 3: Create a Neon provider in SimpleBackups
- Go to the database backup page and click Add in the Connect your DBaaS Provider section.
- Select Neon from the Provider dropdown, enter a name for your Neon account, paste the API key and project ID from the previous steps, then click Save provider.

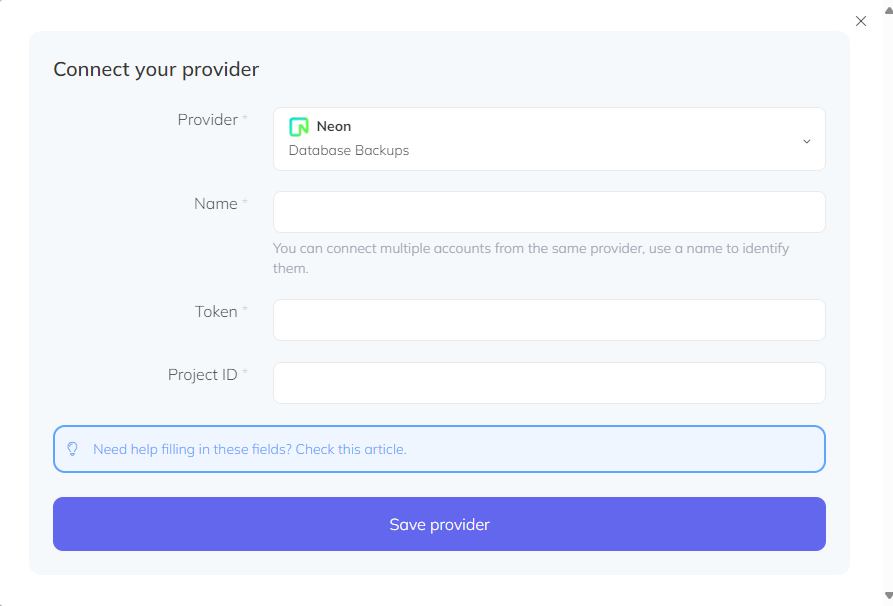
- Select your provider, then the database you want to back up.
- Click Validate.

Step 4: Schedule and activate
Set a schedule for your backups and configure retention policies and storage. Review your configuration and save — SimpleBackups will start backing up your database according to your schedule.
Manual setup
Use this approach if you prefer to supply connection credentials directly rather than through the Neon API.
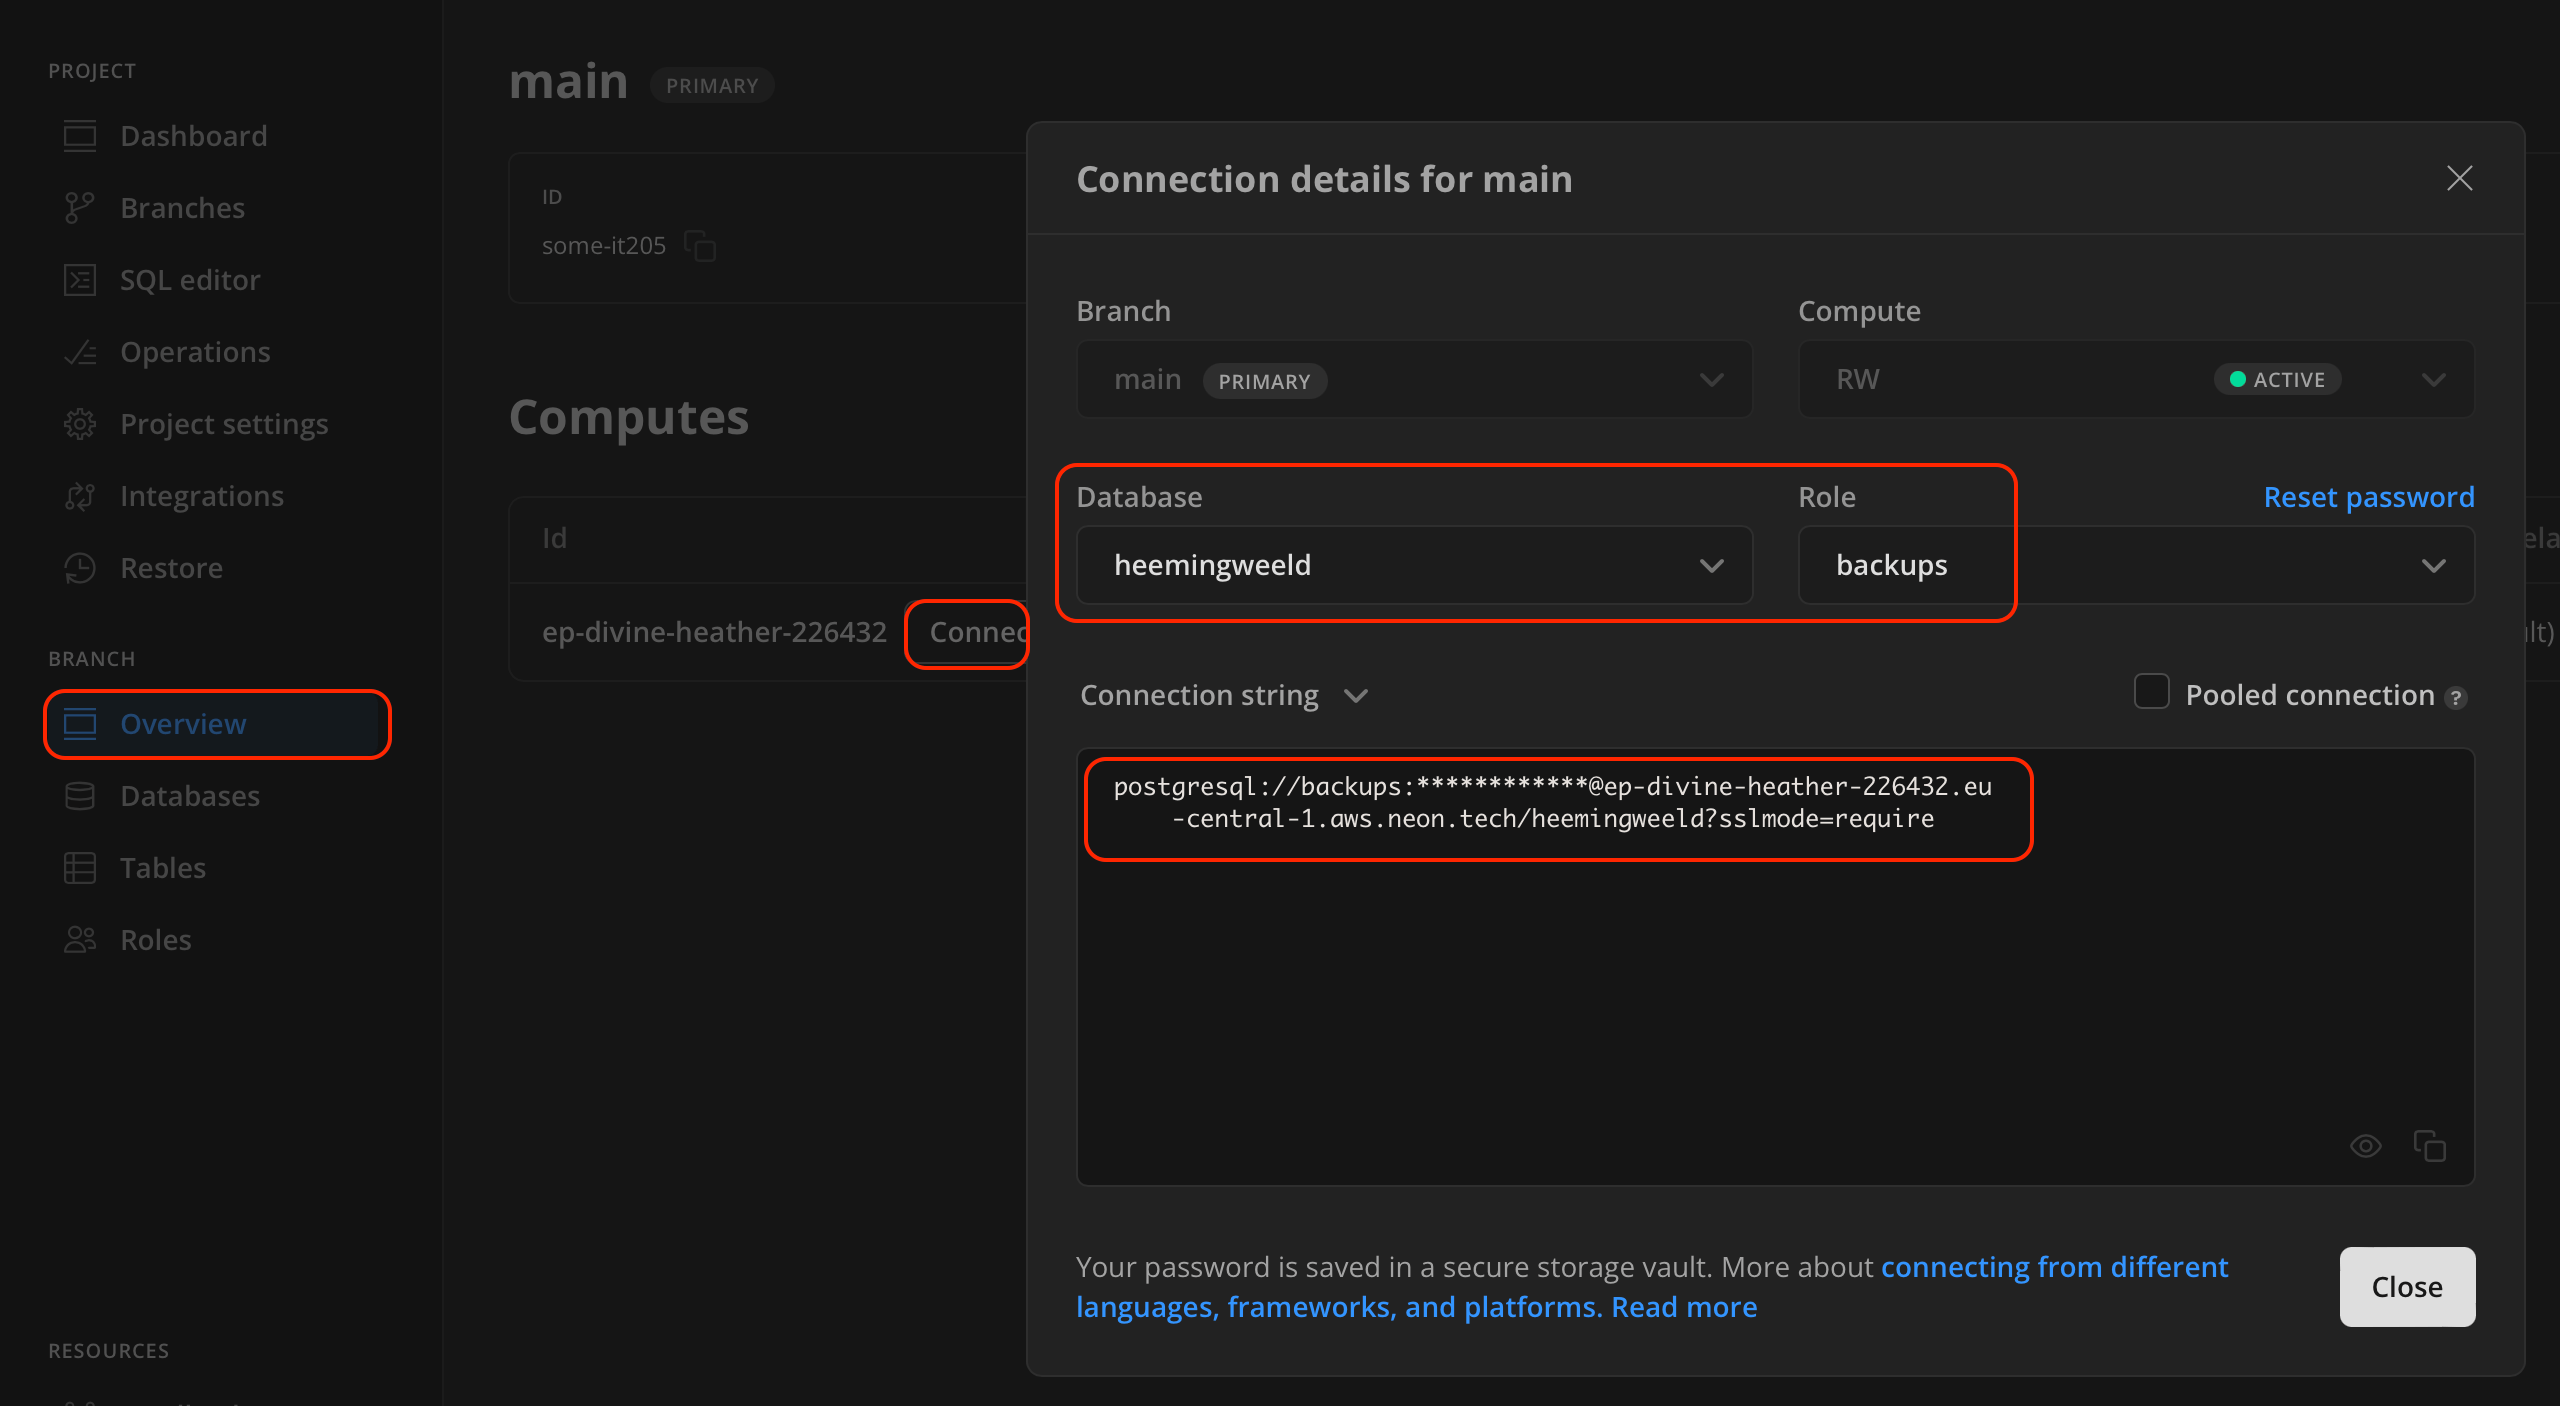
Step 1: Copy your connection string
- Log in to your Neon dashboard and navigate to the database you want to back up.
- Click Overview, then Connect, or refer to Connection Details on the dashboard.
- Create a new user or role with read access to the database if needed. This user will be used by SimpleBackups to connect.
- Copy the connection string and replace the
****placeholder with your actual password.
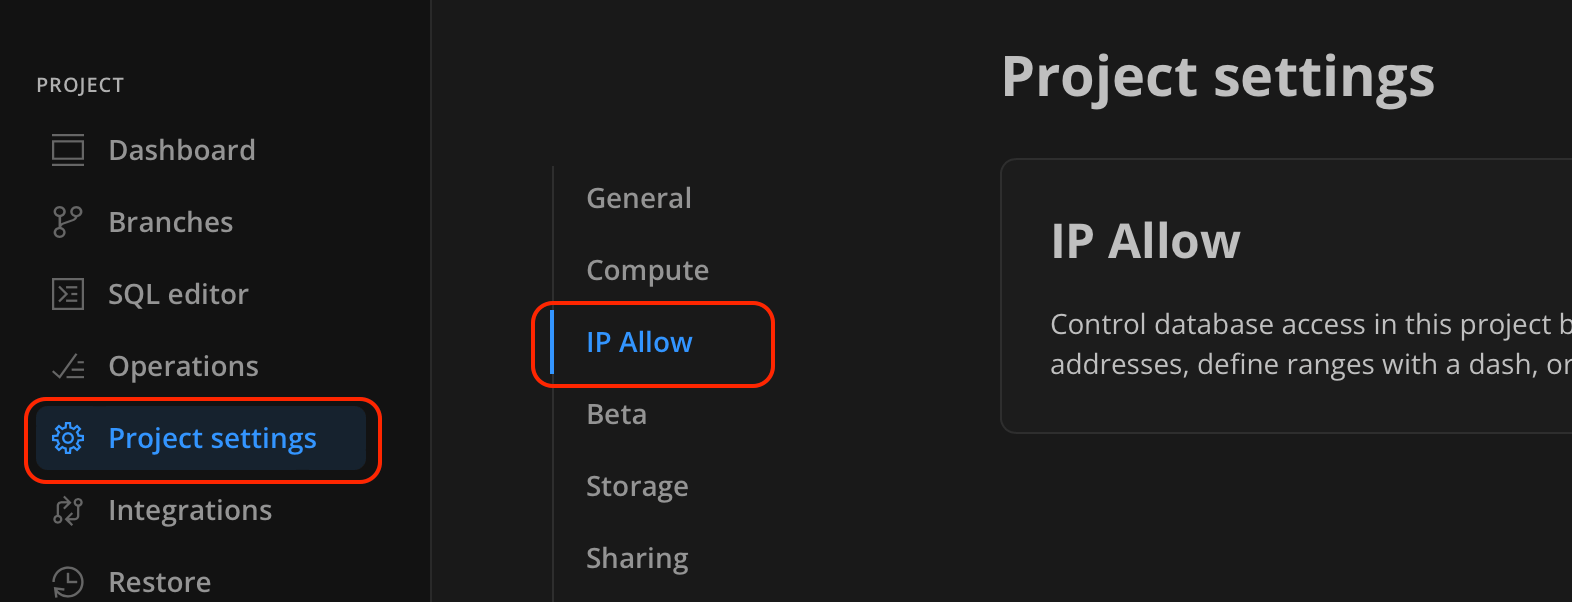
Step 2: Whitelist SimpleBackups IP addresses
- In the Neon dashboard, go to Project settings, then IP Allow.
- Add the SimpleBackups IP addresses to the allowlist.
Step 3: Create a database backup in SimpleBackups
- Navigate to Backups and click Create Backup, then select Database Backup.
- Choose Serverless as the backup server type.
- Select PostgreSQL as the database type.
- Click Paste connection string and fill in the complete connection string, making sure the password is included.
- Click Validate Connection.
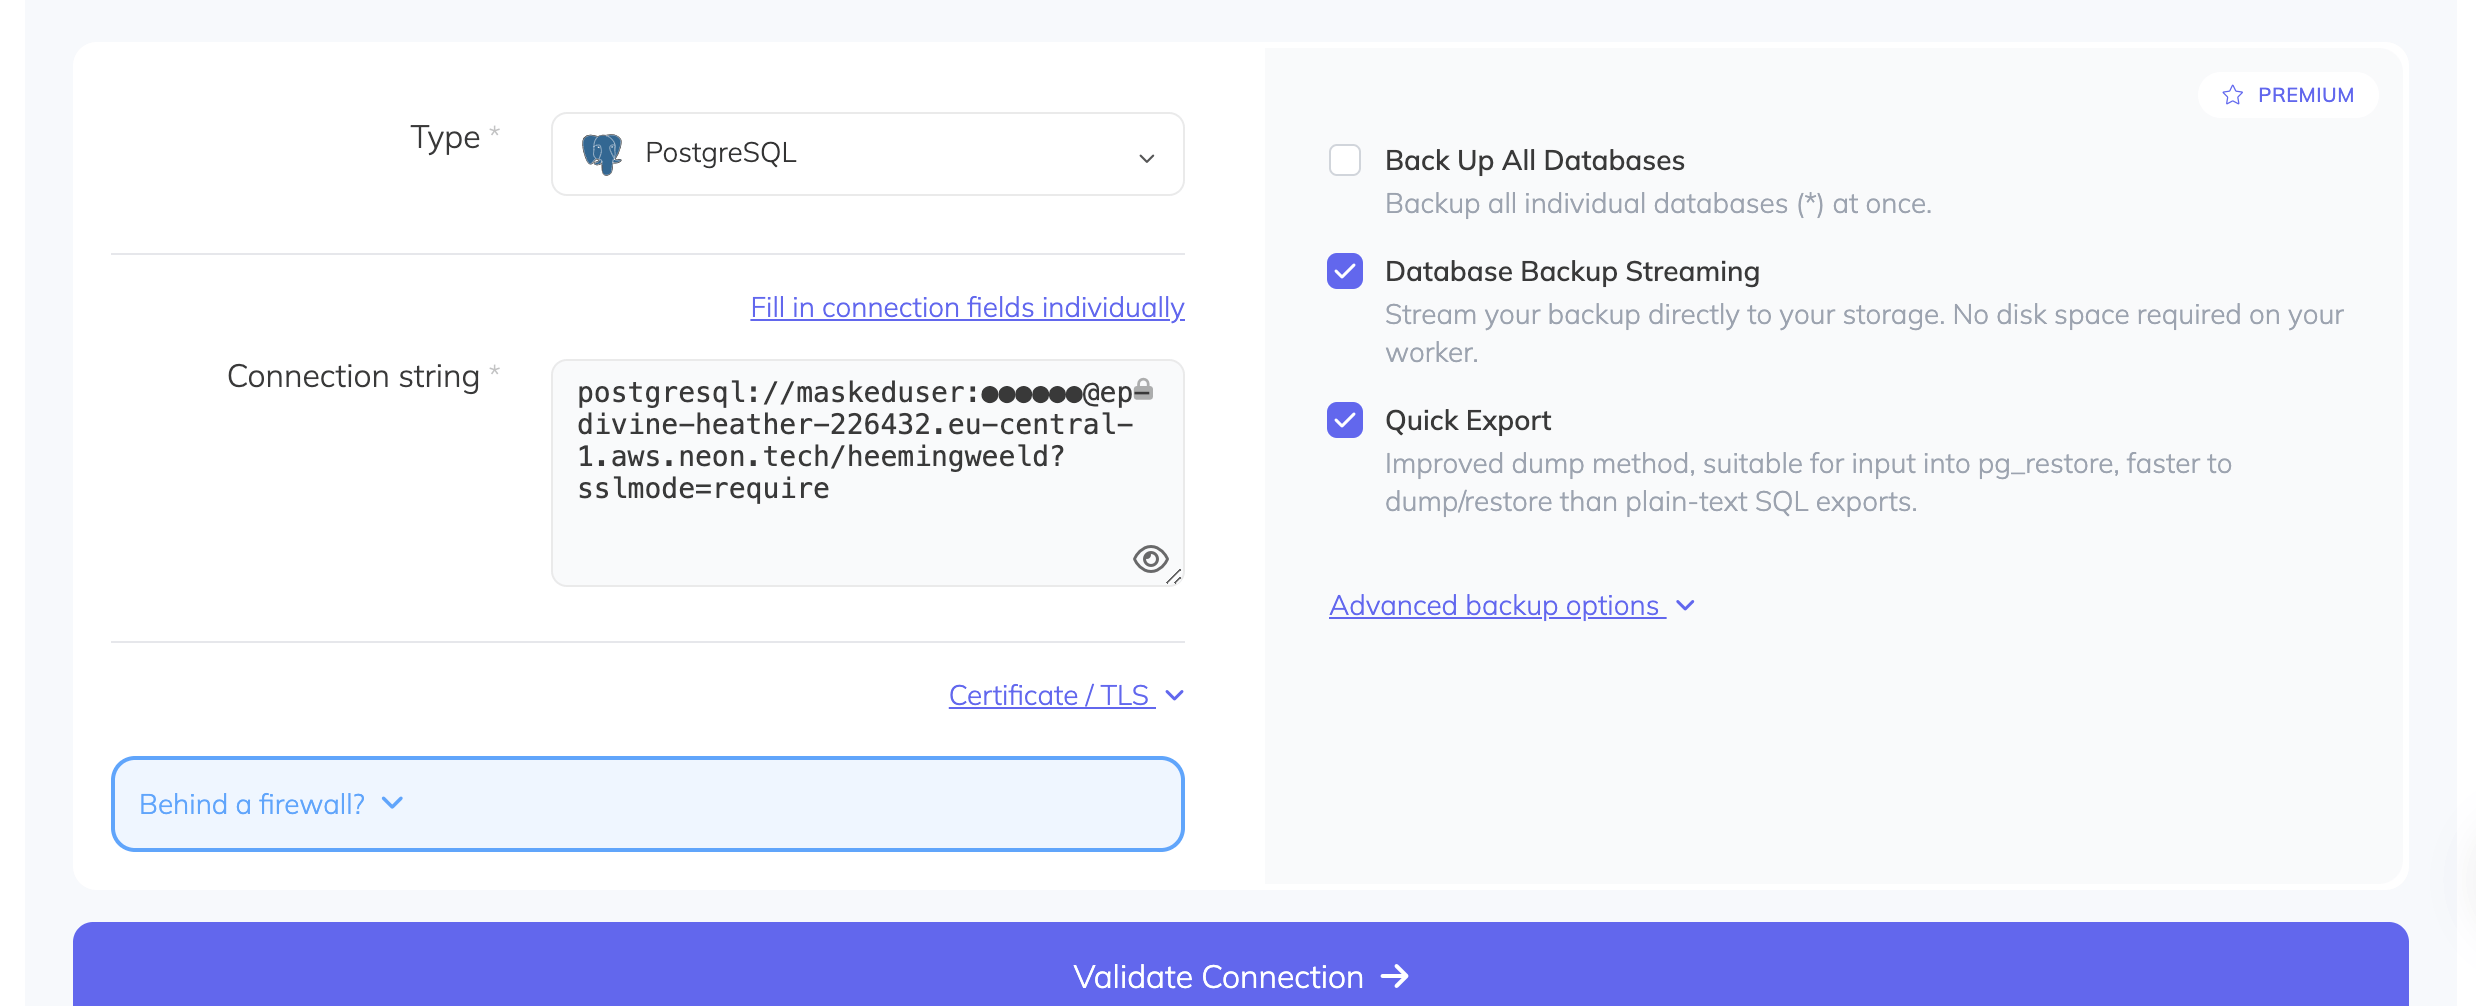
- Set a schedule and configure retention policies and storage. Review your configuration and save.
Restoring a backup
To restore a backup, navigate to your backup page and open the Logs tab. Click the detail icon on the backup you want to restore from, then open the Restore tab. Generate a download link and copy it.
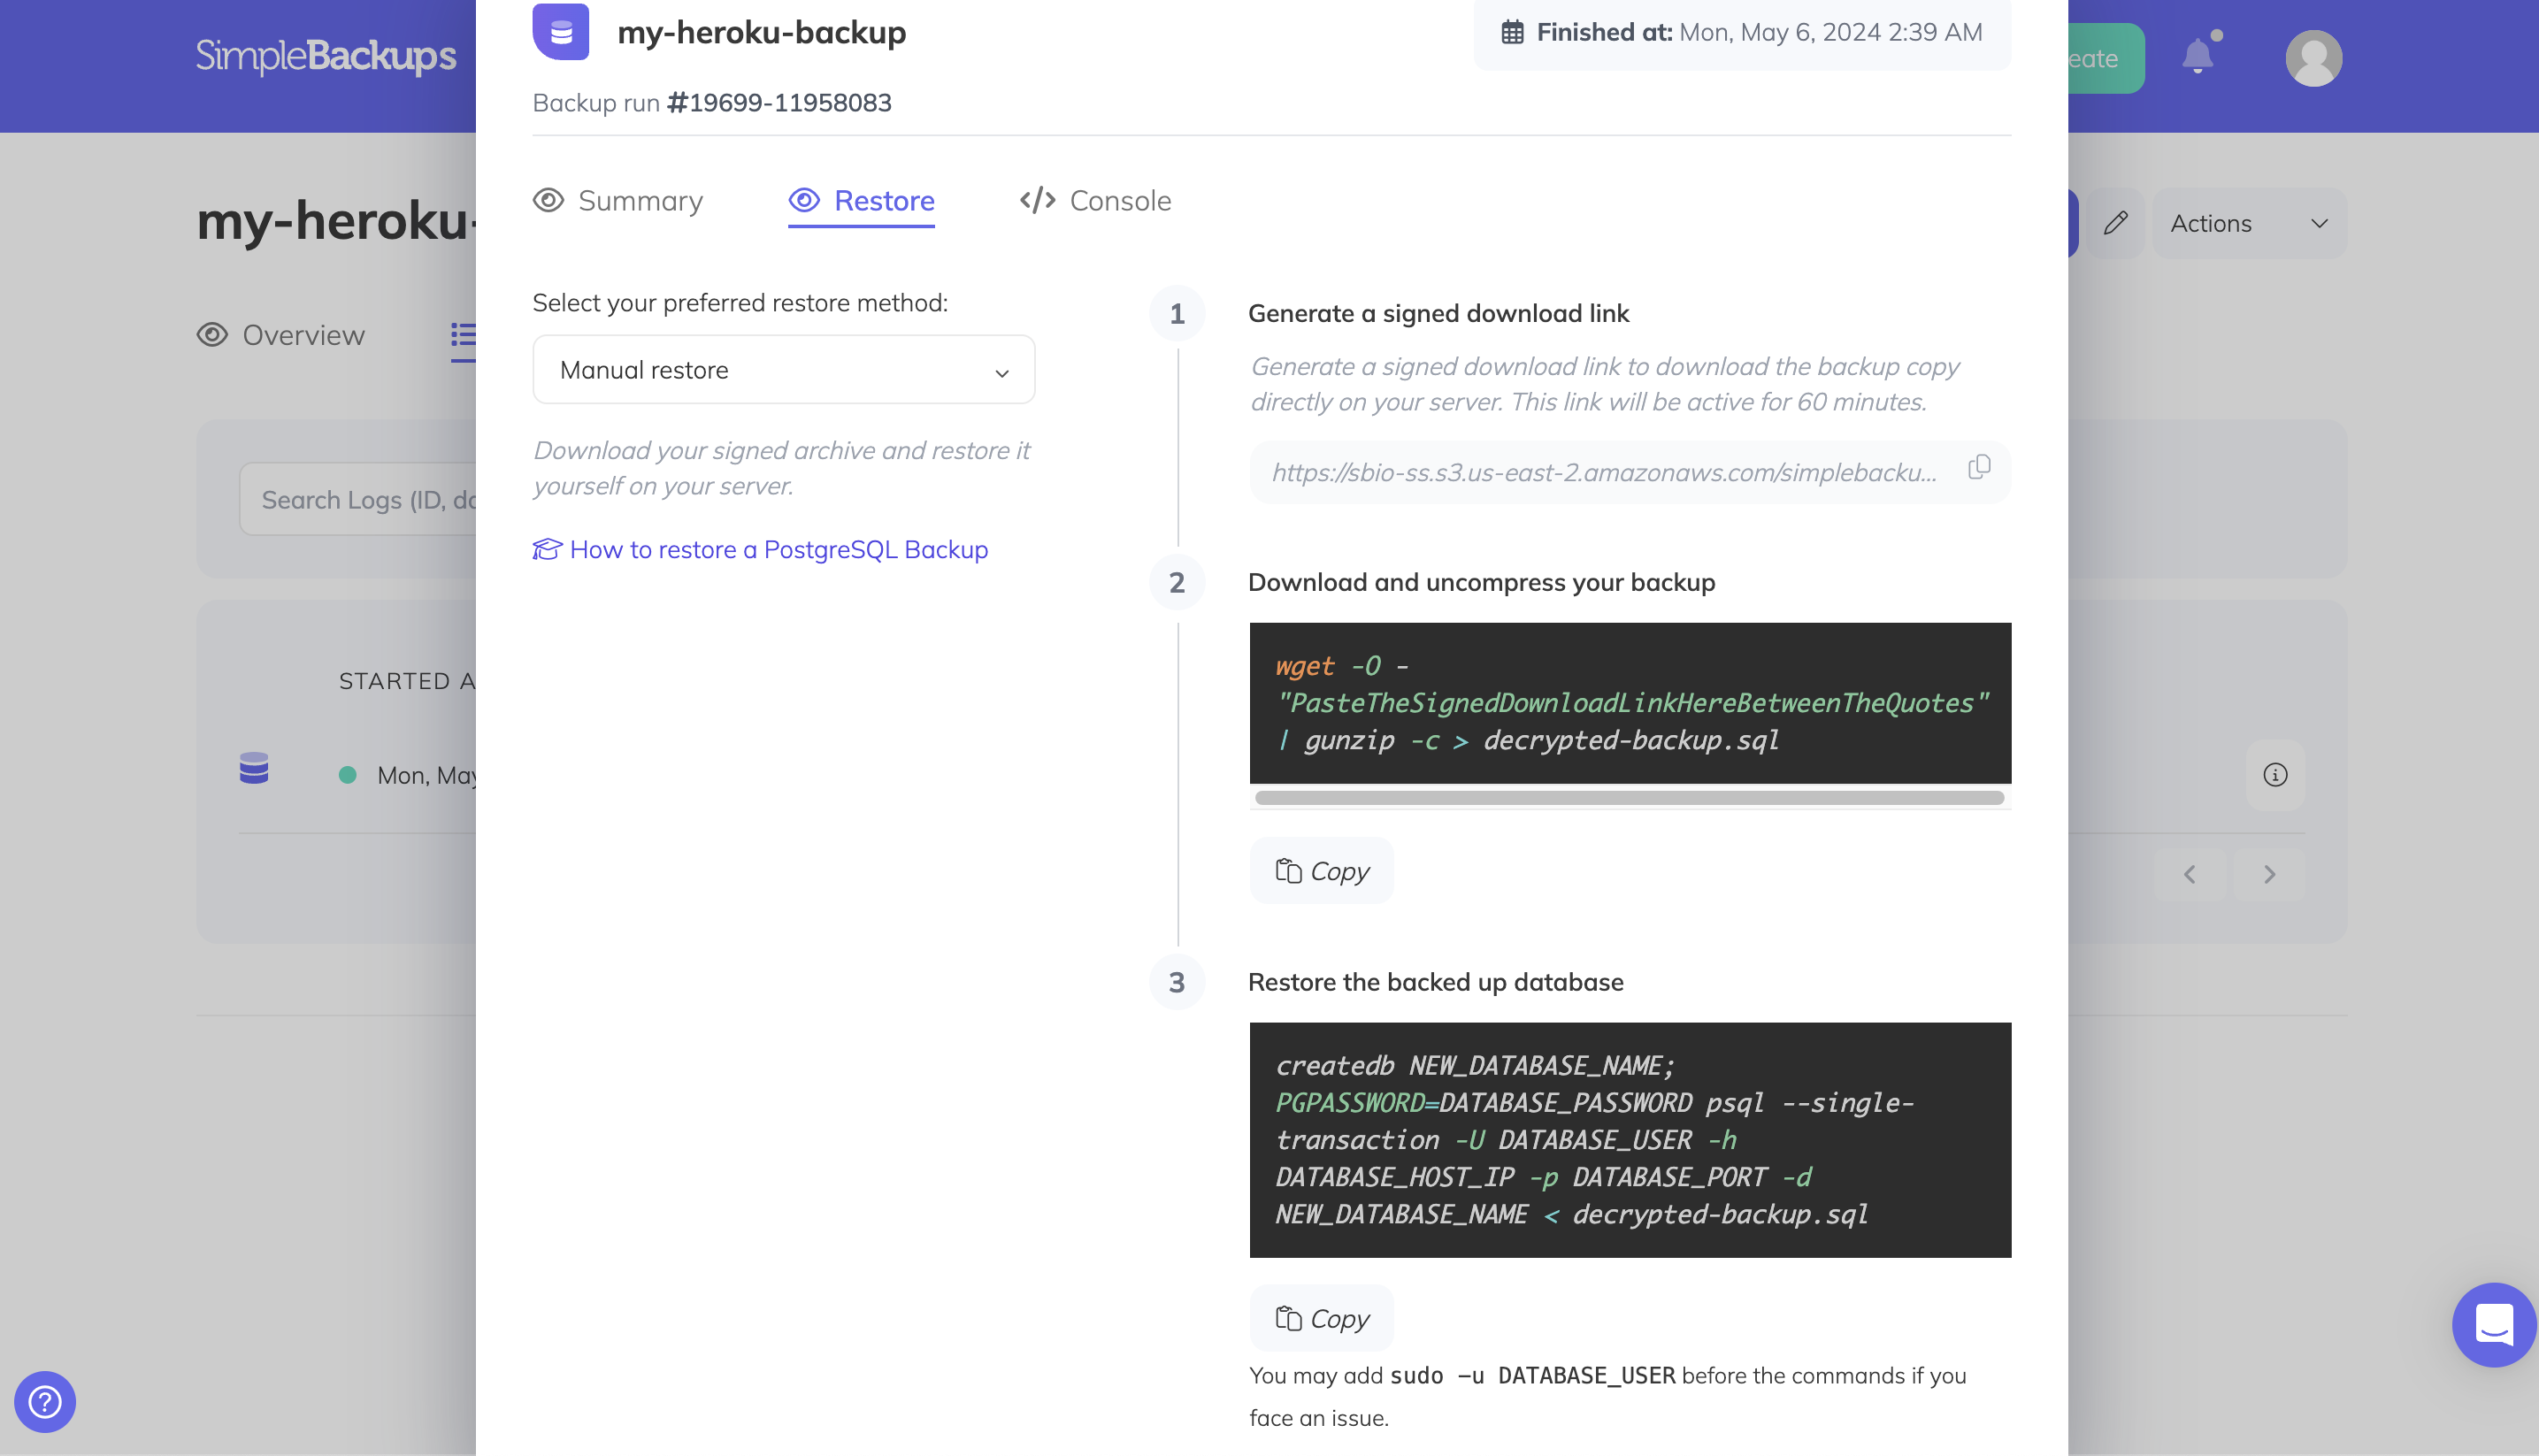
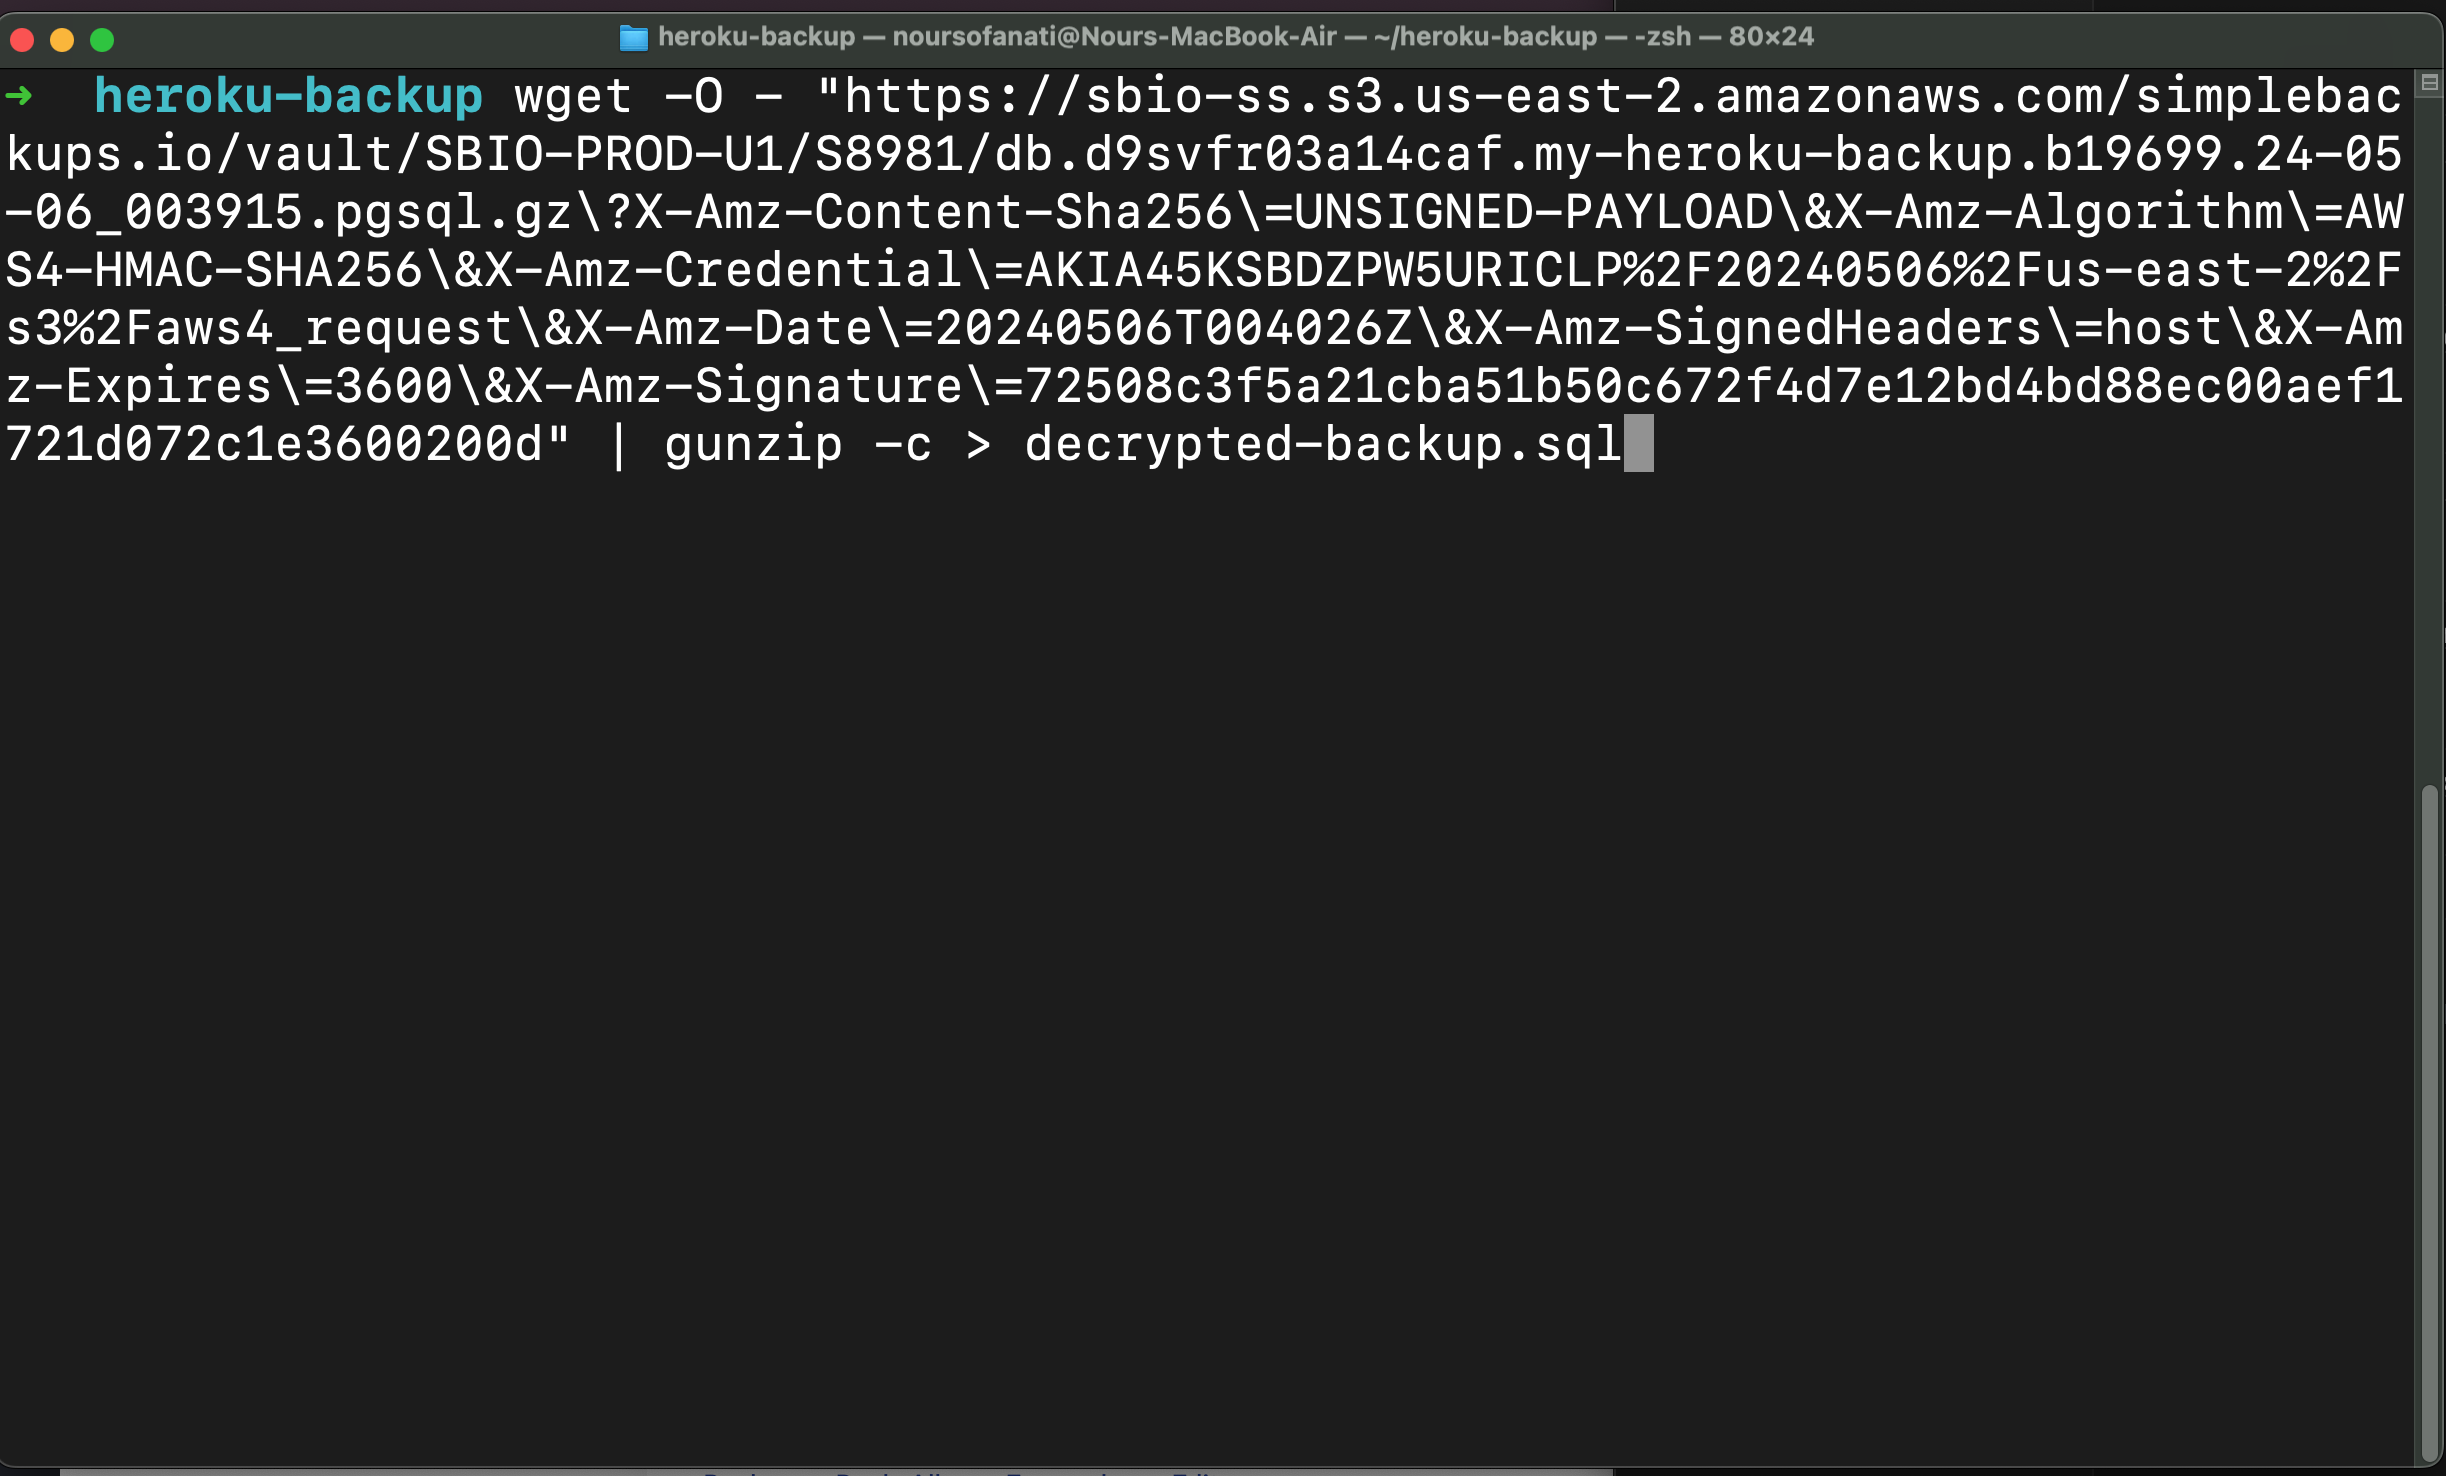
Run the following command to download and decompress your backup (replace the URL with your signed download link):
bash
wget -O - "<signed-download-url>" | gunzip -c > backup.pgsqlThen restore using pg_restore, replacing <your-database-uri> with your full database connection string:
bash
pg_restore -d "<your-database-uri>" ./backup.pgsql