
Appearance
Supabase read-only user
Connect Supabase Storage through a dedicated user that can only read the buckets you choose.
By default, SimpleBackups connects to Supabase with your project's credentials, which can read every bucket. If you need tighter control, you can create a Supabase user for SimpleBackups and decide with Storage policies exactly which buckets it may read. This guide walks you through creating that user, granting read access, and connecting it to SimpleBackups as a sync source.
How it works
SimpleBackups never receives your project's API secrets or service role key. Instead, you give it the email and password of a regular Supabase user, plus your project's public anon key. Before every backup run, SimpleBackups signs in as that user and uses the short-lived token Supabase returns to read your files.
Supabase applies your Row Level Security (RLS) policies to every request made with that token. The user can list and download only the files your policies allow, and it cannot upload, overwrite, or delete anything unless you write a policy for it. SimpleBackups always saves this storage as read-only, so you can use it as the source of a storage backup.
Prerequisites
- A Supabase project with Storage enabled
- Access to the Supabase dashboard for that project, including the SQL Editor
- The names of the buckets you want to back up
Step 1: Create the backup user
Create a user that exists only for SimpleBackups, so you can manage its access separately from your app's users.
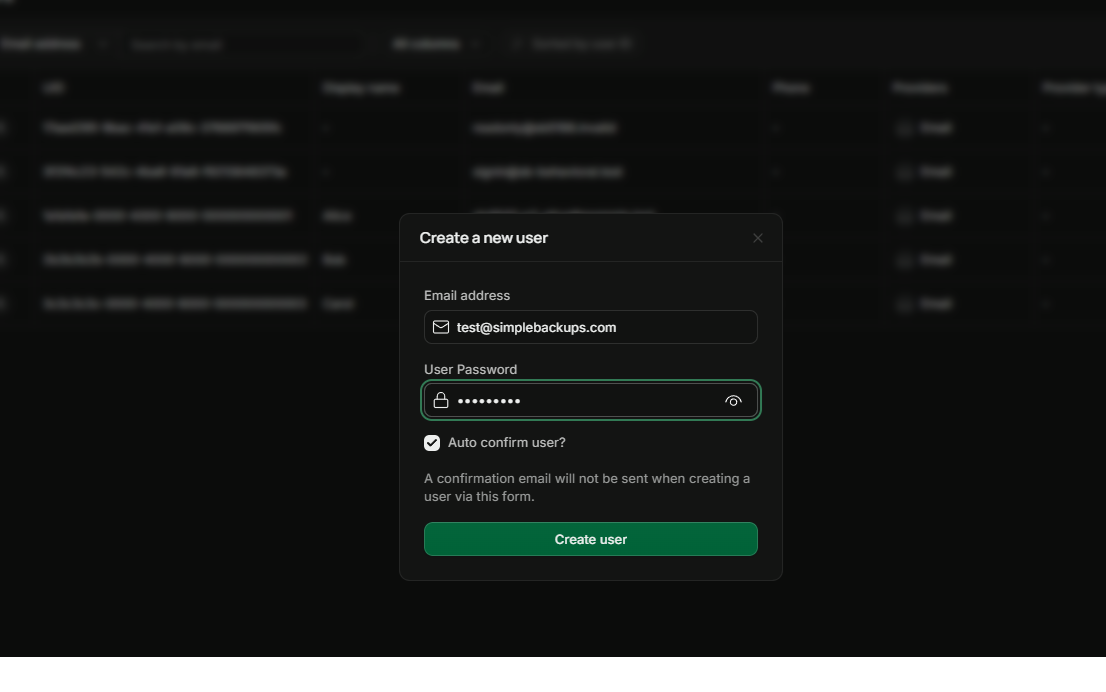
- In the Supabase dashboard, open Authentication → Users.
- Click Add user → Create new user.
- Enter an email address and a strong password for the backup user.
- Tick Auto confirm user? so the user can sign in right away.
- Click Create user.
Step 2: Allow the user to read your buckets
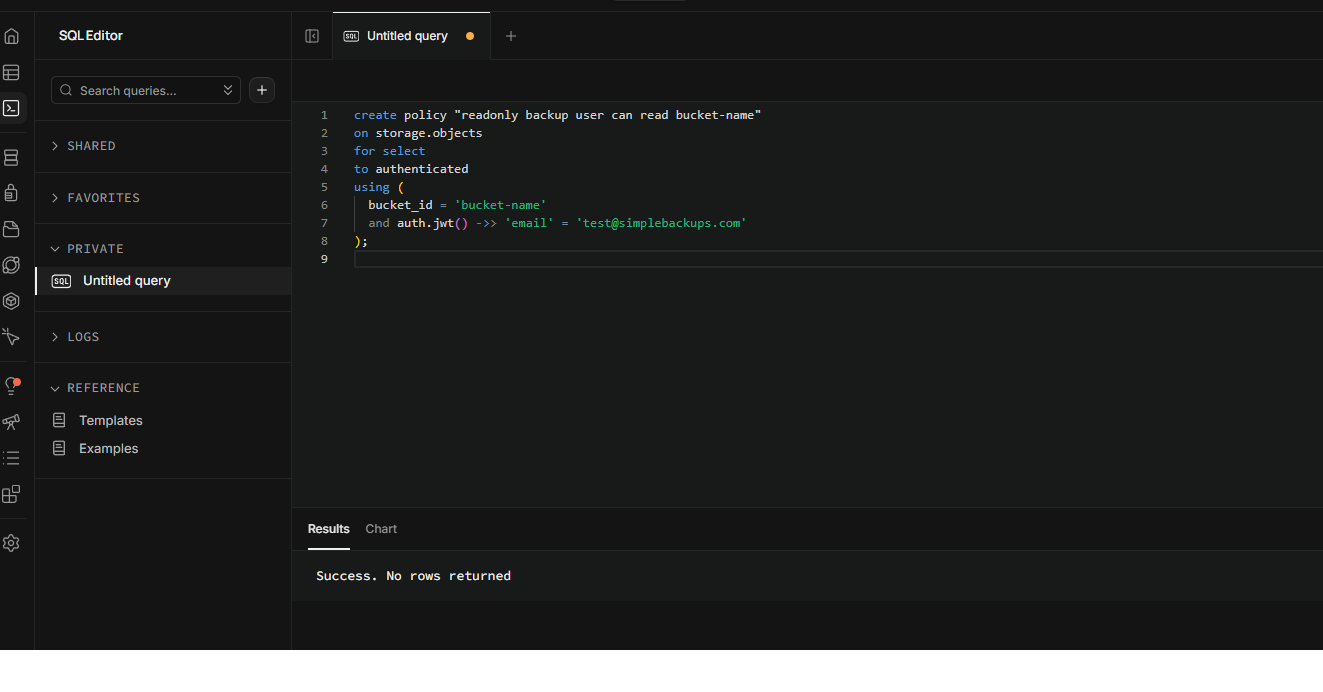
A new user cannot read any files until a policy allows it. You grant read access with a SELECT policy on storage.objects, scoped to your buckets and to this one user.
Open the SQL Editor, then run the following query. Replace bucket-name with your bucket and backup@example.com with the email of the user from step 1.
sql
create policy "SimpleBackups can read bucket-name"
on storage.objects
for select
to authenticated
using (
  bucket_id = 'bucket-name'
  and auth.jwt() ->> 'email' = 'backup@example.com'
);
To allow several buckets, list them all in a single policy:
sql
create policy "SimpleBackups can read backup buckets"
on storage.objects
for select
to authenticated
using (
  bucket_id in ('invoices', 'documents', 'branding')
  and auth.jwt() ->> 'email' = 'backup@example.com'
);
The policy only grants SELECT, which covers listing and downloading. Without INSERT, UPDATE, or DELETE policies, every upload, overwrite, and delete attempt from this user is refused by Supabase.
Step 3: Set the access token expiry
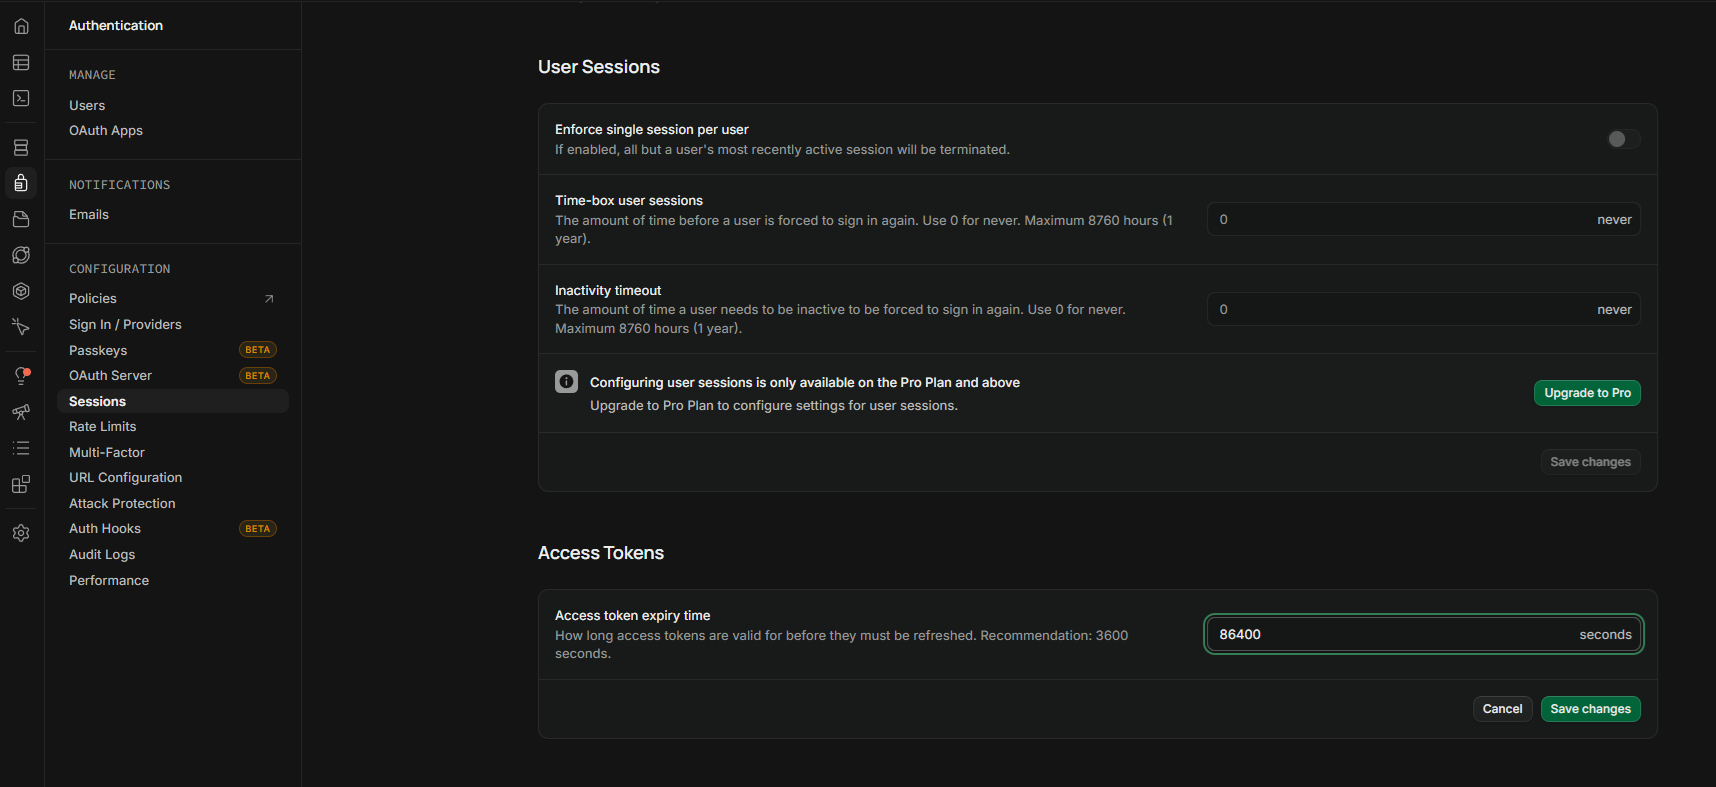
The token SimpleBackups receives at sign-in must stay valid for the whole run. Supabase issues tokens that expire after one hour by default, so a run that takes longer would fail partway through.
- Open Authentication → Sessions.
- Under Access Tokens, set Access token expiry time to a value longer than your longest expected run. For example,
86400seconds allows runs of up to 24 hours. - Click Save changes.
Step 4: Find your project details
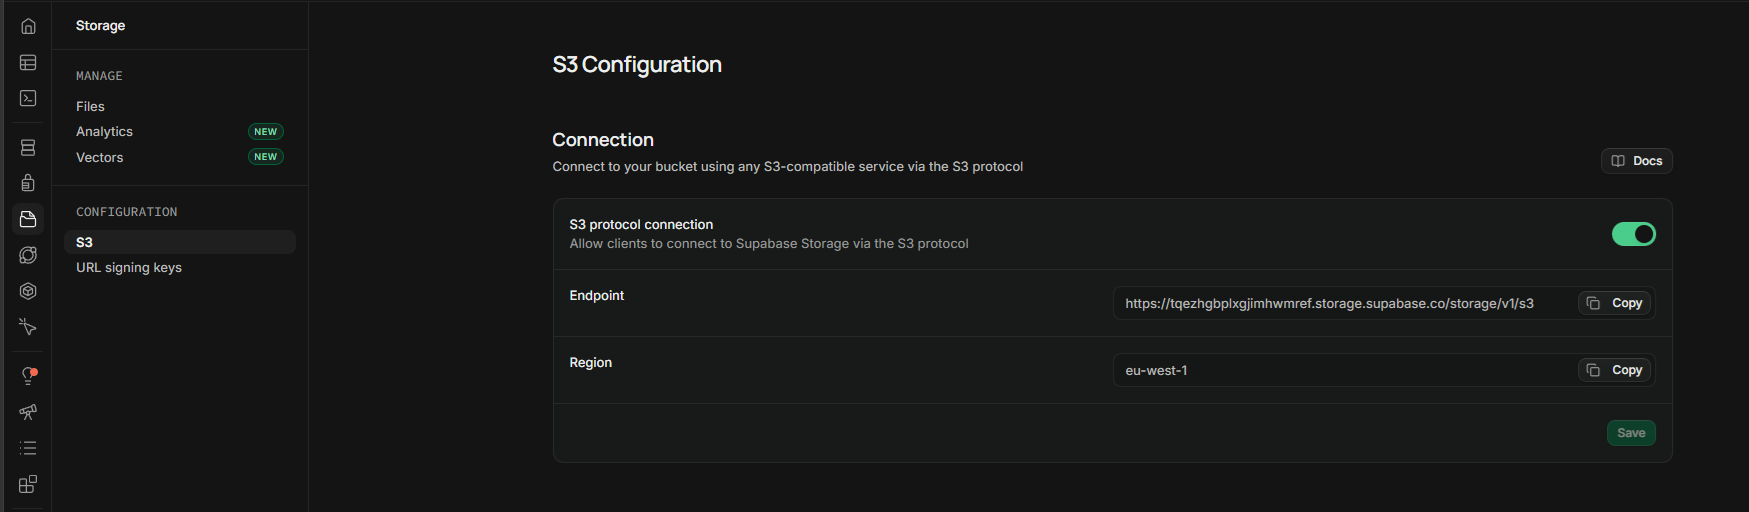
SimpleBackups needs your project reference, region, and anon key to sign the backup user in.
Open Storage → S3. The Endpoint contains your project reference, the part before .storage.supabase.co. For example, in https://abcdefghijklmnopqrst.storage.supabase.co/storage/v1/s3 the project reference is abcdefghijklmnopqrst. Note the Region as well.
Then open Project Settings → API Keys → Legacy anon, service_role API keys, and copy the anon public key. Supabase designs this key to be public, and it grants nothing beyond what your RLS policies allow.
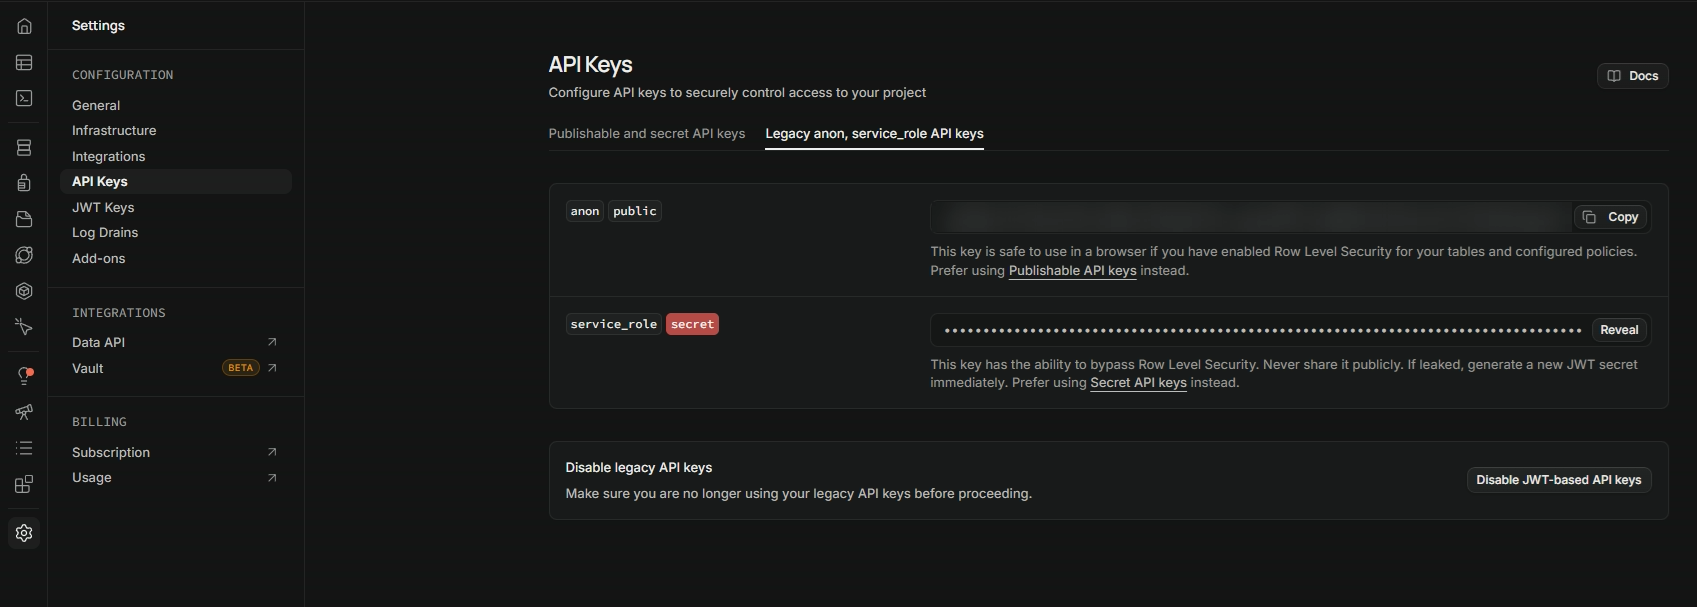
Step 5: Connect the storage in SimpleBackups
- Log into SimpleBackups and open the connect your storage page.
- Pick Supabase Object Storage as the provider.
- Click Use a read-only Supabase user instead (limit access with RLS policies).
- Fill in the form, then click Validate and save the storage.
You'll have to input:
- Project Reference ID: the project reference from step 4
- Region: the region that matches the one shown in step 4 (for example, West EU (Ireland) for
eu-west-1) - User Email and User Password: the backup user from step 1
- Anon Key: the
anonpublickey from step 4 - Bucket: one of the buckets your policy allows
- Path: optional folder inside the bucket; leave it empty to back up the whole bucket
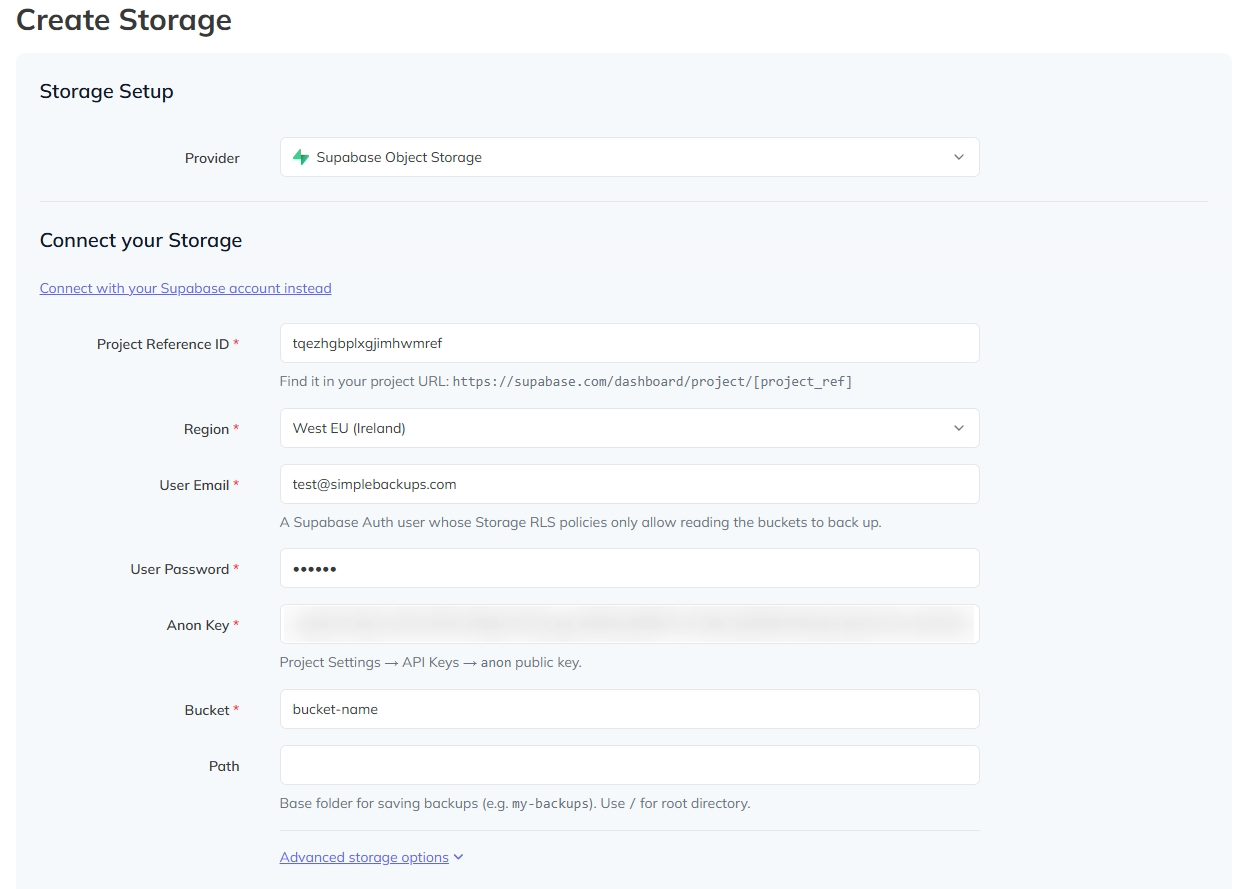
When you click Validate, SimpleBackups signs in as the backup user and checks that it can see at least one file or folder in the bucket, under the path if you set one. If the email, password, or anon key is wrong, the error from Supabase is shown on the form. If the user sees nothing, validation still succeeds but shows a warning, because an empty bucket and a missing policy look the same.
You can now pick this storage as the source of a storage backup.
Troubleshooting
Validation shows "sees no files here"
RLS hides the files a user may not read instead of refusing the request, so a bucket without a matching policy looks exactly like an empty bucket. If the bucket is not empty, check that your policy from step 2 names this bucket and the backup user's exact email. The same hint appears on the warmup panel and in the run log of a storage backup whose source looks empty.
A run fails partway through
If a long run fails after it started reading files, the access token most likely expired before the run finished. Increase the Access token expiry time from step 3 so it covers the full run.
"Supabase refused to save the file"
This storage is read-only, so it cannot be used as a backup destination. Use it as the source of a storage backup and pick a different storage as the destination.
SupabaseConnect Supabase Storage with your Supabase account.Storage BackupsReplicate your buckets to another storage provider.